How to adjust bike brakes (rim and disc)
Fix loose, spongy or rubbing bike brakes: barrel adjuster, pad alignment and caliper centring for rim and disc, cable and hydraulic. And when it is a job for a mechanic.

Written by Conor DonoghueCargo bike mechanic
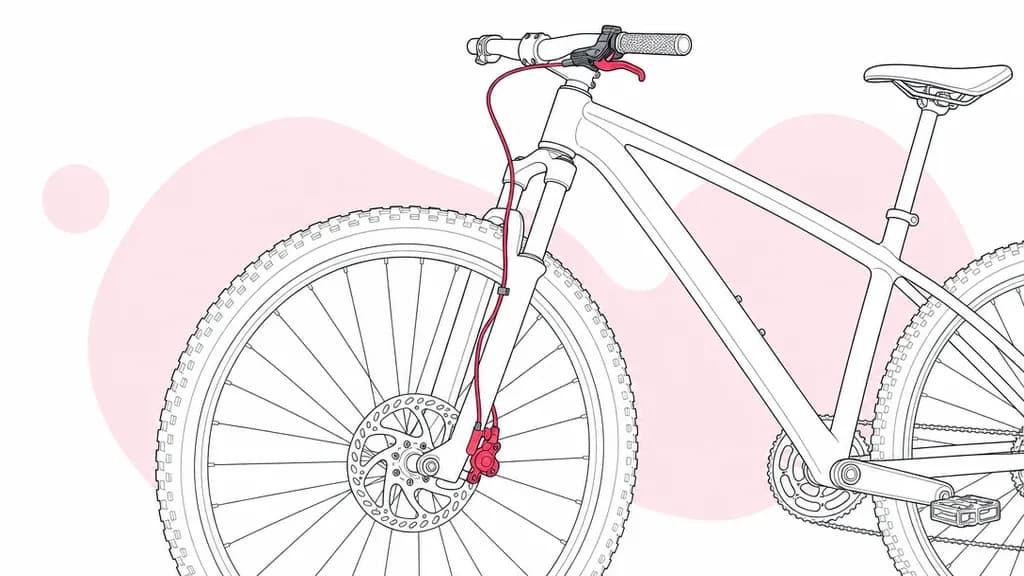
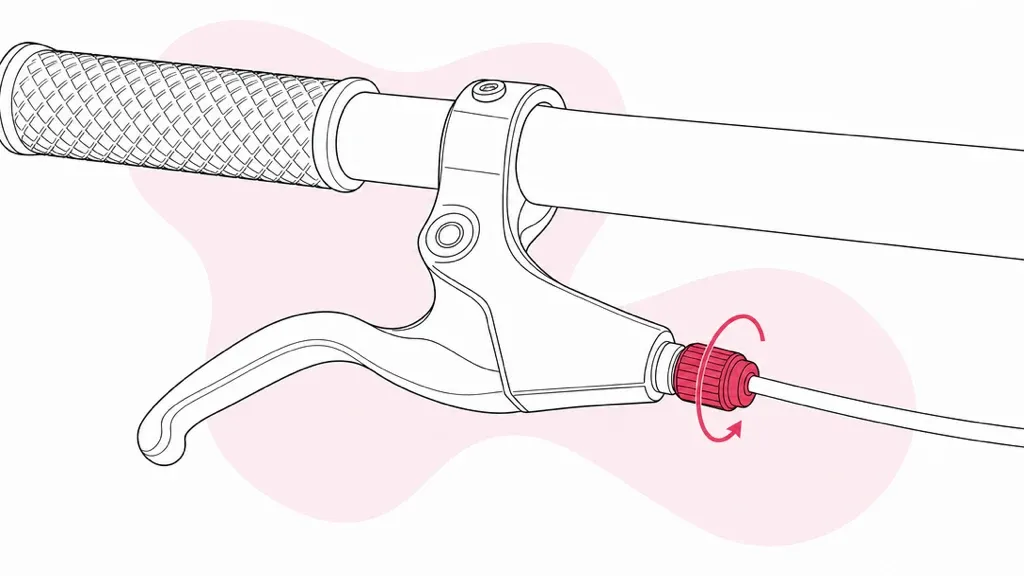
Short answer: start with cable tension, because it is the quickest check and fully reversible. Find the barrel adjuster where the cable enters the lever or the caliper, turn it anticlockwise half a turn at a time, and squeeze the lever after each turn until it bites firmly well before the bar while the wheel still spins freely. That cures loose, vague cable brakes in about a minute. Rubbing, squealing and spongy hydraulic brakes each have their own fix, and they are all covered below.
What you need
- Nothing at all for the barrel-adjuster fix, which turns by hand.
- A set of Allen keys (usually 4 mm and 5 mm) for pad and caliper bolts.
- Disc brake cleaner or isopropyl alcohol and a clean rag, if you are touching a disc brake.
- A workstand, or a friend to hold the bike. Every check is easier when the wheel can spin freely.
One rule before you start: never touch a disc rotor or the pads with bare fingers. Skin oil is enough to contaminate them, and contamination is the first thing to rule out when disc brakes squeal or feel weak.
What kind of brakes do you have?
Every fix below depends on this, so check first. Rim brakes squeeze rubber pads against the wheel rim. If you see a horseshoe-shaped caliper over the tyre, or two arms pulled together by a cable (V-brakes), that is what you have. Disc brakes squeeze pads against a steel rotor at the hub, and they are standard on most e-bikes, cargo bikes and newer commuter bikes.
Then look at the lever. A visible cable running out of it means mechanical (cable) brakes, while a sealed hose and no cable means hydraulic. Cable brakes are adjusted with the barrel adjuster and get looser as cables stretch and pads wear. Hydraulic brakes compensate for pad wear on their own, so a hydraulic lever that slowly goes soft is not an adjustment problem. It means air in the system, and the fix is a bleed.
A short London field guide. Carrera hybrids from Halfords usually run cable disc brakes or V-brakes, a Brompton has dual-pivot rim brakes, and e-bikes and cargo bikes from Specialized, Cube, Urban Arrow or Tern come with hydraulic discs as standard. Dutch-style bikes and many hire-style city bikes use Shimano roller brakes inside the hub. Those have no pads to look at, the cable tension is set at the barrel adjuster as below, and anything beyond that is a workshop job.
Adjusting rim brakes
1. Check the pads before adjusting anything
Rim pads have wear grooves moulded into the rubber. If the grooves have gone, or the pad surface is hard, cracked or shiny, adjustment is pointless and the pads need replacing first. Worn pads are also the usual reason the lever slowly crept closer to the bar in the first place. Brompton pads are a Brompton-specific size, so buy Brompton's own rather than generic road pads.
2. Take up cable tension
Turn the barrel adjuster at the lever or the caliper anticlockwise half a turn, squeeze, and repeat. Stop when the lever bites firmly well before the bar and the pads do not drag on the rim when released. If you wind too far the wheel will not spin freely, so back it off a quarter turn.
3. Check the pads hit the rim squarely
Each pad should land flat on the braking surface, without touching the tyre or hanging below the rim. To move one, loosen its fixing bolt, hold the pad in place against the rim with one hand and retighten. A pad touching the tyre will carve through the sidewall, so fix that before you ride anywhere.
4. Centre the caliper
If one pad rubs and the other sits far from the rim, the caliper is off-centre. Most calipers have a small centring screw on one arm. Turn it a quarter turn at a time while spinning the wheel until the gap is even on both sides. On V-brakes the spring-tension screws sit at the base of each arm and do the same job.
5. Out of adjuster range? Reset at the anchor bolt
If the barrel adjuster is wound fully out and the lever still comes back too far, screw the adjuster most of the way back in, undo the cable anchor bolt on the caliper, pull the cable through while holding the pads close to the rim, and retighten firmly. Then fine-tune with the adjuster as in step 2. While you are there, look at the cable itself. Fraying at the anchor or rust in the outer casing means the cable is due for replacement rather than another adjustment.
Adjusting cable disc brakes
1. Set the fixed pad first
Most cable disc brakes move only the outer pad. The inner one sits on a dial or Allen-key adjuster on the back of the caliper. Wind it in until it lightly touches the rotor, then back it off just enough for the rotor to spin freely. Skipping this step is why cable discs feel wooden after a home adjustment: all the lever travel goes into flexing the rotor across the gap.
2. Take up the cable
Use the same barrel-adjuster routine as for rim brakes: anticlockwise half a turn, squeeze, repeat. Stop when the lever bites firmly well before it reaches the bar and the rotor still spins freely.
3. Fix rubbing by re-centring the caliper
Loosen the two caliper mounting bolts about a turn each, squeeze the brake lever hard and hold it so the caliper centres itself on the rotor, then tighten the bolts back down while still holding the lever. Release the lever and spin the wheel.
4. Still a rhythmic tick? Check the rotor
A faint scrape once per wheel revolution means the rotor has a slight bend. Sight through the caliper and you will see the shiny spot wander. Rotors can be trued with a truing fork and patience, but it is precision work, and bending it a millimetre too far leaves you worse off than before. This is a sensible point to hand over.
Hydraulic disc brakes: what you can and cannot adjust
Two things are adjustable at home. The first is lever reach: a small screw or dial on the lever body that brings the lever closer to the bar, worth setting properly if you have small hands or ride in thick gloves. The second is caliper centring, using the same loosen, squeeze and tighten routine as cable discs, for rub after a wheel change. Some higher-end levers also have a bite-point or free-stroke dial. If yours does, it only changes where the pads engage, not how firm the lever feels.
What you cannot adjust your way out of is a soft or sinking lever. Hydraulic brakes compensate for pad wear automatically, so growing sponginess means air or moisture in the fluid, and that needs a bleed. Bleeding is fluid-specific: Shimano, Tektro and Magura use mineral oil, SRAM Level and Code brakes and Hope use DOT fluid, and the SRAM DB8 uses mineral oil, so read the lever cap or the manufacturer's spec before you buy fluid. Putting the wrong one in ruins the seals. It is messy, it needs the right kit for your exact brake, and a mistake leaves you with no front brake in traffic. This is the one brake job that even confident home mechanics usually hand over, and rightly so.
Checking and replacing the pads
Pads are the cheapest part of the whole system and the first thing to check when brakes feel weak, before blaming anything else. Rim pads: replace them when the wear grooves have vanished or the rubber has gone hard and glassy. Cartridge-style holders let you slide a new rubber insert in without disturbing the alignment, while one-piece pads mean redoing step 3 above. Disc pads: pull the wheel and look into the caliper, and do not wait for metal to show. Manufacturers set minimum-thickness limits well before that point. SRAM, for example, calls for replacement once pad plus backing plate measure 3 mm or less, and Tektro (the HD-M275 fitted to many mid-price e-bikes) and Shimano (the MT200 series) publish their own figures, so check the spec for your brake. Riding pads down to the metal scores the rotor, and then you are buying a rotor too.
A note for e-bike and cargo bike riders: extra weight and motor-assisted speed wear pads noticeably faster than on a pushbike, and London stop-start commuting is the worst case for it. A Tern GSD or Urban Arrow with two children aboard is the extreme version. Check them monthly rather than yearly.
Squeaking brakes: the short version
Squeal is a surface problem rather than a wear problem, which is why brakes with plenty of pad left can still shriek. In order of likelihood:
- New pads not bedded in. Fresh disc pads need twenty or thirty firm, controlled stops to transfer an even film of material onto the rotor. Until then some noise is normal, so ride it out on a quiet street rather than trying to fix it.
- Contamination. Overspray from chain lube, a fingerprint on the rotor, or road film. Clean the rotor with disc brake cleaner or isopropyl alcohol and a clean rag. Pads that have soaked up oil generally cannot be saved and need replacing.
- Glazed pads. A shiny, polished pad surface, often from long drags downhill or from braking with contaminated pads, squeals and stops badly. Light sanding can revive rim pads, while glazed disc pads are usually a replacement.
- Alignment. A caliper sitting slightly skewed, or rim pads hitting the rim dead flat instead of front edge first ("toe-in"), sets up a vibration, and that vibration is the squeal. Redo the centring steps above.
One thing never to do: spray WD-40, or any other lubricant, anywhere near pads, rotors or rims. It does not cure squeal. It contaminates the braking surface, and contaminated pads have to be replaced rather than cleaned. If someone has already done it, budget for new pads and a proper rotor clean.
Still not right? Find the symptom
| Symptom | Likely cause | Fix |
|---|---|---|
| Lever comes back too far | Cable stretch or worn pads | Barrel adjuster; new pads if worn to the marks |
| Lever spongy (hydraulic) | Air in the system | Bleed, which is a mechanic job |
| Lever firm but brake weak | Contaminated or glazed pads | Clean the rotor, replace the pads |
| Constant rub on one side | Caliper off-centre or wheel not seated | Re-seat the wheel; centring screw (rim) or loosen, squeeze, tighten (disc) |
| Rhythmic tick per wheel turn | Bent rotor or untrue rim | Rotor or wheel truing, which is a mechanic job |
| Squeal on new disc pads | Pads not bedded in | 20–30 firm stops on a quiet road |
| Squeal on brakes you have ridden for months | Contamination or glazing | Clean the rotor; replace contaminated pads |
| Grinding metal on metal | Pads worn through to the plate | Stop riding; new pads and a rotor check |
When to stop and book a mechanic
Brakes are the one system where "probably fine" is not good enough. Hand over when:
- A hydraulic lever reaches the bar or stays soft. It needs a bleed with the right fluid and kit.
- The rotor visibly wobbles or has worn thin. Truing and thickness are gauge jobs, and you cannot judge them by eye.
- There is no firm bite even with fresh, clean pads, which means the fault is deeper than adjustment.
- The cable is frayed, rusty or seized in its outer. Replacement is cheap and makes a big difference, but it is fiddly on internally routed frames.
- It is your commuter and you need it working tonight. A mechanic comes to you 9am to midnight, seven days a week, across London, and fixes what can be fixed at the kerb.
Book a brake repair · About mobile bike repair →
Related guides
- How to fix a bike puncture (and when to call a mechanic)
- Bike gears skipping or not changing: causes and fixes
Sources and further reading
- Cycling UK: how to adjust your brakes, the national cycling charity's written and video guide to barrel adjusters, pad alignment and when not to ride.
- SRAM: brake service guide, inspection intervals and the manufacturer's pad-wear replacement limit.
- SRAM: DB8 specification, the product page that lists the DB8 as designed for Maxima mineral oil only, unlike SRAM's DOT-fluid Level and Code brakes.