How to fix a bike puncture (and when to call a mechanic)
Step-by-step puncture repair: remove the wheel, find the cause, patch or replace the tube, refit and inflate in stages. Plus why it keeps happening and when DIY is not worth it.

Written by Conor DonoghueCargo bike mechanic
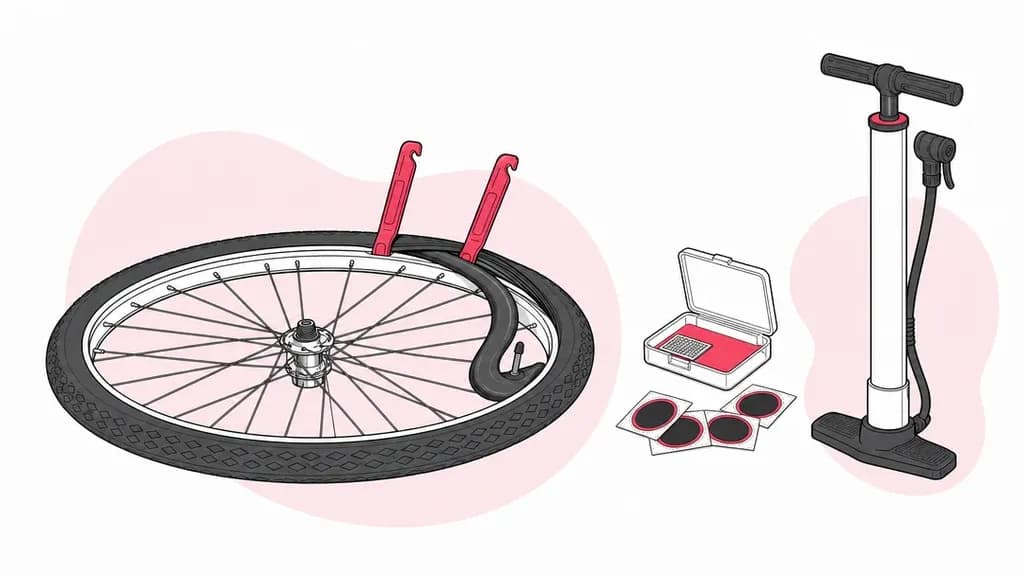
Short answer: take the wheel off, lever one side of the tyre off, pull the tube out, find what caused the hole and remove it from the tyre, then patch or replace the tube, refit and inflate in stages. Allow 15–30 minutes. If it is a rear wheel on an e-bike or a cargo bike, or the third flat this month, it is usually quicker to have a mechanic come to you.
What you need
- Two tyre levers. Plastic ones are kinder to the rim than metal.
- A spare inner tube of the right size and valve type, or a puncture repair kit. Glueless patches are quicker to fit and cleaner at the roadside, but a properly glued patch lasts longer.
- A pump that fits your valve. Check which you have before you are stuck: the thin valve with a small locknut is Presta, the wider car-style one is Schrader.
- A 15 mm spanner if your wheel uses axle nuts rather than a quick-release lever or thru-axle.
Tube size is printed on the tyre sidewall (for example 700×32c or 27.5×2.0), and the spare needs to match both the diameter and roughly the width. Buying "a tube" without reading the sidewall is the easiest way to end up with the right repair and the wrong part.
Common London sizes: a Brompton runs 16-inch tyres (ETRTO 349, with the width figure varying by tyre, so read it off the sidewall), hybrids and Dutch-style bikes run 700c (28-inch, ETRTO 622), and box-style cargo bikes are mixed, with an Urban Arrow Family carrying a 20-inch wheel at the front and a 26-inch at the back while a Tern GSD runs 20-inch at both ends. A cargo bike can need two different spares.
One check before you start: inner tube or tubeless?
Everything below assumes an inner tube, which is what almost all city, hybrid and e-bikes run. Tubeless tyres are common on newer mountain and gravel bikes and on some road bikes. The giveaway is sealant residue at the valve and no tube inside. Small tubeless punctures normally seal themselves, and bigger ones are fixed with a plug kit from the outside without removing the tyre at all. If a tubeless tyre will not seal, fitting an inner tube is the roadside fallback: messy, but it gets you home. If you are not sure what you have, let a little air out and squeeze the tyre. A tube slides audibly inside it.
Step by step
1. Remove the wheel
If it is the rear wheel, shift to the smallest sprocket first, because the chain comes off and goes back on far more easily. Open the brake if it is a rim brake, release the quick-release lever, thru-axle or axle nuts, and take the wheel out. Rest the bike on its side with the chain facing up. Standing it upside down on the saddle and handlebars also works, and keeps the levers off the tarmac.
Two London special cases. On a Brompton the front wheel is a simple 15 mm nut job, but the rear needs the hub gear indicator chain unscrewed and the chain tensioner unhooked, then everything set back on the way in, which makes a rear puncture a natural one to hand over. On an e-bike, check where the motor is first: a rear hub motor (common on budget and delivery e-bikes and on conversion kits) has a cable and often a torque arm to deal with, a Brompton Electric puts the motor in the front wheel, and mid-drive bikes from Bosch, Shimano and Yamaha have an ordinary rear wheel.
2. Take the tyre off one side
Let any remaining air out and push both beads into the centre channel of the rim all the way round. That slack is what lets the tyre come off without a fight. Hook one lever under the bead opposite the valve, clip it to a spoke, and work the second lever round the rim. One side off is enough, because the tyre stays on the rim by the other bead.
3. Pull the tube out and find the hole
Push the valve up through the rim and pull the tube free. Put a little air in it. A big hole hisses. A small one is easier to find by passing the tube slowly past your lips or cheek, where the skin is sensitive enough to feel the air. Note where the hole sits relative to the valve, because that tells you where to look in the tyre.
4. Find the cause in the tyre and the rim
This is the step people skip, and it is why repairs "don't hold". Run a finger slowly around the inside of the tyre, feeling for glass, thorns or wire. Go carefully, because whatever you are looking for is sharp. Check the tread on the outside too. Then look at the rim: the rim tape should cover every spoke hole, and a shifted or torn tape cuts tubes from the inside. A hole on the inner circumference of the tube points to a rim problem, while a hole on the outer side means something came through the tyre. Two holes side by side (a "snakebite") mean the tyre hit a kerb or pothole while underinflated. There is nothing to find in that case, and the fix is more air in future.
5. Patch or replace
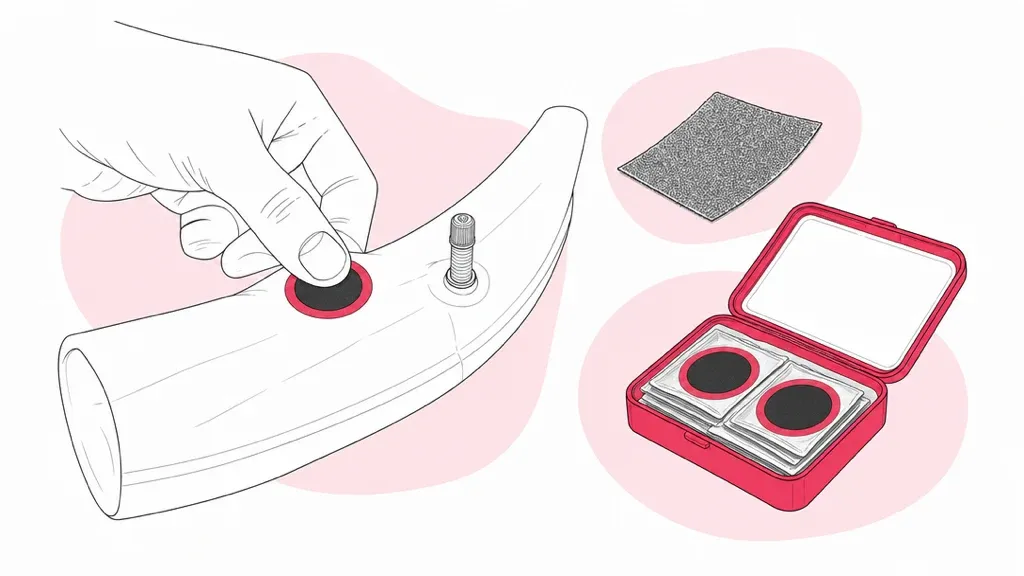
To patch a single clean hole, roughen the area with the sandpaper from the kit, spread the glue thinly and wait for it to go tacky before pressing the patch on hard for a minute. Skipping the wait is the usual reason a patch fails. Glueless patches are simpler: clean, stick, press. Replace the tube instead if the hole is at the valve, if it is a long split or a snakebite pair, or if the tube already carries several patches.
6. Refit without pinching
Put just enough air in the tube to give it shape, seat the valve, and tuck the tube fully into the tyre. Then work the open bead back onto the rim with your thumbs, finishing at the valve. Try not to use levers for this part, because this is where new pinch holes are made. Before inflating, push the bead aside and look around both sides of the wheel to make sure no tube is trapped between bead and rim.
7. Inflate in stages and refit the wheel
Inflate to about half pressure and check that the bead sits evenly all the way round on both sides. There is a moulded line on the tyre that should run parallel to the rim. Then inflate to your riding pressure. The sidewall gives a permitted range rather than a target, and where you sit inside it depends on rider weight, load and conditions. Refit the wheel, close the brake, then spin the wheel and squeeze the lever to check everything before riding off. If the brake rubs once the wheel is back in, the wheel is usually not seated straight. Our brake adjustment guide covers the fix.
Why it keeps happening
Repeat flats are rarely bad luck. The pattern usually tells you the cause:
| Pattern | Likely cause | What to do |
|---|---|---|
| Same spot, days apart | Glass or wire still in the tyre | Search the inside of the tyre again, in good light |
| Hole on the rim side of the tube | Rim tape shifted or a spoke burr | Re-seat or replace the rim tape |
| Two holes side by side | Pinch flat from an underinflated tyre hitting an edge | Keep pressure inside the sidewall range, in the upper half if you are heavier or loaded, and check weekly |
| Slow flat over days | Tiny thorn, porous old tube or a leaking valve | Dunk the inflated tube in water and check the valve core is tight |
| Punctures every few weeks, in different spots | Tyre worn thin or perished | Fit a new tyre, because no repair fixes a worn casing |
The most effective prevention is also the least exciting: keep the tyres inside the pressure range printed on the sidewall, towards the top of it if you are heavier or carrying load. Soft tyres pick up debris, pinch on kerbs and wear through their casings, and much of the table above comes back to pressure. If you commute every day, a puncture-resistant tyre such as a Schwalbe Marathon Plus or Continental Contact Plus is the usual London upgrade: heavier and a little slower, but built with a protective belt under the tread that is designed to stop glass and flints getting through. One London-specific note: after rain, glass washes into the gutters along cycle lanes, so where the road position allows, ride clear of the gutter line.
Can you fix it without taking the wheel off?
Sometimes, and it is worth knowing when. If you can see or feel where the hole is, you can lever off just that section of tyre with the wheel still in the bike, pull out that part of the tube, stick a glueless patch on and tuck it back. It is fiddlier than it sounds because you are working against the frame, and it only beats wheel removal in two cases: rear wheels with a hub motor (no motor cable to disconnect and no torque settings to redo) and bikes with a full chain case, such as Dutch-style bikes from Gazelle or Pashley. For everything else, taking the wheel out is faster. What never works is riding on a flat "just to the office". A few hundred metres on a flat tyre destroys the tube, often the tyre, and sometimes the rim.
What not to patch with
There are two roadside improvisations people actually try. Duct tape cannot hold pressure and lifts within minutes once the tube inflates against it. Super glue dries rigid and cracks the first time the tube flexes. A real patch vulcanises to the rubber and outlives the tube, and a glueless patch takes thirty seconds with no mess. If you have neither, fit the spare tube. If you have no spare either, walk it or get a lift, because improvised repairs on a moving wheel fail at the worst possible moment.
When it is not worth doing yourself
- A rear wheel with a hub motor on an e-bike, because of the motor cable and torque settings.
- Cargo bikes such as an Urban Arrow, Babboe or Tern GSD, which have heavy wheels that are often enclosed and are easier to work on at the kerb with a stand.
- A hire bike. If a Santander, Lime or Forest bike goes flat, report it in the app and take another one. You are not expected to fix it.
- Repeat flats, where the cause is usually in the tyre or rim tape and needs a proper look.
- Tubeless tyres that will not seal, which need plugs, a sealant top-up and the right kit to seat the bead.
- You are already late. A mobile mechanic comes to you 9am to midnight, seven days a week, with puncture repair from £30.
Book a puncture repair · About mobile puncture repair →
Related guides
Sources and further reading
- Cycling UK: how to repair a puncture, a written and video walkthrough of the same roadside repair from the national cycling charity.
- Halfords: how to fix a bike puncture, the retailer's step-by-step guide to removing the wheel, replacing the tube and refitting the tyre.