Bike brakes squeaking? Causes and how to stop it
Why bike brakes squeal, in the order worth checking: contamination, bedding-in, glazed pads and alignment. Fixes for disc and rim brakes, and what never to spray on them.
By the tyred mechanics
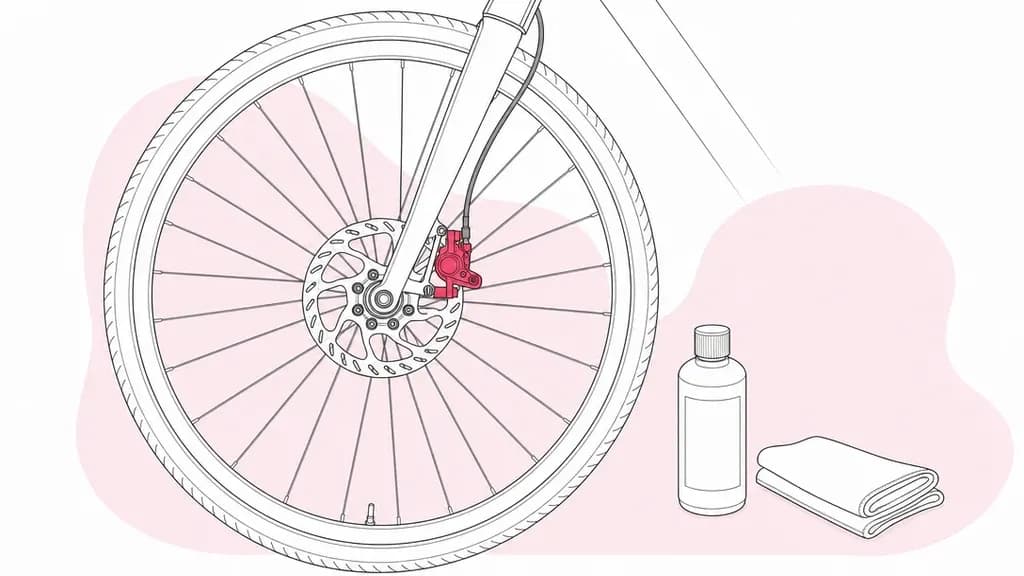
Short answer: brake squeal is the pad vibrating against the rotor or rim, so start with the braking surface. On disc brakes, wipe the rotor with isopropyl alcohol on a clean rag, then bed new pads in with about twenty firm stops. On rim brakes, clean the rim and set the pads so the front edge touches first. Keep WD-40 and every spray lubricant away from pads, rotors and rims: it does not cure squeal and it ruins the pads.
Why bike brakes squeak
The noise is the pad chattering against the rotor or rim many times a second instead of gripping it smoothly. Any one of these will do it:
- A film of oil.
- A shiny glazed pad.
- A caliper sitting at a slight angle.
- A rim pad that sits flat instead of angled.
- A rotor that has worn thin.
That chatter is why a brake with plenty of pad material left can still shriek, and why pad thickness is not the first thing to check.
Weather turns the same brake from quiet to noisy and back again. Water on a rotor or rim changes the friction for the first stop or two, so a brief squeak on the first pull on a wet London morning is normal and clears itself.
A squeal that lasts the whole ride, or that gets louder the harder you brake, has a cause you can find. One rule before you touch anything: keep bare fingers off the rotor and the pad faces, because skin oil is enough to start a squeal.
Find the cause from when it squeaks
Work out when the noise happens before you reach for tools. Each pattern points at a different fix.
- New pads or a new rotor. The pads are not bedded in. Start with disc step 2.
- After lubing or cleaning the bike. Contamination. Start with disc step 1, or rim step 1.
- The first stop or two in the wet. Water on the braking surface. Do nothing, it clears.
- The whole ride in the rain. Road film or the pad compound. Work through disc steps 1 and 6.
- Hard braking, and the brake feels weak. Glazed pads. Go to disc step 4, or rim step 3.
- Only at walking pace, just before you stop. Glazing or the pad compound. Disc steps 4 and 6.
- Rubs even when you are not braking. Alignment. Disc step 3, or rim step 2.
- Grinding rather than a squeal. The pads are worn out. Stop riding and fit new pads.
- A howl on an e-bike or cargo bike downhill. Heat or the pad compound. Disc steps 5 and 6.
If two of these fit, do the cheapest one first. A rotor clean takes minutes, and if the noise survives it you have ruled out contamination.
Squeaky disc brakes: the fixes in order
Disc brakes are standard on e-bikes, cargo bikes and newer commuter bikes, so this is the section for them. You need:
- A clean rag.
- A torch.
- Isopropyl alcohol or disc brake cleaner (any bike shop stocks both).
Caliper bolts take a 5 mm Allen key or a T25 Torx key. Do the steps in order and stop when the noise stops.
1. Clean the rotor and inspect the pads
Contamination is the first thing to rule out because it is the easiest to cause. All of these land on the rotor:
- Chain lube overspray.
- A squirt of GT85 aimed at a squeaky pedal.
- Road film.
- A fingerprint.
Spray disc brake cleaner or isopropyl alcohol on a clean rag and wipe both faces of the rotor until the rag comes away clean, then wipe the caliper body. Do not spray anything directly into the caliper.
Then look at the pads. Pull the wheel out and look at the pad faces with a torch. A dry, matt, grey surface is healthy. A dark, oily sheen means the pads have soaked up oil.
Sanding removes the surface layer only, and oil that has soaked deeper comes back through as the pad heats up, so treat sanding as a trial.
If the squeal returns, follow BikeRadar's workshop advice: clean the rotor and caliper scrupulously and fit new pads. Clean the rotor before the new pads go in, or they will pick the oil straight back up.
2. Bed the pads in
New pads and new rotors squeal until a thin, even layer of pad material has transferred onto the rotor. That layer is what the pad grips, and until it exists the brake is both noisy and weak.
SRAM publishes a written procedure for its own brakes, and the same steps carry over to other hydraulic discs:
- Accelerate to a moderate speed, brake firmly down to walking pace without locking the wheel.
- Repeat about twenty times.
- Do around ten harder stops from a faster speed.
- Let the brakes cool before riding on.
Stay seated, and use a quiet street or park path rather than a road with traffic. The brake stays noisy and weak until the transfer layer exists, so finish the whole set. SRAM adds that the caliper may need re-centring afterwards, which is step 3.
3. Re-centre the caliper
A caliper sitting slightly skewed lets one pad touch first, and that uneven contact chatters. To re-centre it:
- Loosen the two caliper mounting bolts a turn or so with the Allen key or Torx key, and spin the wheel.
- Pull the brake lever hard and hold it, so the pads clamp the rotor and pull the caliper square.
- Tighten the bolts alternately while you keep the lever held.
- Spin the wheel again and look through the caliper from above.
The rotor should sit in the middle of the gap with daylight either side. The same centring step is in our guide to adjusting brakes.
On cable disc brakes the inner pad is set by a dial or Allen-key adjuster on the back of the caliper. After centring, wind it in until it just touches the rotor, then back it off until the wheel spins freely.
4. De-glaze or replace the pads
Glazing is a hard, shiny surface on the pad from overheating. Long drags down a hill with the brake half on, or braking with oily pads, both cause it. A glazed pad squeals and stops badly at the same time, and that combination is the sign to look for.
Take the pads out and rub the faces on a sheet of medium-grit sandpaper or wet-and-dry paper laid flat on a table. Stop when the shine has gone and the surface is matt again. Then clean the rotor and bed the pads in again from step 2.
Check the thickness while the pads are out. Shimano's dealer manual calls for new pads at 0.5 mm of friction material or less, and SRAM's once pad and backing plate together measure 3 mm or less. Pads at those limits, or glazed right through, are a replacement rather than a sanding job.
5. Check the rotor, the bolts and the mount
A rotor that has worn below its minimum thickness flexes and sings under the pad. The limit is stamped on the rotor: 1.5 mm for Shimano, and 1.55 mm or 1.7 mm for SRAM depending on the rotor.
A mechanic measures the thickness with a vernier gauge, because a worn rotor is only a few tenths of a millimetre thinner than a good one. A rotor with a slight bend rubs on every turn and can squeal at the bent spot.
Loose rotor bolts or a loose caliper let the whole assembly vibrate, so check that every bolt is tight, using the torque figure printed on the part. If the squeal survives all of the above on a brand-new bike, the frame's caliper mount may need facing so that it sits square. Facing needs a workshop tool.
6. Consider the pad compound
Disc pads come in two families. Resin, also sold as organic, bites well from cold and, in BikeRadar's words, tends to run quieter than metallic. Sintered, also sold as metallic, lasts longer and copes better with heat and wet, but it is louder, especially in the rain.
The compound is marked on the pad's backing plate or against its part number, so check what is fitted before you buy. If your brake is clean, bedded in and aligned and still sings in the wet, the compound is the last variable worth changing.
Swap sintered pads for resin, or go the other way on a heavy cargo bike that cooks resin pads. Check the rotor first: Shimano marks some rotors, such as the SM-RT10, "resin pad only", and metal pads must not be used on those.
Squeaky rim brakes: the fixes in order
Rim brakes are what you will find on the standard Brompton, on older hybrids and road bikes, and on children's bikes with V-brakes. Second-hand commuters across London run them too. The physics is the same, but the surfaces are rubber on aluminium rather than pad on steel, and the fixes are different.
1. Clean the rim and the pads
Aluminium rims build up a black film of brake dust and road grime that acts like a lubricant, and London's winter roads add salt and grit to it. Wipe the braking track on both sides with isopropyl alcohol or a dedicated rim cleaner until the rag stops coming away black.
Then look at the pads. Pick out any embedded grit or aluminium flakes with a small screwdriver, and scuff the face lightly with sandpaper if it is shiny.
2. Set the toe-in
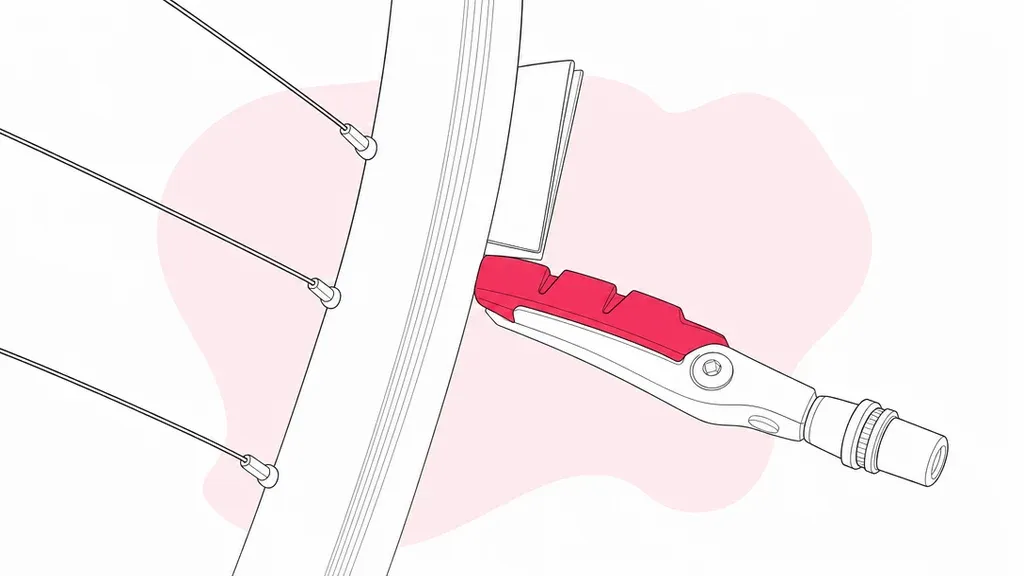
Rim pads should touch the rim with their front edge first, angled so the back of the pad sits about a millimetre away. This is called toe-in, and it is the first adjustment to make for rim brake squeal because it stops the pad grabbing and chattering. To set the toe-in:
- Loosen the pad fixing bolt (an Allen key or a small spanner, depending on the pad).
- Slip a folded piece of card or a business card between the back half of the pad and the rim.
- Hold the pad against the rim with the brake lever, and tighten the bolt.
- Remove the card and check that the pad still sits flat on the braking track, not touching the tyre above or hanging below the rim.
3. Replace hardened pads
Rubber goes hard with age and sunlight, and a hard pad squeals no matter how you angle it. If the pad face is glossy, cracked, or the wear grooves have vanished, fit new pads.
Brompton uses its own pad shape, so buy the Brompton part or a pad made to fit it. Carbon rims need pads made for carbon, and using aluminium pads on them damages the rim.
4. Check for play
Squeal that persists on clean, toed-in, fresh pads points to something moving that should not. Rock the wheel side to side to check for play in the hub bearings, and check that the brake caliper's pivot bolts are tight. A loose caliper vibrates, and the pad angle you just set moves with it.
What never to do
- Do not spray WD-40, GT85 or any lubricant near the brakes. The oil goes onto the pad, the pad glazes, and cleaning does not bring it back.
- Do not lube the chain with the wheel out or the bike upside down unless the rotor is covered. Use a drip bottle rather than an aerosol, and wipe the chain afterwards.
- Do not touch the rotor or pad faces with your fingers. Do not use a rag that has touched oil or chain lube, and wash sun cream off your hands first.
- Do not use degreaser or household cleaner on the pads. Isopropyl alcohol, or a cleaner sold for bike disc brakes, is all that belongs on them.
- Do not burn contamination out of pads with a blowtorch or a gas hob. BikeRadar's verdict is that it does not always work and is more trouble than it is worth, and new pads are the reliable fix.
- Do not ride on a grinding brake. Grinding means metal on metal, and every stop is eating the rotor.
Squeal that will not go away
Suppose you have cleaned the rotor, bedded the pads in and centred the caliper, and the brake still squeals. The remaining causes need a workshop measurement rather than a guess:
- A rotor below its minimum thickness.
- Pads that have soaked up oil below the surface.
- A caliper mount that is not square to the rotor.
- A rotor size and pad compound that are wrong for the weight of the bike.
A cargo bike with the weekly shop aboard asks far more of its rotors and resin pads than the same brake on a road bike, and a larger rotor or a different compound can be the real fix. That is a mechanic's call.
E-bikes, cargo bikes and hire bikes
E-bikes and cargo bikes follow the disc section above, because they are built with disc brakes to cope with their weight. More weight means more heat, and more heat means glazing arrives sooner, so check the pad faces whenever the noise changes.
The caliper model is printed on the caliper body; Shimano's MT200 and Tektro's HD-M275 are two you will see on e-bikes. Buy pads by that code from the maker's site or a bike parts supplier, and keep to the fitted compound unless you are changing it on purpose.
Dutch-style bikes and hire bikes with roller brakes inside the hub do not squeal in the same way. There are no pads to see, and noise from a roller brake points to the special grease it needs, which is a workshop job.
If a Santander Cycles bike squeals, dock it and press the fault button on the docking point within ten seconds, or call TfL on 0343 222 6666. Then take another bike. Lime and Forest bikes have a report option in the app.
When it is a workshop job
- Pads that squeal after a proper clean, bed-in and re-centre. The rotor needs measuring.
- Any hydraulic brake where the noise came with a soft or sinking lever. That is a bleed, and the squeal is a side issue.
- A rotor that is bent in more than one place, or below its stamped minimum thickness.
- A brand-new bike that squeals from day one after bed-in. The caliper mount may need facing.
- Roller brakes and hub brakes on Dutch-style bikes.
- A cargo bike or e-bike where the brakes have been squealing and fading on hills. A mechanic can check whether the rotor size and pad compound suit the load. A mechanic comes to you 9am to midnight, seven days a week, anywhere inside the M25, with a fully stocked workshop.
There is no MOT for a bicycle, but the Highway Code says you must ensure your brakes are efficient (Pedal Cycles (Construction and Use) Regulations 1983). A brake that squeals because the pads are glazed or oily also stops badly, so fix it before your next ride in traffic.
Book a brake repair · About mobile bike repair →
Related guides
Sources and further reading
- SRAM disc brake user manual, the bed-in procedure and the pad and rotor wear limits.
- Shimano dealer's manual, hydraulic disc brakes (DM-MBBR001), the 0.5 mm pad limit and 1.5 mm rotor limit.
- BikeRadar: how to silence disc brakes (Oscar Huckle, July 2025), nine causes of disc brake noise.
- road.cc: stop your bike brakes squeaking and squealing (David Arthur, 2021), rim brake toe-in with a folded card.
- The Highway Code, Annex 1: you and your bicycle, the requirement to ensure your brakes are efficient.
- TfL: Santander Cycles, lost, stolen or faulty, reporting a faulty hire bike.