How to fit tubeless tyres and convert from inner tubes
How to fit tubeless tyres on approved wheels: compatibility and hookless checks, rim tape width by rim, valve length, mounting, sealant and seating.
By the tyred mechanics
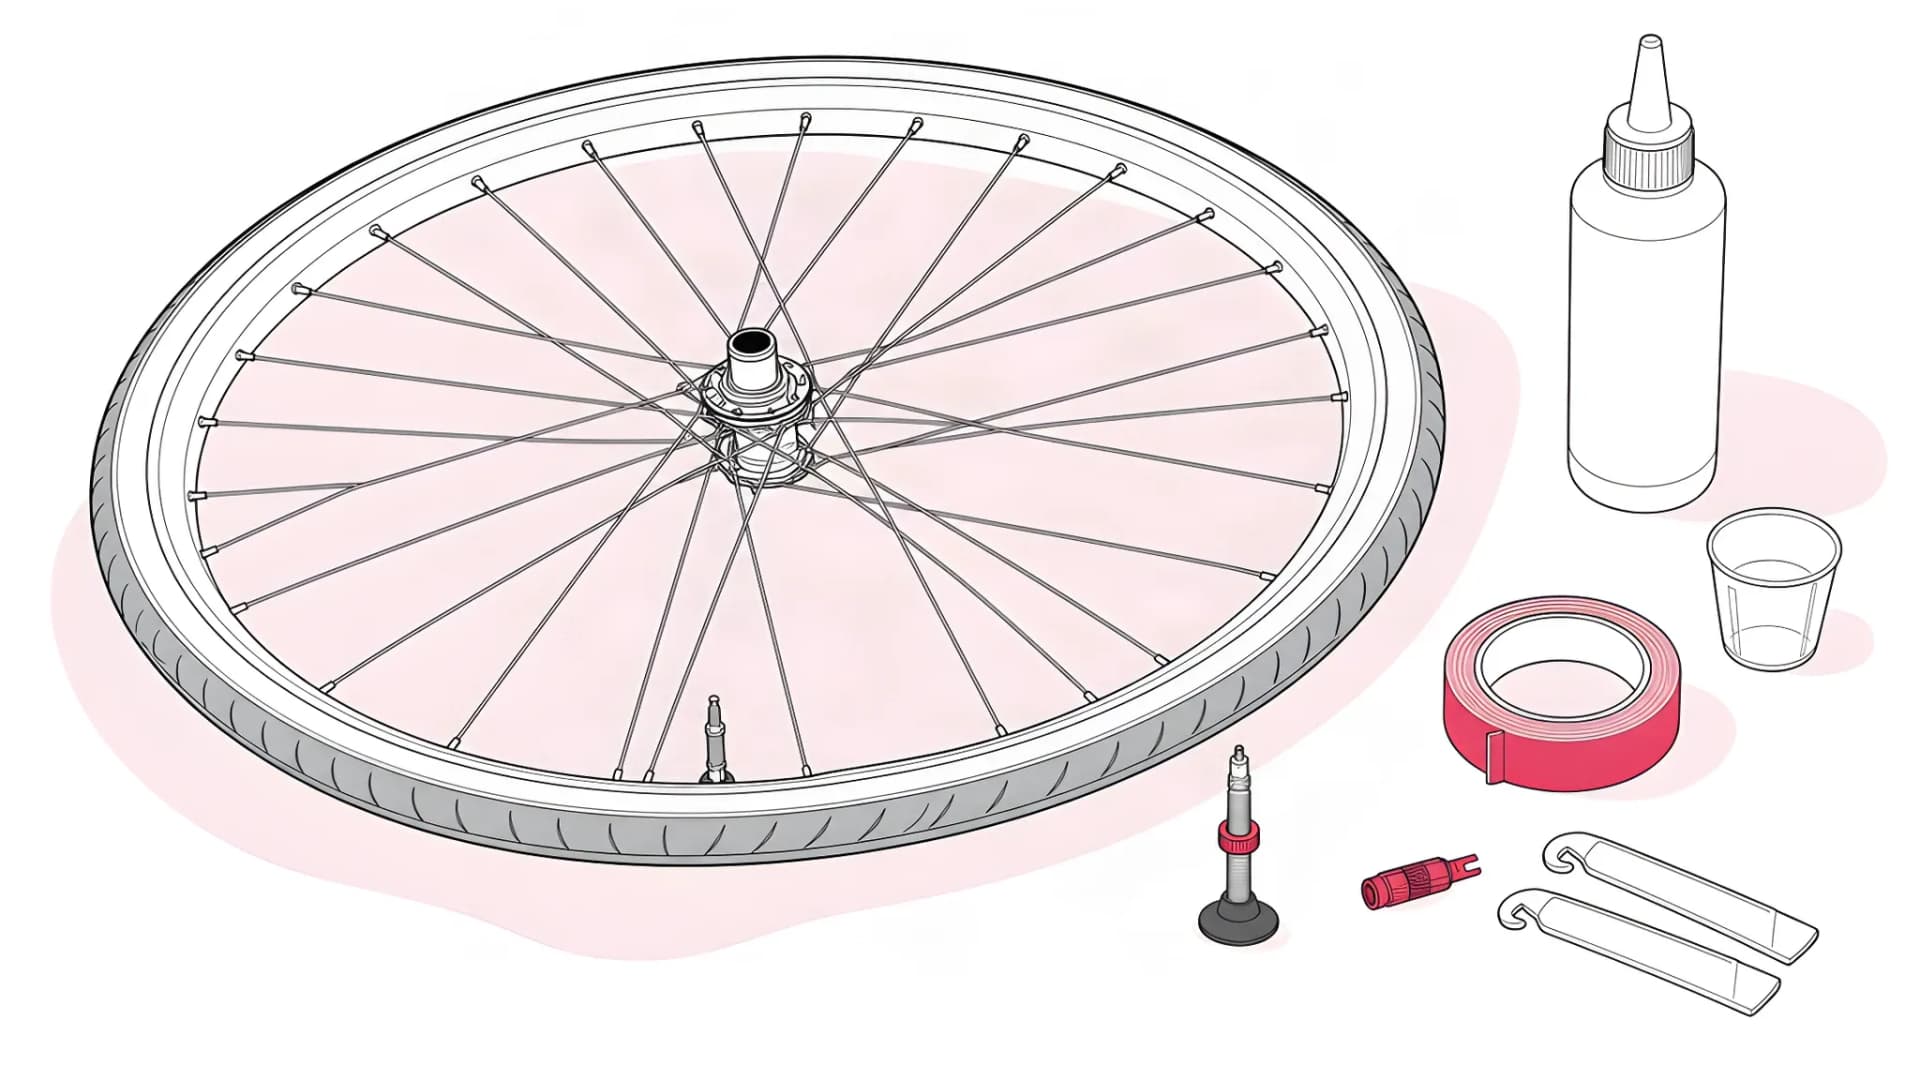
Short answer: how to fit tubeless tyres is seven steps on parts already approved for tubeless. Tube out and rim cleaned, tape, valve, tyre, the first fill of sealant, then seating and a check. Schwalbe's rule for the tape is 2 to 4 mm wider than the rim's internal width; Stan's says 1 to 2 mm. A rim or tyre with no tubeless marking is a stop, and Cycling UK still rates tubes as more practical for transport use.
Can your wheels and tyres run tubeless?
Your wheels and tyres can run tubeless only when both carry a tubeless marking and the wheel maker allows the pair; a tubeless conversion from inner tubes starts with the same check. Continental's instruction is to check the compatibility of tyre and rim together, and Schwalbe says to use only wheels the manufacturer has approved for tubeless.
Five parts have to pass before you open a bottle of sealant:
- Tyre. Marked tubeless, tubeless ready, TLR, TLE or TCS on the sidewall. Continental explains that a tyre marked Tubeless or TL only runs without sealant, while Tubeless Ready tyres need it. No marking means inner tubes.
- Rim. Marked tubeless or tubeless ready, with a bead seat diameter and internal width that suit the tyre. Schwalbe advises against very narrow 13C rims, very cheap rims and rims with eyelets in the drop centre.
- Tape or rim strip. An airtight layer over every spoke hole; cloth or plastic rim tape protects a tube and does not seal. Some rims need none: Mavic's technical manual lists several Cosmic wheels as "UST tubeless on its own".
- Valve and sealant. A tubeless valve with a rubber base shaped for the rim channel, and a sealant the tyre maker accepts. Schwalbe says the valve nut is necessary to fix the valve in the rim.
A tubeless-ready bike can still arrive with inner tubes fitted, so read the sidewall and the rim label. Bead seat diameters, the ETRTO chart of widths per rim and frame clearance are in our guide to bike tyre sizes.
Hooked or hookless rims
A hooked rim has a lip at the top of each sidewall; a hookless rim has straight sidewalls and takes approved tyres only. Schwalbe's hookless page permits only its TLE and TLR tyres on hookless rims, and Zipp says to use only tyres marked TSS-compatible on its hookless wheels.
Pressure is capped too. ENVE gives the ETRTO maximum for hookless road rims as 5 bar (72.5 psi) for 25 to 29 mm tyres and 4.5 bar (65 psi) for 30 to 34 mm. An inner tube changes nothing: Schwalbe applies the same limits with a tube, and Zipp allows tubes only inside a TSS-compatible tyre.
If you cannot confirm the pair, stop and ask the wheel maker or a mechanic. BikeRadar's tubeless guide says an incompatible tyre on a hookless rim can roll off, and that a road rider should never convert a tube-type rim.
Is tubeless worth it on a London commuter bike or e-bike?
For a city hybrid or an e-bike on tarmac, the published advice leans towards tubes. Cycling UK's pros-and-cons article lists lower pressures without pinch punctures and self-sealing punctures as the gains, but says that for touring or transport use, tougher conventional tyres with tubes are currently more practical.
BikeRadar's tubeless guide calls tubeless an unequivocal yes for mountain and gravel bikes, less stark on the road, and would not recommend it for a bike used infrequently, because the sealant dries up.
The cost is upkeep. Cycling UK says sealants that coagulate need topping up every six months, that valve cores clog, and that you still need a spare tube for a hole too big to plug. Continental says a tubeless tyre loses air faster than one with a tube and wants the pressure checked before every ride.
On an e-bike the tyre also needs the e25 or e50 rating Continental describes, which is separate from the tubeless mark.
What you need for a tubeless setup
The kit for a tubeless setup, beyond the approved tyre and rim, is short:
- Tape of the right width and two valves of the right length (next sections), unless the rim came sealed or taped.
- Sealant with a measuring cup, or a syringe if it can pass through the valve.
- A track pump with a gauge. Stan's guide says a floor pump or compressor, and DT Swiss says a standard floor pump is all its rims need; a compressor is not required.
- A valve core tool, plastic tyre levers, isopropyl alcohol, lint-free cloths and soapy water. Muc-Off's V2 and DT Swiss's valve caps include a core tool; Schwalbe's fitting guide rules out metal levers.
Foam inserts come with their own fitting and valve instructions.
What size tubeless rim tape do you need?
Tubeless rim tape should be a little wider than the internal width of the rim, so it seals the edge of the rim bed. Stan's recommends tape 1 to 2 mm wider, DT Swiss says approximately 2 mm wider, and Schwalbe says 2 to 4 mm. Muc-Off says to take the next size up between its widths.
Measure the internal width between the inside faces of the rim walls, or read the rim label: 622 x 19C means 19 mm. Then, by internal rim width:
- 17 mm. DT Swiss: 19 mm tape. Muc-Off makes 19 mm; Stan's narrowest is 21 mm.
- 18–19 mm. DT Swiss: 21 mm tape. Stan's and Muc-Off both make 21 mm.
- 20–21 mm. DT Swiss: 23 mm tape. Stan's rule gives 21 mm tape for a 20 mm rim and its next size, 25 mm, for 21 mm.
- 22–23 mm. DT Swiss: 25 mm tape. Mavic fits 25 mm UST tape in two laps to its 23 mm Comete and Cosmic rims. Stan's and Muc-Off: 25 mm.
- 24–25 mm. DT Swiss: 27 mm tape. Stan's own example is 27 mm tape for a 25 mm rim; Muc-Off's nearest is 28 mm, which Mavic also uses on its 24.8 mm rims.
- 26–28 mm. Stan's rule gives its 30 mm tape; Muc-Off: 28 or 30 mm.
- 29–31 mm. Stan's rule gives its 33 mm tape; Muc-Off: 30 or 35 mm.
- 32–35 mm. Stan's rule gives its 36 mm tape; Muc-Off: 35 mm.
Layers are set by the tape maker, and they disagree. Schwalbe says one layer is generally sufficient, with a second on rims with a small shoulder diameter. Stan's says one layer below 45 or 50 psi (3.5 bar), the figure differing between its pages, and two above. DT Swiss says two or three may help; Mavic specifies two laps.
Check first whether you need tape at all: DT Swiss says its ASM wheelsets come with tape and valves fitted, and Mavic lists wheels that are UST tubeless on their own. Sound factory tubeless tape stays on.
What length tubeless valve do you need?
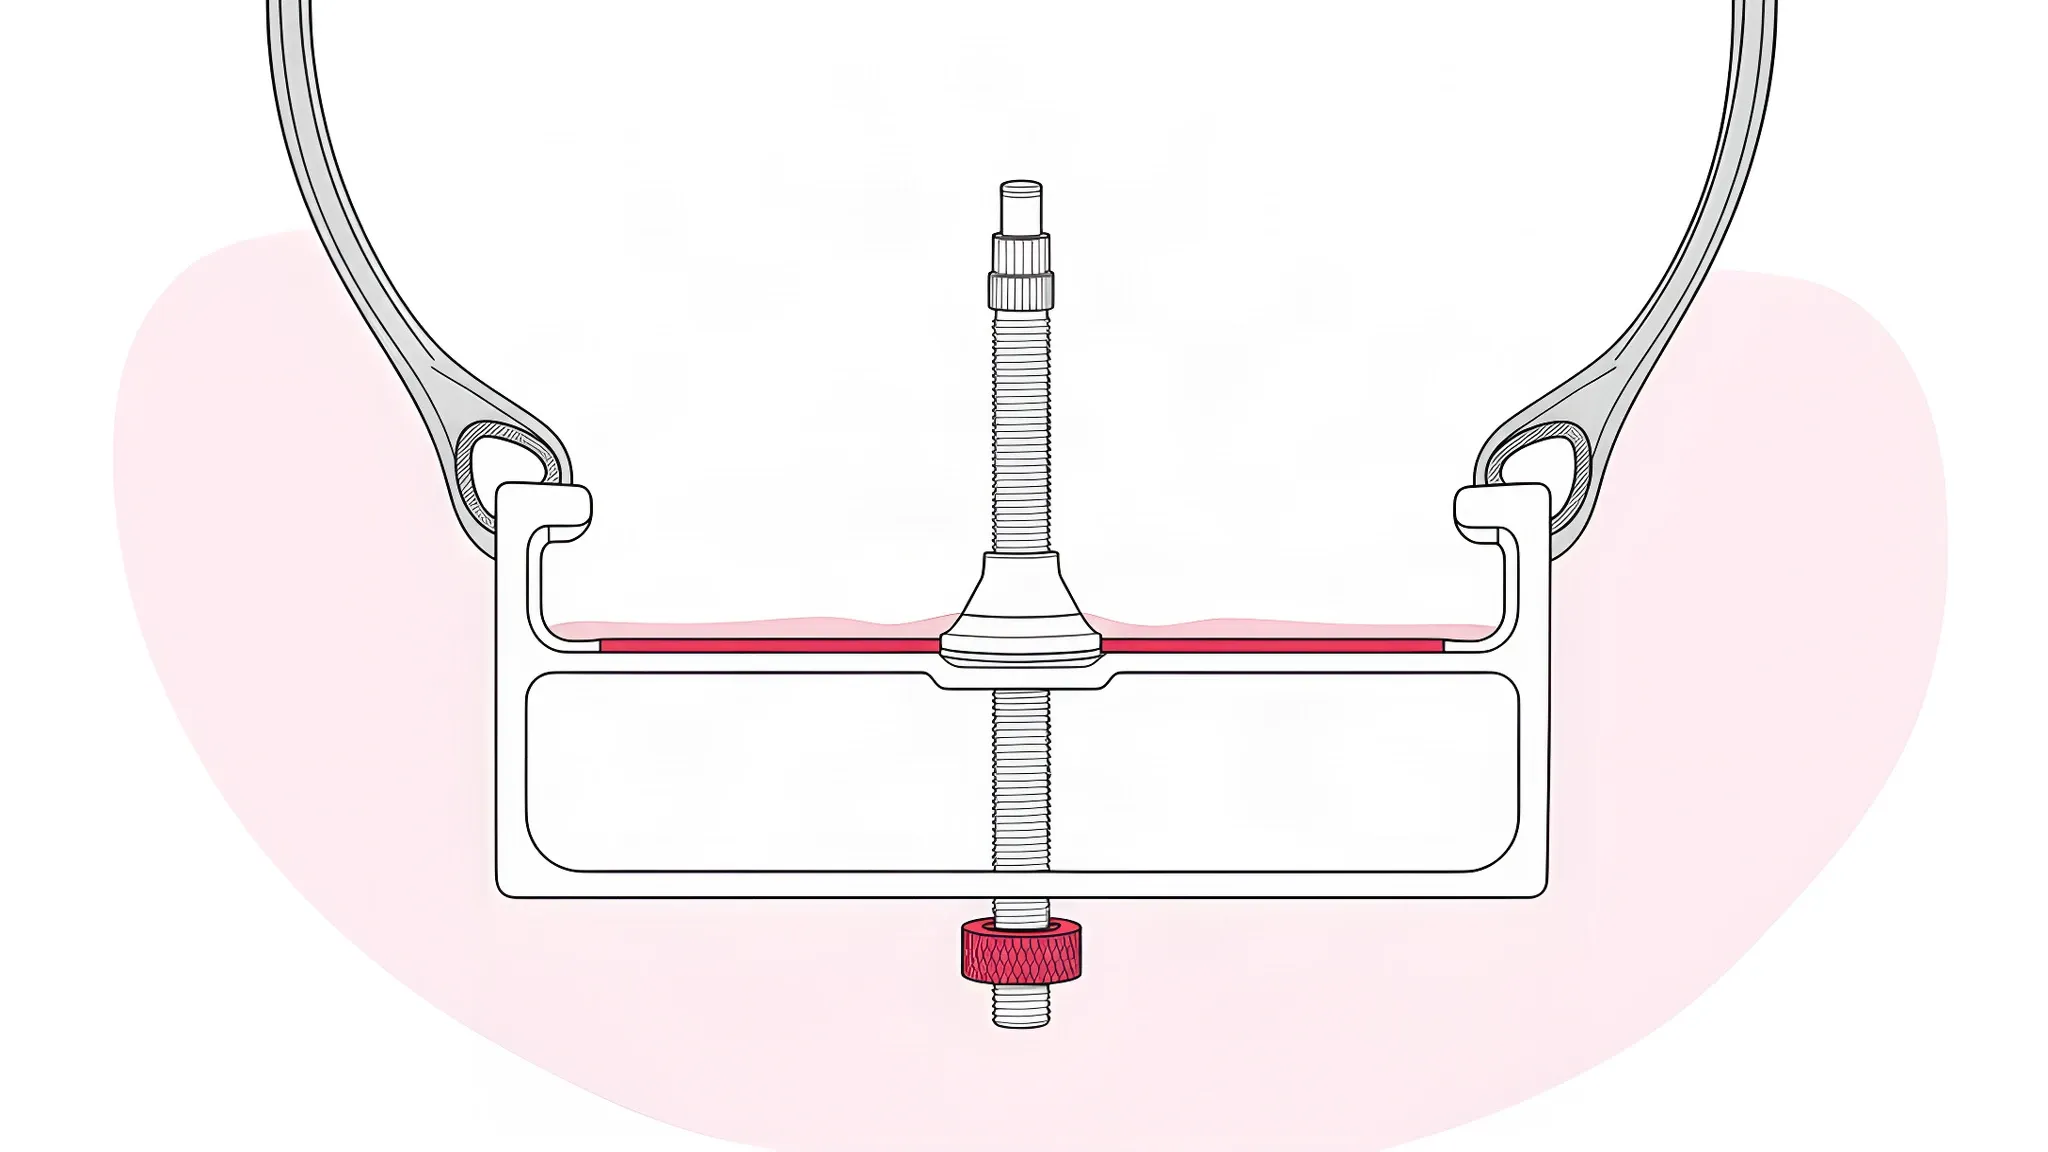
A tubeless valve has to clear the rim with enough stem left for a pump head, so its length follows the rim depth:
- DT Swiss matches its five valve lengths to rim heights of 18–25, 26–35, 36–48, 49–65 and 66–80 mm.
- Mavic's technical manual specifies a 60 mm UST valve for rims 30 to 45 mm deep, an 80 mm valve for 36 to 66 mm, and a valve extender on its 85 mm Comete.
- Stan's alloy valves come in 35, 44 and 55 mm and fit valve holes up to 8 mm.
- Muc-Off's V2 valves come in 44, 60 and 80 mm, with round, square and large round rubber bases to suit different rim channels.
A 50 mm deep rim therefore falls in Mavic's 80 mm band and DT Swiss's 49–65 mm band.
How to fit tubeless tyres: step by step
Set up tubeless tyres in this order: tube out and rim cleaned, tape, valve, tyre, sealant, seating, check. The sealant decision in step 5 depends on whether your product can pass through the valve, so settle it before the second bead goes on.
1. Remove the tube and prepare the rim
Take the wheel out, let all the air out, lever one bead off and pull the tube out. Spin the bare wheel by its axle: Michelin's guide has you check it is not warped or damaged, because a damaged rim will not let the tyre seal.
Clean the rim bed with isopropyl alcohol and a lint-free rag and let it dry, as Stan's guide describes; Schwalbe says the rim base must be absolutely clean and level. Peel off old cloth or plastic tape and any glue, but leave sound factory tubeless tape alone.
Continental adds a step for a new tyre: wash it with soapy water, rinse and dry it, to remove the manufacturing coating that stops sealant bonding.
2. Apply tubeless rim tape if the rim needs it
Choose the width from the list above and follow the tape's own instructions for the start point and overlap, because they differ. Stan's starts two to three spoke holes before the valve hole and overlaps three to four holes past it. Muc-Off starts opposite the valve and overlaps by 10 to 15 cm.
The technique is the same whichever you follow. Stan's says to pull with firm, steady tension straight down the centreline and press the tape into the channel with the other thumb. Schwalbe says the tension must be strong enough that no air bubbles form.
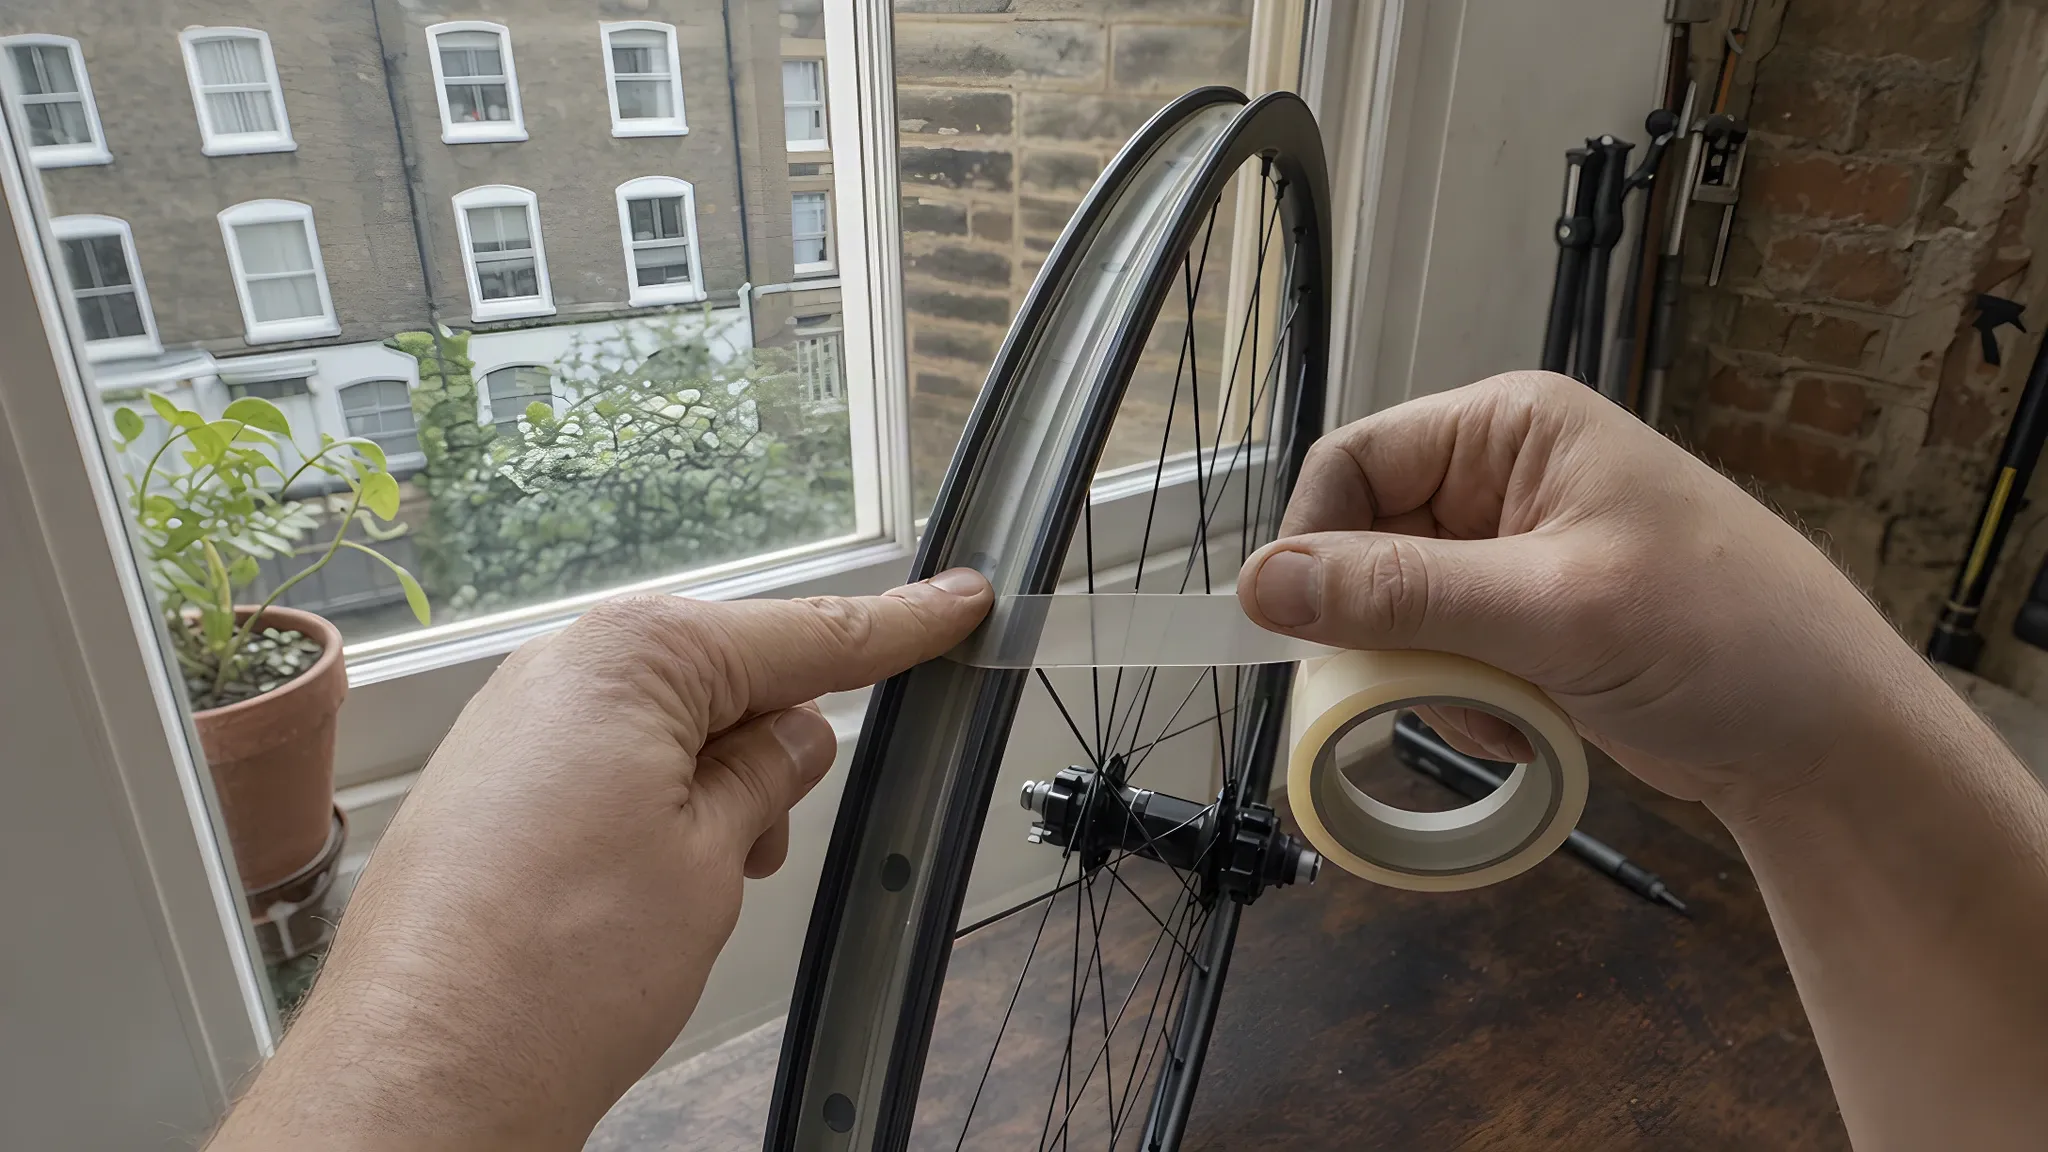
Press out every bubble; BikeRadar's advice on a wrinkle, gap or tear is to strip the tape and start again. Make the valve opening last: Stan's says to pierce a clean round hole with a heated tool or a sharp pick, not an X-shaped slit, which tears under pressure.
3. Fit the tubeless valve
Unscrew the lock ring and any O-ring. If the valve comes with a choice of rubber bases, as Muc-Off's V2 does, pick the one that matches your rim channel. Push the valve through the tape and the rim from the inside, so the base sits in the channel on top of the tape.
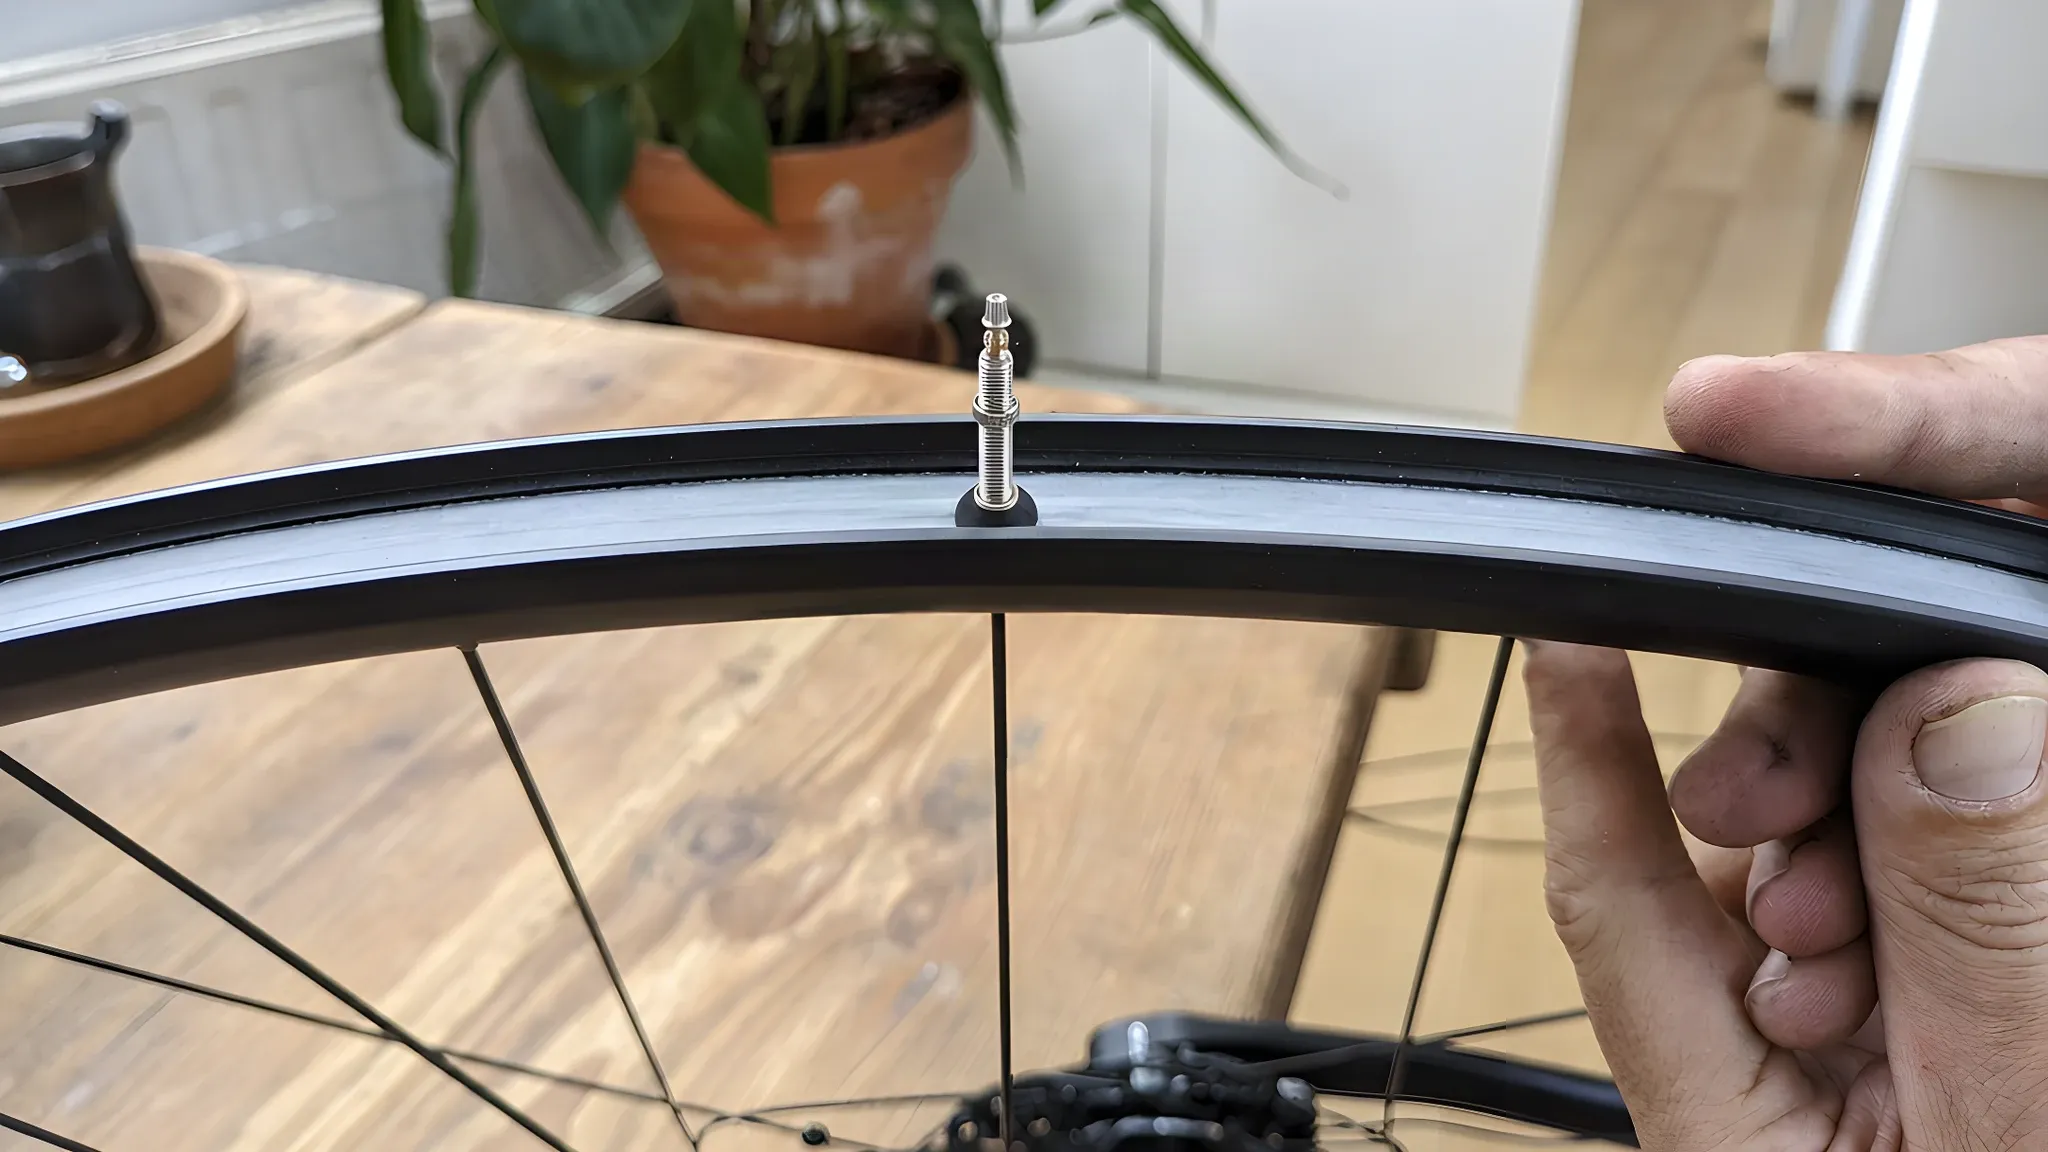
Press down on the valve with a thumb and screw the lock ring on from outside, by hand only. BikeRadar describes the thumb pressure deforming the rubber bung as the ring goes on. Muc-Off says hand tight and not over-tightened; BikeRadar warns that tools deform the O-rings.
4. Mount the tyre
Check the rotation arrow and fit the first bead by hand. Schwalbe's fitting guide starts opposite the valve and finishes at the valve, keeping the bead down in the rim well, where the rim is smallest, so the rest has slack.
Wet both beads before the second one goes on. Schwalbe applies its Easy Fit fluid with a sponge, or soapy water, and says it evaporates in about ten minutes; Stan's guide puts soapy water round both beads. Keep the valve base between the two beads, which Schwalbe says is required when inflating.
If you plan to pour the sealant, stop with a hand's width of bead still off the rim; Hunt's guide fits three quarters of the bead first. If you will inject through the valve, finish the bead. Use plastic levers only, in small sections, as Schwalbe advises, and stop if a lever needs real force.
5. Add the first fill of sealant
Decide first whether your sealant goes in through the valve or over the bead. Stan's Race Day cannot be installed through a valve and must be poured over the bead, while Stan's Original, Continental's sealant and Muc-Off's MTB sealant go in through the valve with the core out.
Shake the bottle hard; Continental's warning is that an unshaken bottle delivers only the carrier liquid.
The amount is on your bottle, and the makers' figures show the range. Continental's minimums are 30 ml for road, 50 ml for gravel and 70 ml for a mountain bike tyre. Stan's gives 50 ml for a 700 x 28 tyre and 105 ml for a 29 x 2.3.
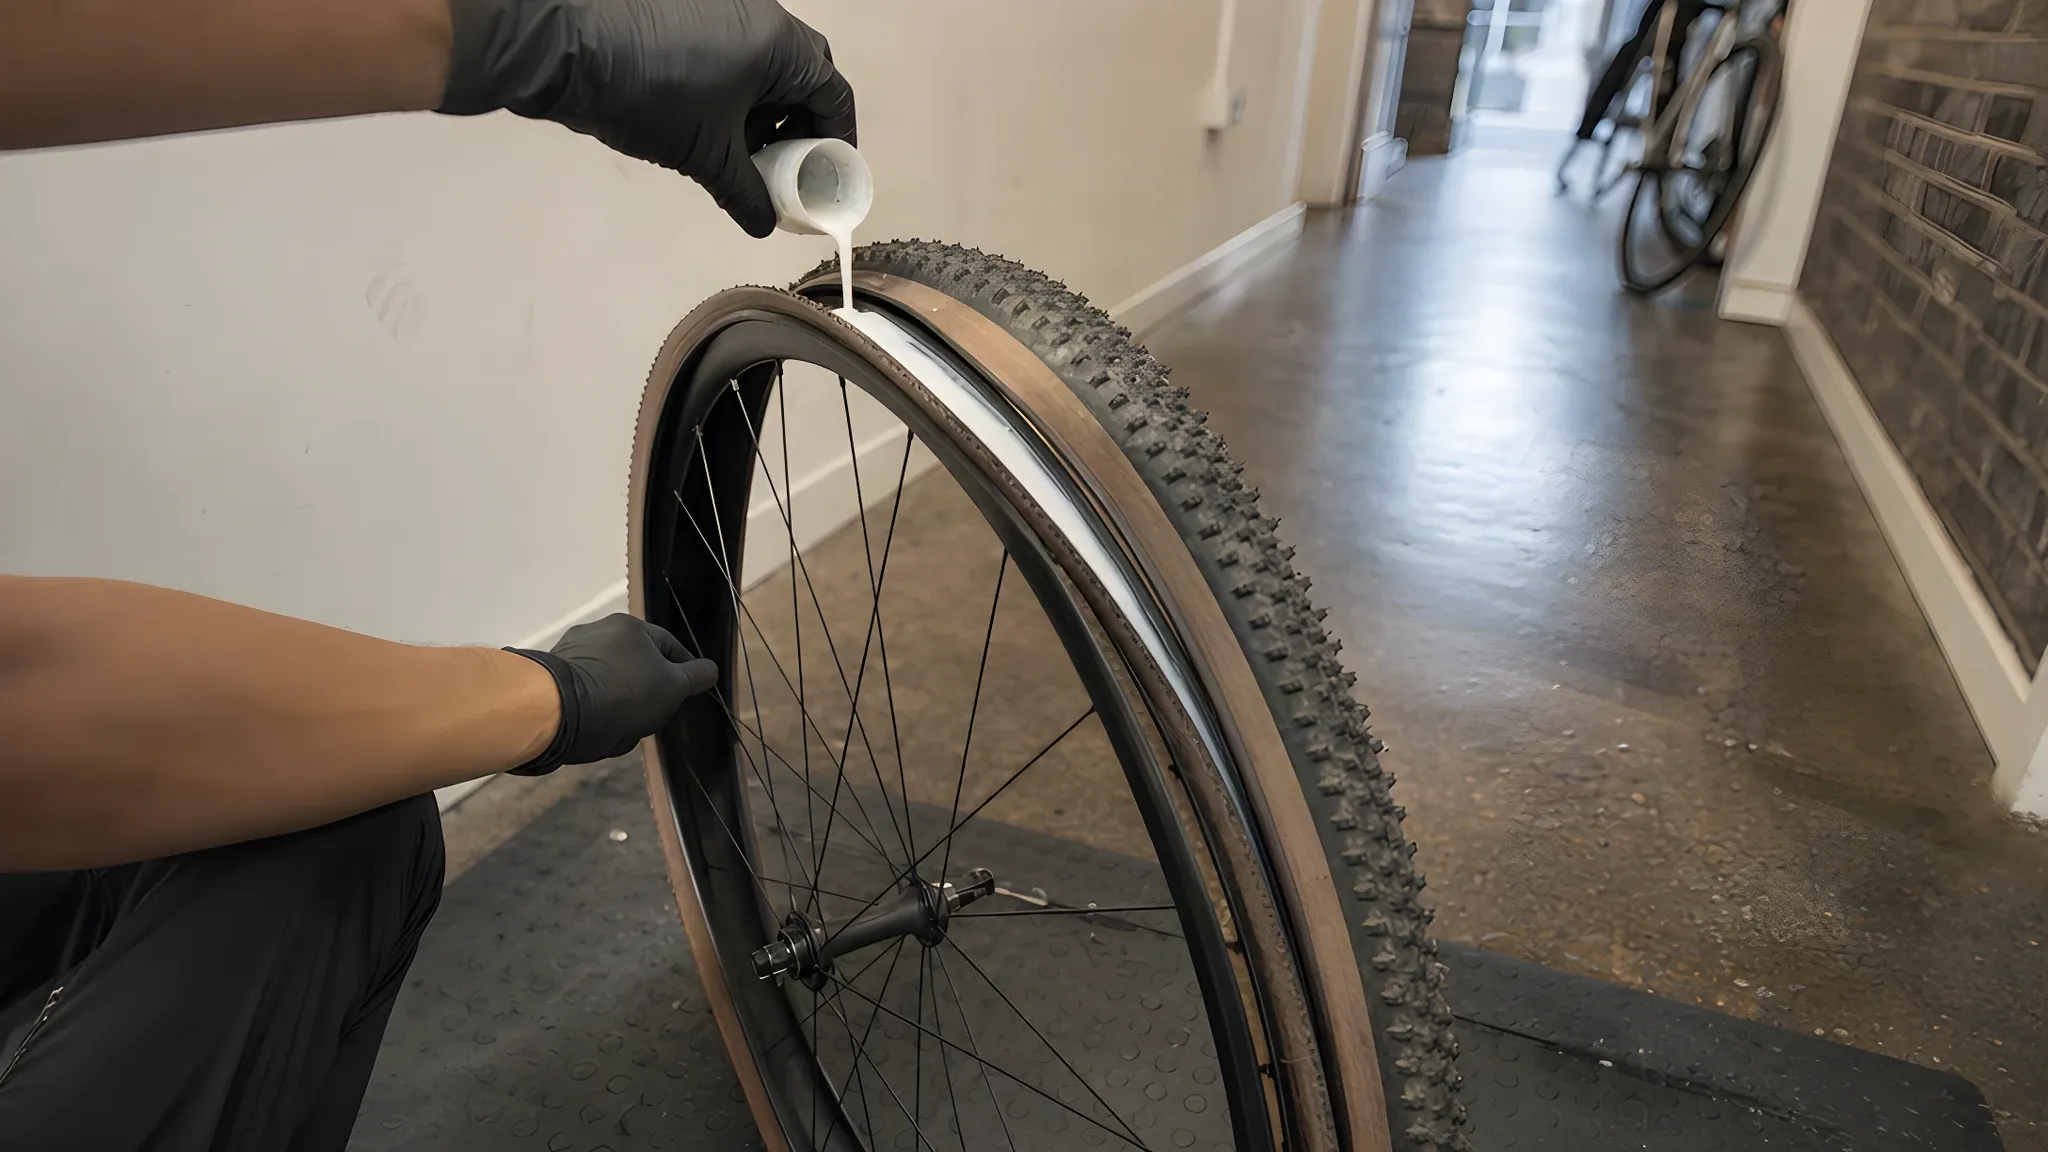
To pour, hold the wheel with the open section at the top and tilted, pour the measured amount in, then rotate the wheel so the liquid runs away from the opening before you pop the last of the bead on, as Hunt's guide describes.
To inject, remove the core, set the valve at 5 or 7 o'clock as Continental instructs, and push the sealant in.
Later top-ups and the full replacement are in our tubeless tyre maintenance guide.
6. Seat the beads
Pump hard and fast with a track pump, or release the chamber of a tubeless pump. Schwalbe says the first inflation needs a strong blast of air from a floor pump, compressor or booster, and BikeRadar removes the valve core first to give the air a direct path.
Respect the lowest limit in the system. Schwalbe's rule is that where the rim's maximum is lower than the tyre's, the rim's figure applies; on a hookless rim that is 5 bar (72.5 psi).
Check the moulded line just above the bead on both sides. Schwalbe says to check the tyre sits on its characteristic curve, and BikeRadar uses the same witness marks; a pop on its own does not confirm seating. A tyre that will not seat with your pump is covered in our guide to inflating tubeless tyres.
7. Finish and check before you ride
Refit the core and inflate to a riding pressure inside the tyre's and the rim's limits. Our bike tyre pressure guide explains how to choose it, and the tyre pressure calculator gives a starting figure with a hookless setting.
Spin and shake the wheel so the sealant coats the inside, as BikeRadar suggests, and look for weeping sealant at the valve, the beads and the spoke holes. Refit the wheel, check it runs clear of the frame, and squeeze the brake.
road.cc notes that a fresh setup can lose a few psi in the first 24 hours, so check the pressure again before the first ride. Loss that keeps coming back is covered in our guide to a tubeless tyre losing air.
What to check after the first ride
Check the pressure and the seating line again and wipe the rim: dried sealant at the bead or a spoke hole shows where air escaped. Then put the sealant on a schedule. BikeRadar suggests checking it every two to three months, Cycling UK gives six months for a top-up, and Stan's puts its Original sealant at 2 to 7 months.
The method is in our tubeless tyre maintenance guide; a puncture the sealant does not close is covered in tubeless puncture repair.
When it is a job for a mechanic
- You cannot confirm that the rim and tyre are approved together, or the rim is hookless and the tyre is not on the wheel maker's list. Guessing risks a tyre off the rim.
- The tyre will not seat with the pump you have, or the pair will not hold air; a mechanic can fit an inner tube instead.
- The rim is bent, dented or cracked. Michelin's guide says a damaged rim will not seal.
- A tubeless tyre has gone flat on the road. Tyred's puncture page says its mechanics repair tubeless tyres too, with puncture repair from £30 and a new tyre not included in that price, as the pricing page shows.
A mechanic comes to you with a fully stocked workshop, 9am to midnight, seven days a week, across London.
Book a repair · About mobile puncture repair →
Related guides
Sources and further reading
- Schwalbe: tubeless, approved wheels only, the rims to avoid, tape 2 to 4 mm wider than the internal width, every spoke hole covered, one or two layers, a clean and level rim base, the valve nut, the valve between the beads, the blast of air, the lower of the rim and tyre limits and the seating check.
- Schwalbe: hookless rims, TLE and TLR tyres only, the 5 bar road limit, the rim's lower maximum, and the same rules with an inner tube.
- Schwalbe: bike tyre fitting, Easy Fit by sponge or soapy water and its ten-minute evaporation, starting opposite the valve with the bead in the rim well, plastic levers in small sections.
- Continental: tubeless ready, Tubeless versus Tubeless Ready, checking tyre and rim compatibility, washing a new tyre, the valve at 5 or 7 o'clock, the 30, 50 and 70 ml minimums, shaking, the pressure check before every ride and faster air loss than a tube; and Continental: bicycle tyre FAQ, inner tubes in a tubeless ready tyre and the e25 and e50 markings.
- Stan's: Original tubeless rim tape, the widths, the 1 to 2 mm rule with the 27 mm on 25 mm example, the 45 psi layer threshold, the start and overlap in spoke holes, tension down the centreline and the round valve hole rather than an X slit; Stan's: rim tape 21 mm and Stan's: rim tape 33 mm, the 50 psi (3.5 bar) layer threshold.
- Stan's: tubeless guide, isopropyl alcohol and a lint-free rag, soapy water on both beads, a floor pump or compressor, injecting through the valve and Race Day poured over the bead; Stan's: Race Day tubeless sealant, not installable through a valve; Stan's: how much sealant, the 50 and 105 ml figures; Stan's: Original tubeless sealant, 2 to 7 months in the tyre; and Stan's: alloy valves, 35, 44 and 55 mm and valve holes up to 8 mm.
- Muc-Off: tubeless rim tape, the widths, the next size up, starting opposite the valve, the 10 to 15 cm overlap and the 45 degree cut; Muc-Off: Tubeless Valves V2, 44, 60 and 80 mm, the three base shapes, hand tight and the core tool in the cap; and Muc-Off: MTB tubeless sealant, filling through the valve.
- DT Swiss: tubeless tapes, tape width per rim inner width; DT Swiss: FAQ, approximately 2 mm wider and two or three layers where needed; DT Swiss: tubeless valves, lengths by rim profile height and the core tool in the cap; and DT Swiss: tubeless technology, ASM wheelsets taped and valved and a standard floor pump.
- Mavic technical manual: road UST tubeless wheels (PDF, 7 September 2026), tape width and two laps per wheel, wheels that are UST tubeless on their own, and the 60 mm and 80 mm valves by rim depth.
- ENVE: hookless rim technology 101, the ETRTO maximum pressures for hookless road rims by tyre width.
- Zipp: hookless tyre compatibility, TSS-compatible tyres only, never above 5 bar (72 psi), and tubes only inside a TSS tyre.
- BikeRadar: how to set up a tubeless tyre (Oscar Huckle, March 2025), re-taping rather than patching, thumb pressure on the bung, no tools on the lock ring, the core out for seating, witness marks and checking sealant every two to three months.
- BikeRadar: what is a tubeless tyre (Matthew Loveridge, April 2025), an unequivocal yes off road and less stark on the road, not for an infrequently used bike, never a non-tubeless tyre or tube-type rim on the road, and the hookless roll-off risk.
- Cycling UK: what are the pros and cons of tubeless tyres?, the pros, topping up every six months, clogged valve cores, the spare tube, a tubed tyre on a tubeless rim, and conventional tyres with tubes for touring or transport use.
- road.cc: how to fit tubeless tyres (Emily Tillett, January 2026), the frustration at the inflation stage and losing a few psi in the first 24 hours.
- Hunt Bike Wheels: road bicycle tubeless tyre fitting guide, two layers of Hunt tape, three quarters of the bead before sealant and rotating the wheel before closing the bead.
- Michelin UK: how to fit tubeless bike tyres, spinning the wheel to check for a warped or damaged rim.