How to repair a tubeless bike tyre puncture: sealant, plug, patch or tube
How to fix a tubeless puncture in order: sealant, plug, inside patch or emergency tube, with makers' hole-size limits and when to replace the tyre.

Written by Conor DonoghueCargo bike mechanic
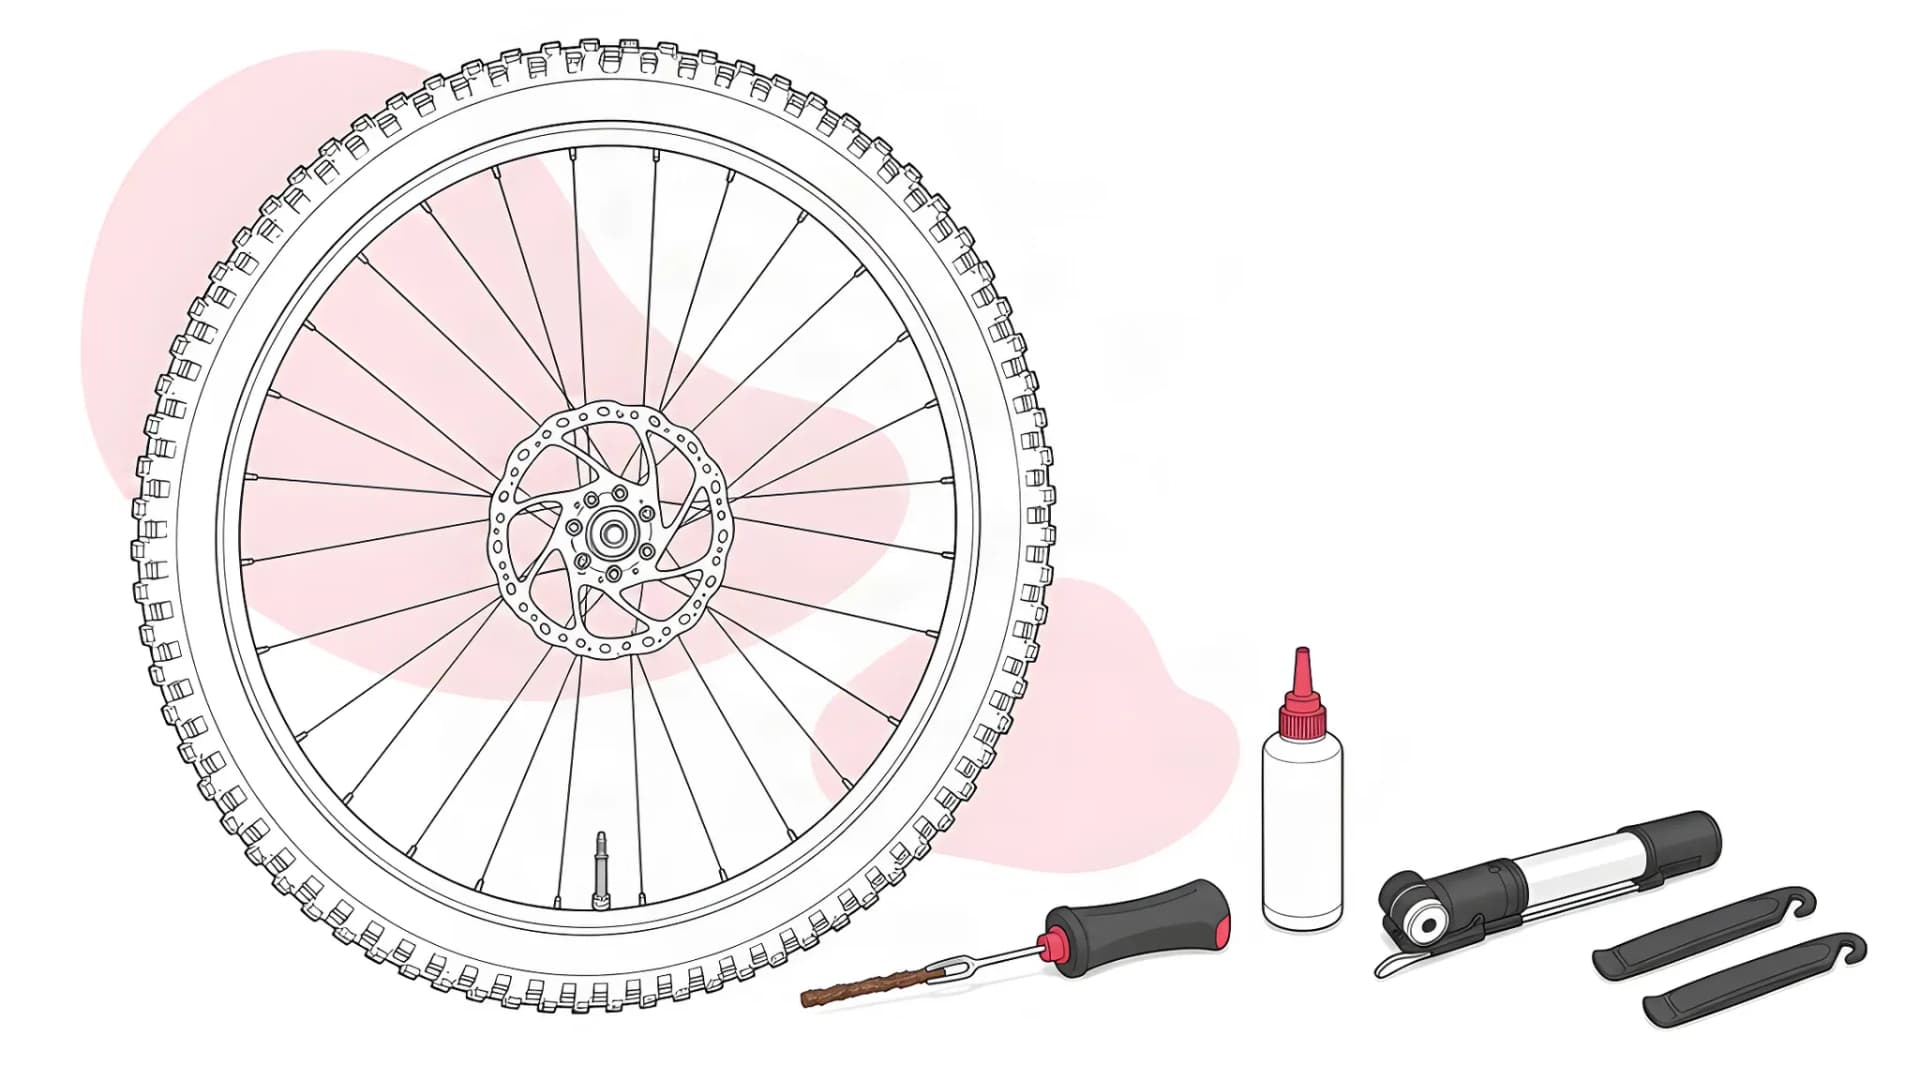
Short answer: to repair a tubeless bike tyre puncture, let the sealant try first, then plug the hole, and fit an inner tube if the plug will not hold. Turn the hole to the bottom of the wheel so sealant reaches it; Hutchinson, Stan's and Muc-Off rate their sealants for holes of 3 to 7 mm. An inside patch is a home repair. A cut sidewall, a damaged bead or a torn casing needs a new tyre.
Which tubeless puncture repair do you need?
Match the repair to what the hole does after you turn the wheel and pump the tyre. Sealant closes small holes, and a plug fills a hole the sealant cannot close. A cut casing or a damaged bead needs a tube to get home and a new tyre after that.
- Sealant bubbles out, then stops, and the tyre stays firm. The sealant has done the job. Check the tyre again at home.
- Sealant keeps spraying, or air keeps hissing out. The hole is too big for the sealant. Fit a plug from the outside, with the wheel on the bike.
- A plugged hole keeps seeping. Patch the hole from the inside at home, if the tyre maker allows a patch.
- A slit, a plug that will not stay in, or two holes at the rim edge. Fit an inner tube, with a tyre boot behind any cut, and ride home gently.
- A cut sidewall, a damaged bead, exposed casing threads or a bulge. Replace the tyre. A boot and tube may get you home from a cut, but they do not repair a damaged bead.
A tube works only while the casing can contain it, and Park Tool's repair guide warns that a ripped casing may not hold one.
If you cannot find a hole, look for wet sealant and listen for a hiss. A leak at the valve or rim, or a slow loss with no hole, is a different fault from a puncture.
What to carry for a tubeless puncture
Carry a plug tool with its own plugs, a pump, two tyre levers, a spare inner tube, a rag, a valve core tool and whatever removes your wheel.
- Plugs in two widths. Cycling UK's group test of tubeless repair kits suggests taking at least two widths of plug if in doubt.
- An inner tube with a long enough valve. Hunt's road tubeless guide reminds riders on deep-section rims to check the valve length. Our guide to bike tyre sizes explained shows how to read the tyre size off the sidewall, which is the size a spare tube must match.
- Optional extras. A small bottle of sealant that fits through the valve, and a tyre boot for a cut.
CO2 is a question for your sealant maker. Schwalbe and Continental advise against CO2 with their sealants, Stan's says it can degrade liquid latex, and Muc-Off's plug guide uses it. A pump works with all of them.
How to get the sealant to seal a tubeless puncture
Stop somewhere safe, turn the wheel so the hole is at the bottom, then spin or ride it and pump the tyre back up. Schwalbe's tubeless advice is to keep riding or press the damaged spot onto the ground, because the tyre flexing helps the sealant work.
- Keep the hole low. Schwalbe says sealant cannot reach a hole held at the top of the wheel.
- Pump and check that it holds. Continental says sealant leaks slightly from minor damage and should seal it straight away. Leave the hole at the bottom, then press the tyre again to check it has stayed firm.
- Stop pumping a hole that keeps spraying. Cycling UK's test says a hole too large for the sealant keeps spraying instead of hardening into a plug. Each pump pushes more sealant out of the hole, so fit a plug.
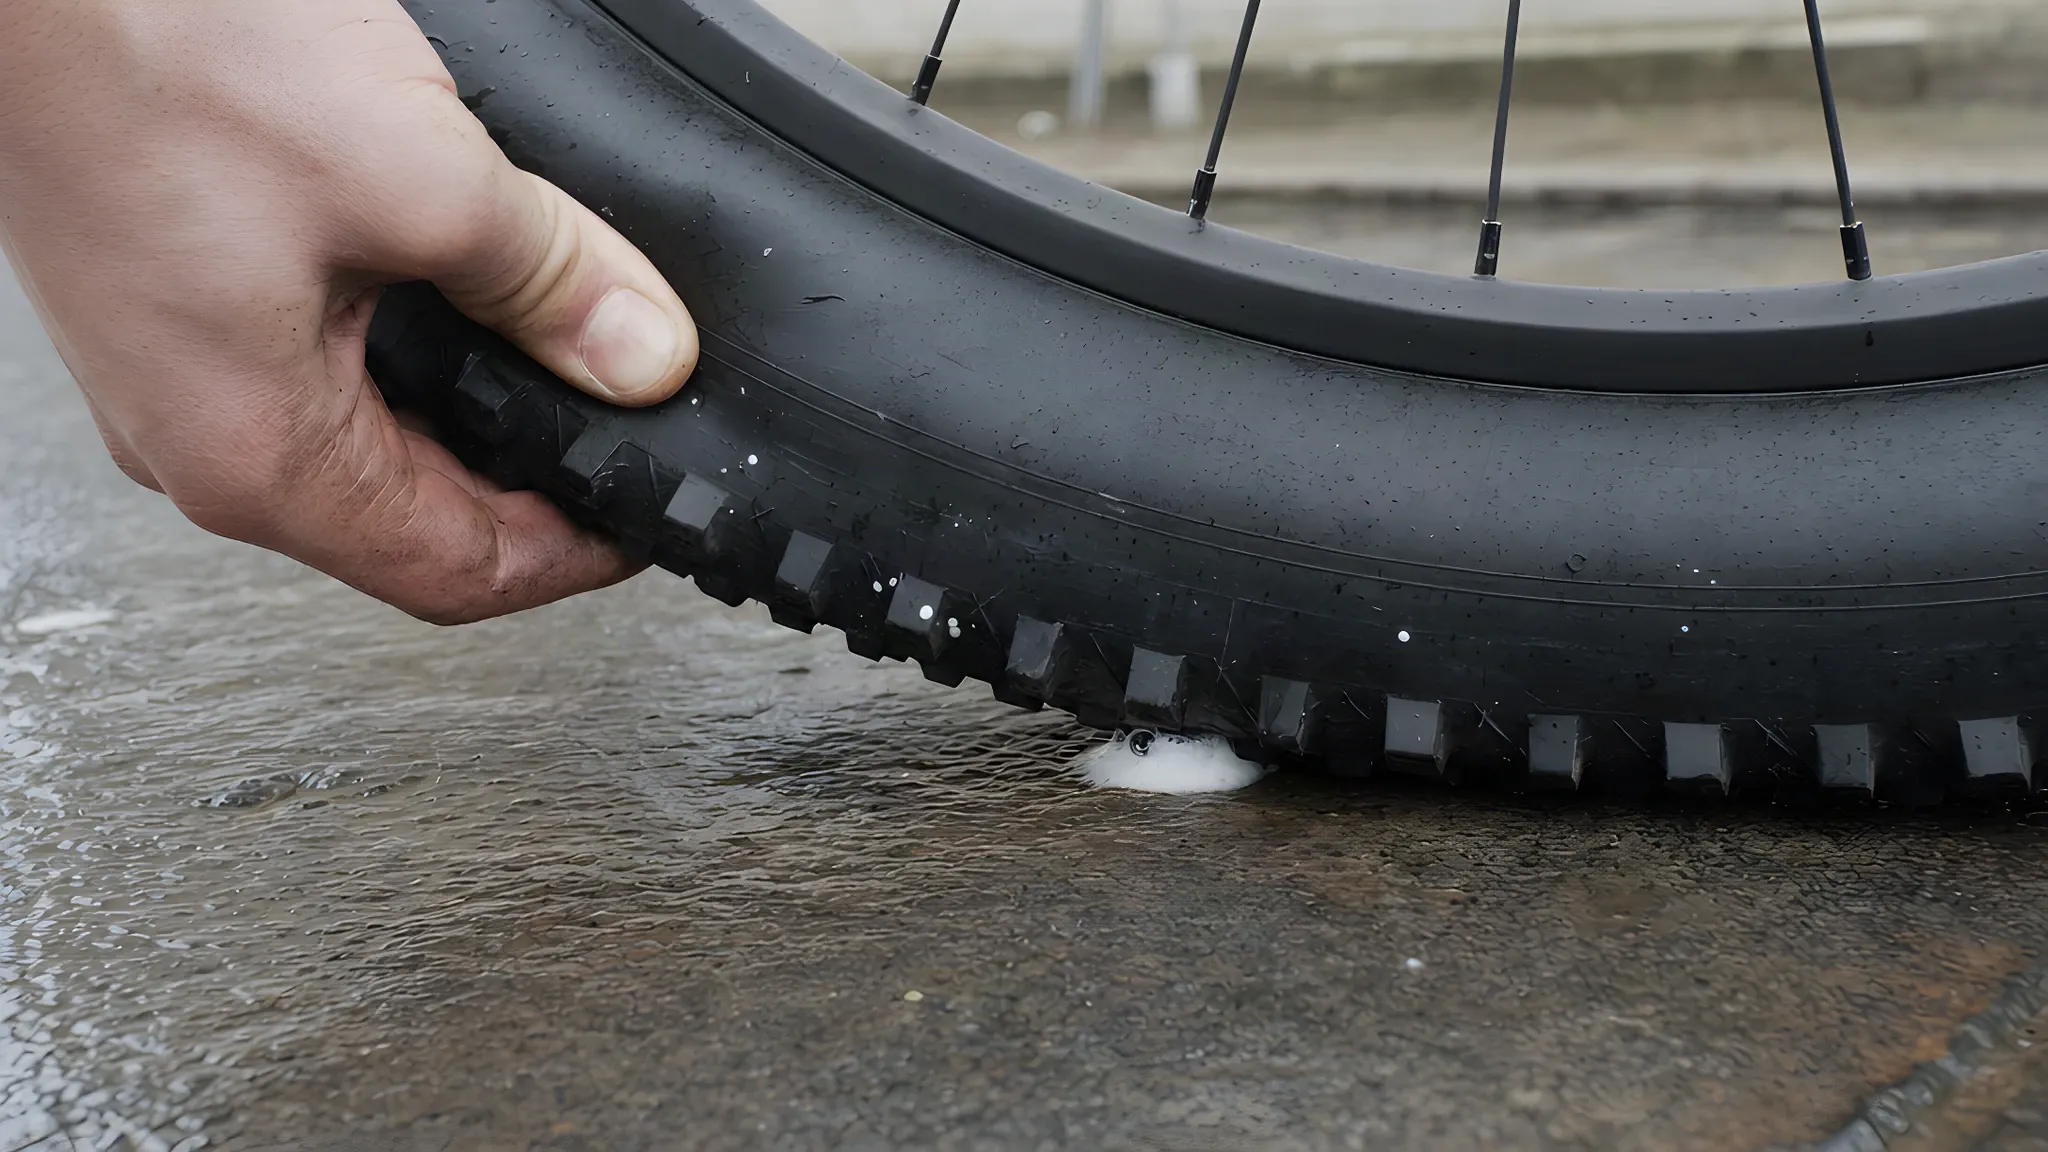
Sealant ratings differ by product. Hutchinson says its Protect'Air Max fills holes up to 3 mm, Stan's rates its Original sealant to 6.5 mm and Muc-Off rates its MTB No Puncture Hassle sealant to 7 mm. The figure that applies is the one for the sealant in your tyre.
Sealant that has dried out cannot seal a hole. Stan's gives its Original sealant 2 to 7 months, and Schwalbe gives Doc Blue about 2,000 km or 2 to 7 months, depending on temperature. If a hole under 5 mm will not seal, Stan's DART instructions say the tyre likely needs more sealant, which is a separate maintenance job.
How to plug a tubeless tyre
A plug is a strip of sticky rubber cord pushed into the hole from outside, with the tyre left on the rim. Park Tool describes what its TPT-1 plug does: it shrinks the hole to a size the sealant can then seal.
The steps follow Muc-Off's instructions for its fork-type plug kit; other tools differ, as listed after the steps. Cycling UK's test advises reading your own kit's instructions before you need them.
Not every tyre maker endorses plugs: Continental recommends a new tyre when the sealant does not seal the damage, and advises against repairing the tyre yourself, including with a tubeless repair kit.
1. Find the hole and remove the object
Look for wet sealant or listen for the hiss. Pull out the thorn, glass or flint with pliers or the tip of the tool. Muc-Off's guide says to take care in case something sharp is still inside the tyre.
2. Ream the hole if your kit says so
Muc-Off's reamer is pushed into the hole and worked backwards and forwards to roughen the edges, so the plug seals better. BikeRadar's guide asks you to insert the spike carefully so it does not damage the rim tape.
3. Load a plug of the right size
Choose a thin plug for a narrow puncture and a thick one for a larger hole. With Muc-Off's kit, pinch the end of the plug, thread it through the eye of the tool and pull it halfway through.
4. Push the plug in
Aim at the hole and push until the plug is about halfway in, with two tails outside. BikeRadar's guide says not to push it all the way through.
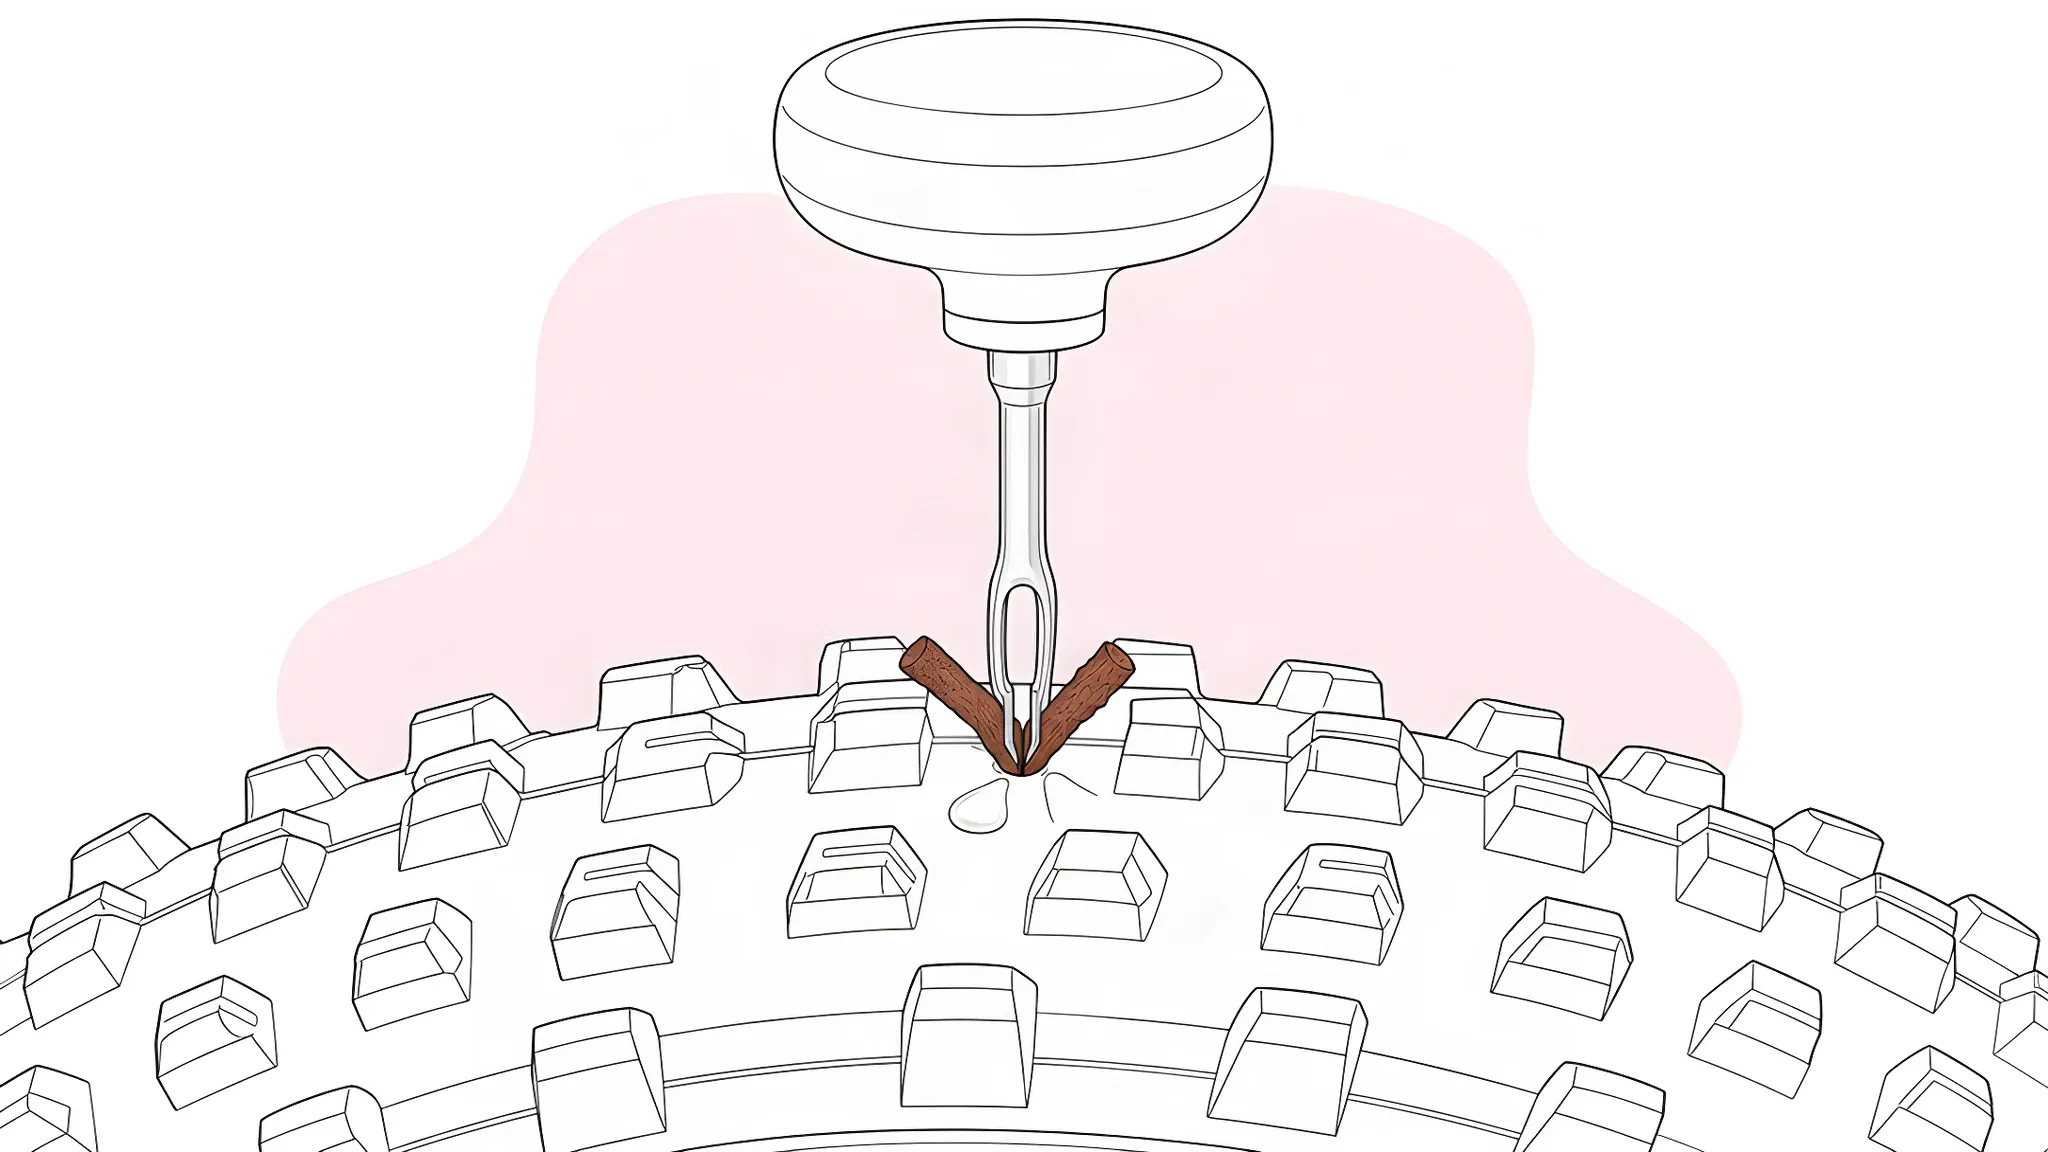
5. Twist the tool out
Muc-Off says to twist the tool a few turns while holding the plug's tails down, then pull it out slowly. The plug stays in the tyre.
6. Pump the tyre and wait
Pump back to riding pressure. BikeRadar's guide says to turn the wheel so the plug sits at the bottom for a few minutes before you ride, so sealant flows into the repair.
7. Trim the tails later
Muc-Off says you can trim the excess at home, taking care not to take too much off. BikeRadar warns against cutting the plug too close to the tyre.
If air still escapes after the first plug, add a second one: Cycling UK notes that many kits allow more than one strip in a hole. If the plug moves or pulls out, the tyre bulges around it, or the hole is a slit, fit an inner tube.
Plug systems differ, so one tool's instructions do not transfer to another:
- Fork tools with sticky strips. Ream, push the strip halfway in, twist the tool out, trim later, as in the steps above.
- Dynaplug. The plug has a metal tip and sits in a steel tube. Dynaplug's tips say not to twist or wiggle the tool, because the tip can shear off the cord. Afterwards, spin the wheel, or face the repair to the ground and tap the tyre.
- Stan's DART. Made for holes larger than 5 mm, with no trimming. Stan's says to turn the wheel at once so the DART sits at 6 o'clock in the liquid sealant, which must be fresh and latex-based for the DART to bond. On a tyre above 45 psi, Stan's suggests letting some air out first.
How to patch a tubeless tyre from the inside
An inside patch is a home repair for a hole that keeps seeping after a plug, and only where the tyre maker allows it. Makers disagree, so check first:
- Park Tool says tubeless tyre punctures in general cannot be patched: only UST tyres and other tubeless tyres with a butyl inner lining can potentially take a vulcanising patch. For other tubeless tyres, Park Tool points to a plug tool instead.
- Continental recommends changing the tyre if the sealant does not reliably seal the damage. It does not recommend repairing the tyre yourself, with a tubeless repair kit or any other way.
- Hutchinson makes its Rep'Air kit for road tubeless tyres, with patches for punctures up to 5 mm.
Where a patch is allowed, the method below follows BikeRadar's tubeless repair guide. If the kit's preparation or curing times differ, follow the kit.
1. Open one side of the tyre
Mark the hole on the outside. Let the air out with the valve away from the bottom of the wheel, as Park Tool advises, because there is sealant inside. Lever one bead off over a container to catch the sealant.
2. Clean and roughen the inside
Wipe the sealant off around the hole and let the area dry, then roughen it with the kit's sandpaper. BikeRadar's guide calls cleanliness the key to a glued patch.
3. Glue and press the patch
Spread vulcanising solution over the area and wait until it is tacky. Press the tubeless patch down firmly without touching its glued face, which BikeRadar warns contaminates the adhesive.
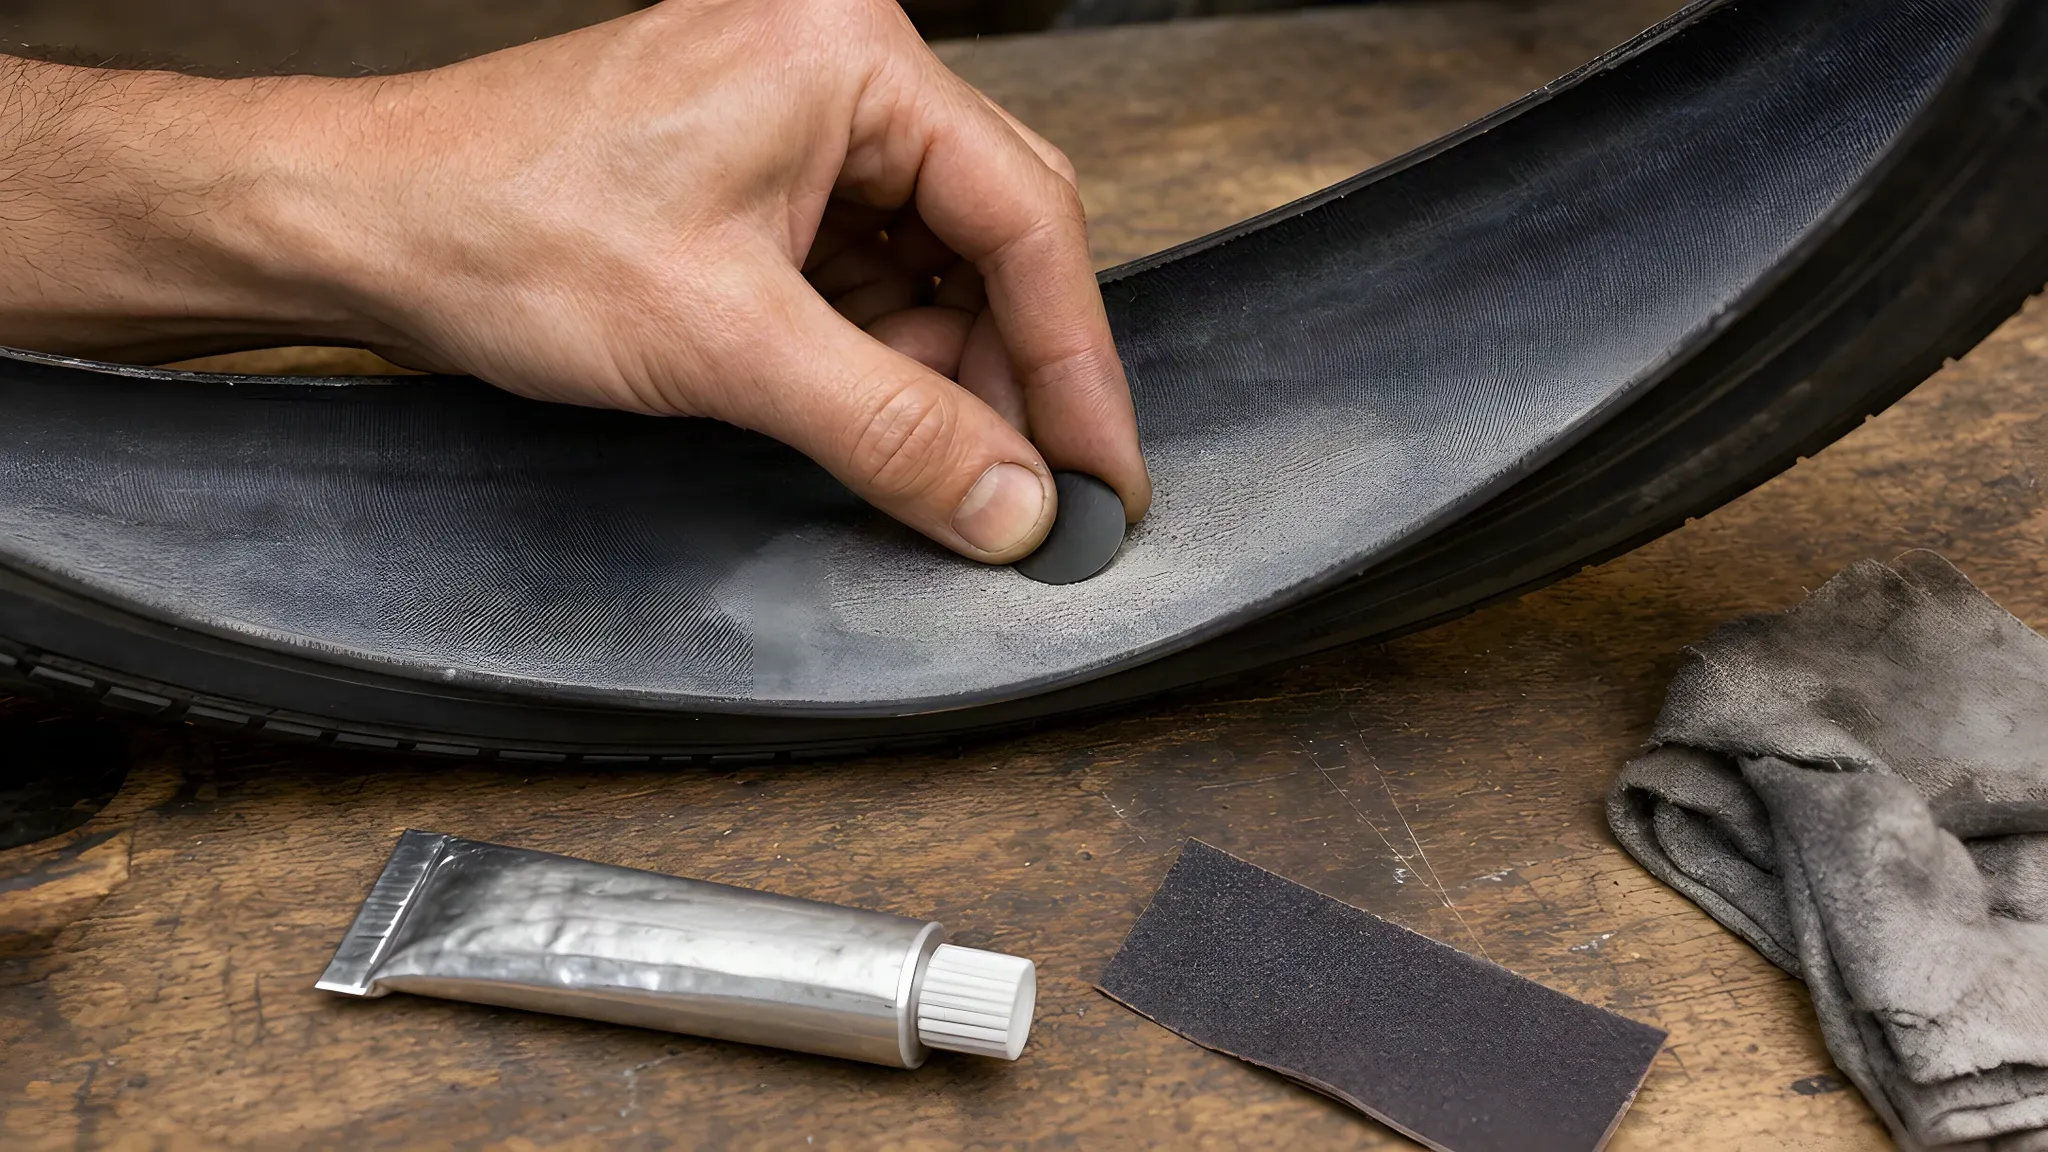
4. Let it cure, then refit
BikeRadar says a patch needs minutes or hours, depending on type, before the tyre goes back on. Refit the bead, add fresh sealant and inflate until the bead seats. Schwalbe says seating needs a strong blast of air, and a floor pump is not enough on every wheel.
A stick-on inner tube patch is the wrong part here: Park Tool says tubeless tyre bodies cannot be patched with stick-on patches.
How to fit an inner tube in a tubeless tyre
Fit a tube to get home when a plug will not hold. Schwalbe calls a replacement tube the best solution for large cuts and snakebites, and says the sealant left in the tyre does not damage the tube.
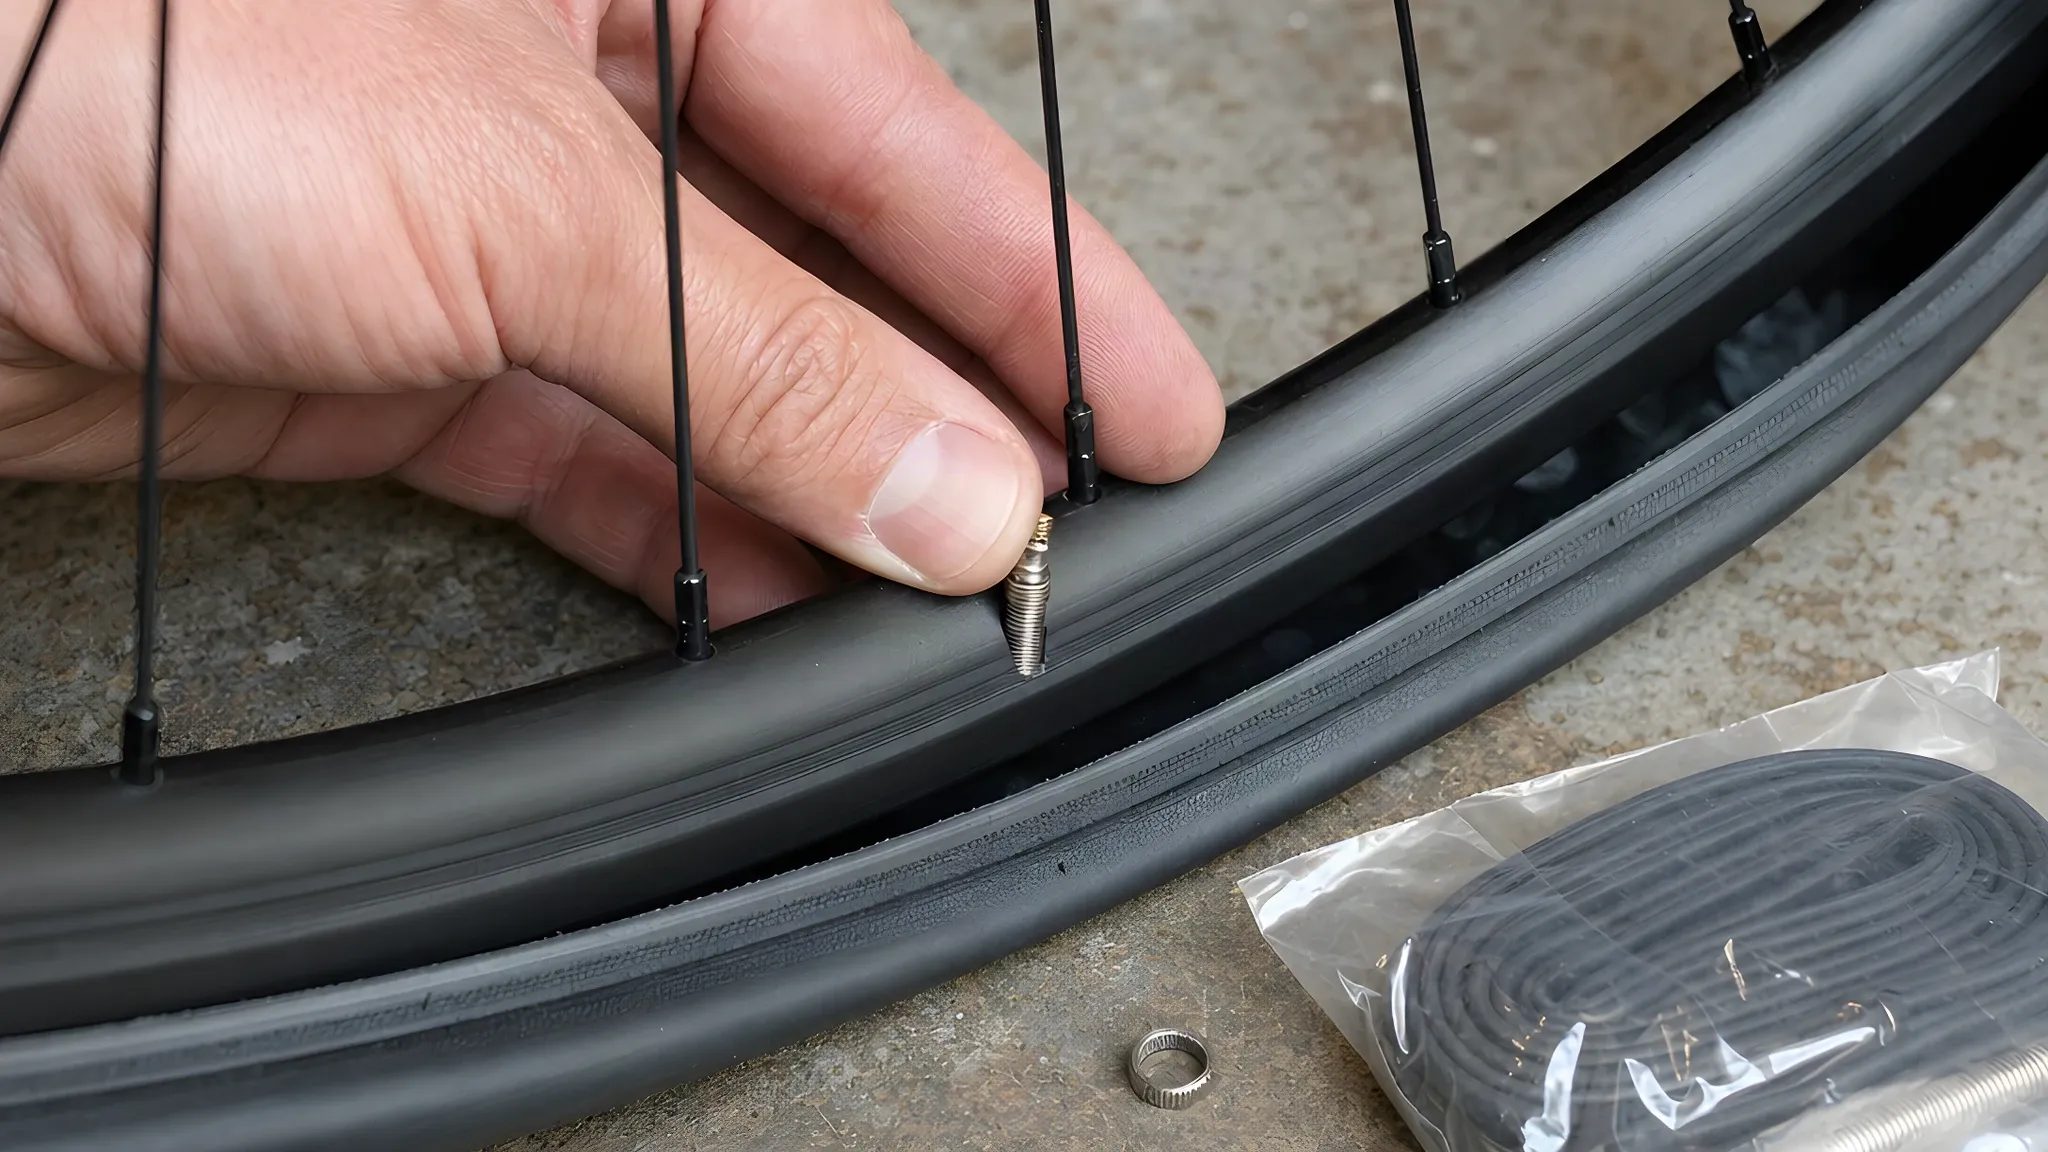
1. Take out the tubeless valve
Deflate the tyre and lever one bead off. Undo the valve's lock ring, as Hunt's road tubeless guide describes, and push the valve out of the rim.
2. Wipe out the sealant and feel for thorns
Wipe out as much sealant as you can, as Schwalbe advises, then run your fingers carefully around the inside. Hunt warns that sealant may have sealed earlier punctures with the thorn still in place.
3. Check the rim tape
Schwalbe's tubeless advice is that every spoke hole must be covered. A lifted or cut tape can puncture the new tube, so smooth it down or cover the gap first.
4. Boot any cut
BikeRadar explains that a boot stops the tube bulging out through a cut. Park Tool's instructions are to wipe the inside clean and centre the boot so it completely overlaps the rip, with its edges inside the bead.
5. Fit the tube and check the bike
Fit the tube as in our guide to fixing a bike puncture, working the last of the bead on by hand. Inflate within the tyre's range, refit the wheel, and squeeze both brakes before you ride.
Road, gravel and mountain bike tubeless: what changes
The order of repairs is the same on every tubeless bike. Pressure, sealant volume and the rim's limits change how each step goes.
- Road tyres run at higher pressure. Hunt's road guide says high pressure can force sealant out through a larger hole before it seals. A road tyre at around 60 psi, Hunt adds, can still get you home.
- Sealant has a pressure range. Muc-Off rates its MTB No Puncture Hassle sealant for 15 to 80 psi.
- Road tyres hold less sealant. Continental recommends 30 ml of sealant for a road tyre, 50 ml for gravel and 70 ml for a mountain bike tyre at first fitting.
- Mountain bike tyres still pinch. BikeRadar warns that tubeless tyres can get snakebites on rocky ground, with holes close to the bead that are tricky to fix.
- Foam inserts stay in for a plug. CushCore's FAQ says trailside repairs follow the standard tubeless approach and that plugs are a good option.
Hookless rims cap the pressure. ENVE, a hookless rim maker, gives the ETRTO maximum for hookless road rims as 5 bar (72.5 psi) for 25–29 mm tyres. For 30–34 mm tyres, the ETRTO figure ENVE gives is 4.5 bar (65 psi).
Continental and Schwalbe both say the lower of the tyre's and the rim's limits applies. After a plug or a tube, stay at or below that lower figure. Our bike tyre pressure guide covers choosing a pressure inside it.
When to replace a tubeless tyre instead of repairing it
Replace the tyre when the damage is to its structure. A plug, a patch or a boot closes a hole, and none of them restores the strength of a cut casing.
- Cut or torn sidewall. Schwalbe says sealant is unlikely to seal larger cuts. A boot and tube can get you home, and Park Tool says a booted tyre should be replaced as soon as possible.
- Damaged bead. The bead holds the tyre on the rim and seals it, and nothing in a repair kit fixes it. Continental's safety advice is to replace damaged parts of a tubeless set-up.
- Exposed or cut casing threads, or a bulge. The casing has lost strength at that point.
- A hole beyond your kit's limit, or a repair that fails again. Continental recommends changing a tyre whose damage the sealant does not reliably seal.
A small sidewall hole may take a plug, and Dynaplug makes pointed tips for small punctures next to the rim. Treat that plug as a way home and have the tyre checked before you rely on it.
What to check before riding on a repaired tubeless tyre
Check the bead, the pressure, the wheel and the brakes before you ride:
- Bead. Schwalbe's mounting steps include checking that the tyre sits correctly all the way round.
- Pressure. Pump inside the tyre's and rim's limits, wait, then check again; the bike tyre pressure calculator gives a starting figure. Continental recommends checking tubeless pressure before every ride.
- Wheel and brakes. The axle or quick release is closed, the wheel sits straight, and both brakes bite without rubbing.
Ride the first stretch gently, then check the pressure again. At home, replace the sealant the puncture lost, as Stan's DART instructions suggest after a large loss. If you used CO2, Stan's suggests letting it out and refilling from a pump.
Common mistakes with a tubeless puncture
- Holding the hole at the top of the wheel. Schwalbe says sealant cannot reach it there.
- Twisting a Dynaplug tool. Dynaplug says the tip can shear off the cord. Fork tools are the opposite: Muc-Off's is twisted out.
- Cutting the plug flush. BikeRadar and Muc-Off both warn against trimming too close.
- Treating a boot as an airtight tubeless repair. Park Tool's boot is for emergency use only and is not intended for tubeless systems, so it goes in with a tube behind it.
When it is a job for a mechanic
- A hole that will not seal or hold after a plug. The tyre needs an inside repair or a replacement, set up again with sealant.
- A cut sidewall, a damaged bead, exposed threads or a bulge. The tyre needs replacing and seating, which can take more air than a floor pump gives.
- A tubeless tyre that will not seat or hold air after a tube or a new tyre goes in.
- Hookless rims, or a road tyre where you are unsure of the safe pressure after a repair.
Tyred mechanics carry tubeless sealant and plugs. If a hole is too large to seal, they can fit an inner tube or a new tubeless tyre at the door. Puncture repair starts from £30, and a new tyre is not included in that price, as the pricing page shows.
A mechanic comes to you with a fully stocked workshop, 9am to midnight, seven days a week, across London.
Book a repair · About mobile puncture repair →
Related guides
- How to fix a bike puncture (and when to call a mechanic)
- Bike tyre pressure: the right psi for your weight, tyre and bike
- Bike tyre sizes explained
Sources and further reading
- Schwalbe: tubeless, sealing while riding with the hole off the top of the wheel, larger cuts and snakebites, fitting a tube, no CO2 with Doc Blue, Doc Blue's life, unshaken sealant, rim tape over every spoke hole, the blast of air for seating, the seating check and the lower of the rim and tyre limits.
- Continental: tubeless ready, sealant sealing minor damage, sealant amounts for road, gravel and MTB, the lower of tyre and rim limits, CO2 not recommended with sealant, changing a tyre the sealant does not seal, no repairs by the rider, replacing damaged parts, faster air loss than a tube and checking pressure before every ride.
- Stan's: Original tubeless sealant, the 6.5 mm rating and the 2–7 month life; Stan's: Original DART tool, the 5 mm threshold, more sealant for smaller holes, the 6 o'clock position, adding sealant after a large loss, CO2 and the permanent bond; and Stan's: DART, no trimming.
- Muc-Off: how to seal any puncture with the Puncture Plug Repair Kit, the reaming, loading, insertion, twist-out and trimming steps and CO2 reinflation; and Muc-Off: MTB No Puncture Hassle tubeless sealant, the 7 mm rating and the 15–80 psi range.
- Hutchinson: Protect'Air Max sealant, holes up to 3 mm; and Hutchinson: Rep'Air road tubeless kit, patches for punctures up to 5 mm.
- Dynaplug: tips for successful use of your Dynaplug tool (PDF), no twisting, spinning the wheel or tapping it with the repair facing down, adding plugs, pointed tips next to the rim, and no sealant or patch needed after a successful repair.
- Hunt Bike Wheels: road bike tubeless tyre maintenance and puncture repair guide, high pressure and larger holes, riding home at around 60 psi, the miles after a plug, the valve lock ring, sealed thorns left in the tyre and valve length for deep rims.
- BikeRadar: how to repair a punctured tubeless tyre (Katherine Moore, May 2025), reaming without damaging the rim tape, inserting and trimming plugs, the plug at the bottom for a few minutes, the inside patch method, what a boot does, snakebites near the bead.
- Cycling UK: group test of tubeless repair kits (Hannah Collingridge, Cycle magazine, February/March 2024), which holes self-seal and which keep spraying, reading each kit's instructions, two widths of plug and more than one strip in a hole.
- Park Tool: tubeless tyre removal and installation, deflating with the valve away from the bottom and which tubeless tyres can take a vulcanising patch; Park Tool: how to patch a tyre and tube, stick-on patches on tubeless tyres, the plug tool for other tubeless tyres, ripped casings and fitting a boot.
- Park Tool TB-2 instructions (PDF), emergency use only and not for tubeless systems; Park Tool TPT-1, what a plug does.
- ENVE: hookless rim technology 101, the ETRTO maximum pressures for hookless road rims by tyre width.
- CushCore: FAQ, trailside repair and plugs with a foam insert fitted.