How to true a bike wheel and fix a small buckle
How to true a bike wheel in the frame: rule out tyre and hub faults, read nipple direction, make quarter turns, check dish and tension, know when to stop.
By the tyred mechanics
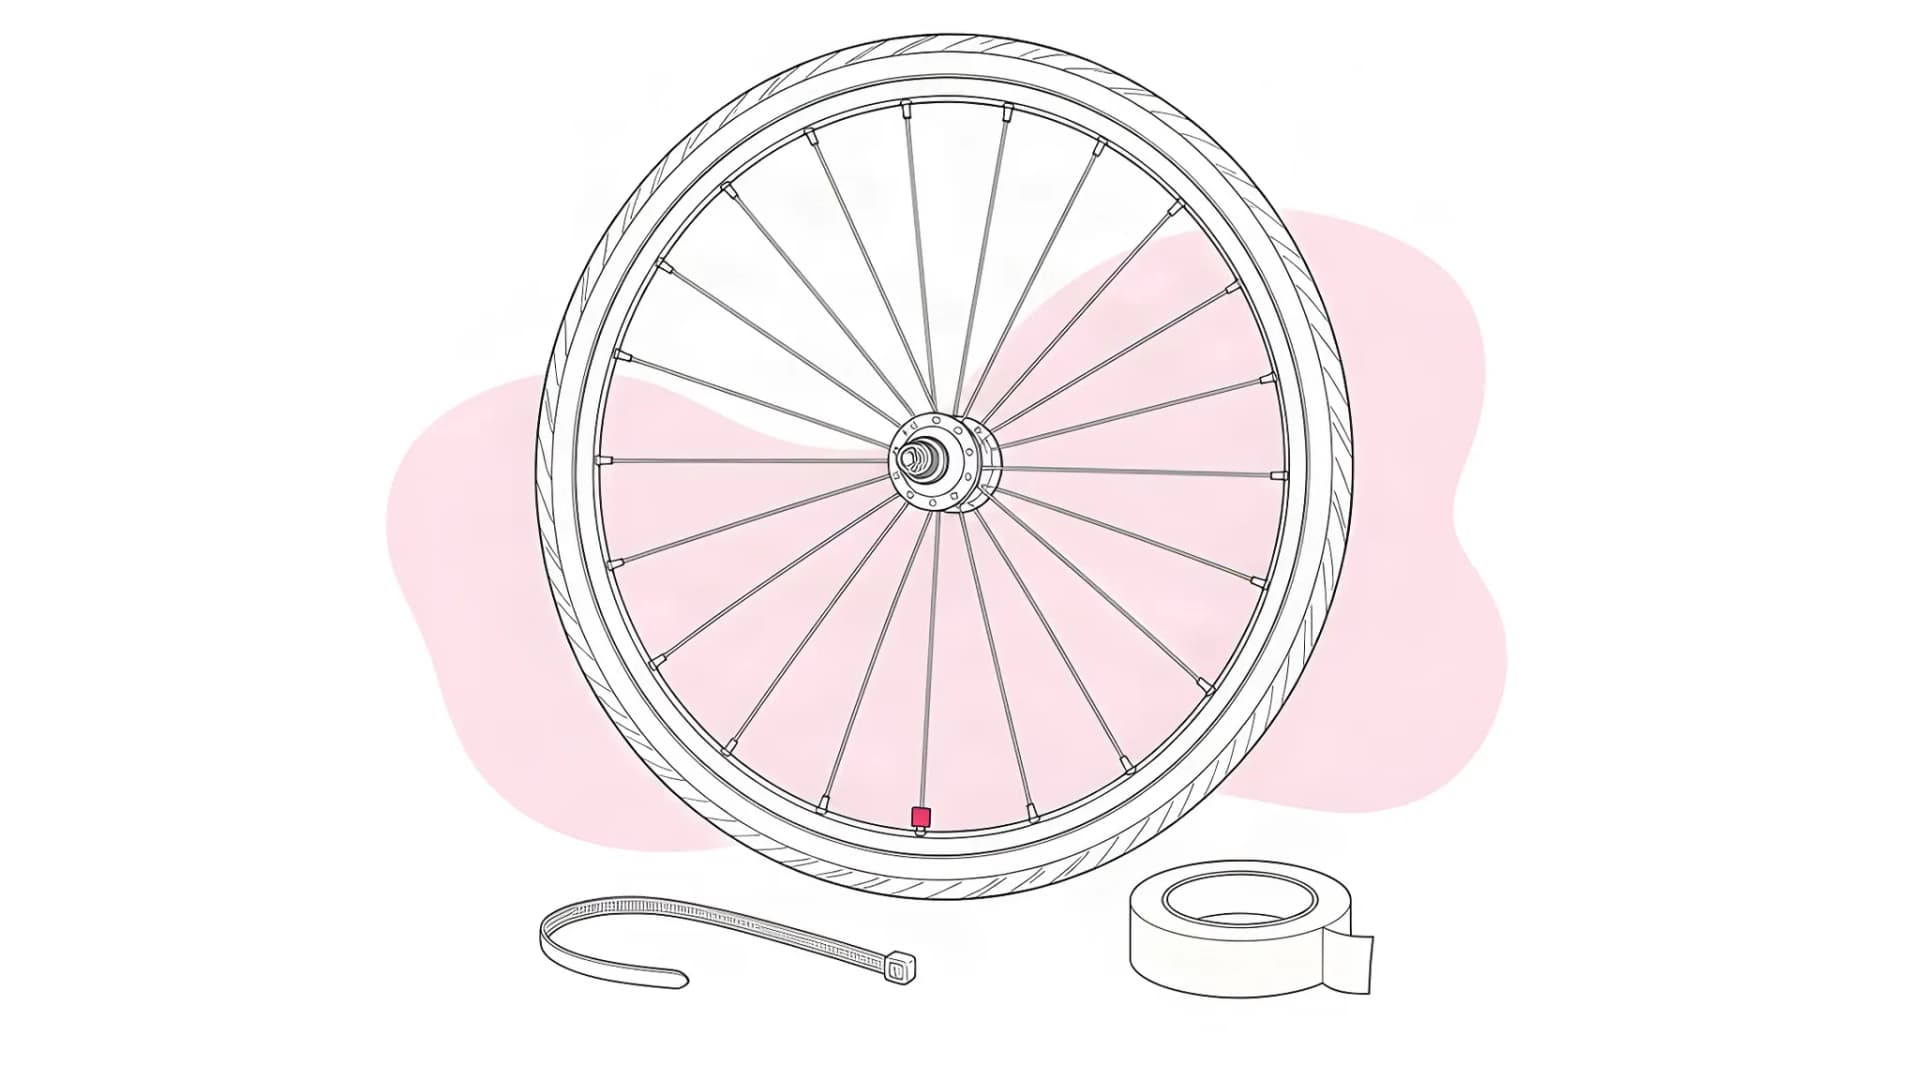
Short answer: how to true a bike wheel comes down to small spoke adjustments. Turn the nipples a quarter turn at a time, as Park Tool advises, so spoke tension pulls the rim back into line. First rule out a loose wheel, a badly seated tyre and hub play, because truing only corrects the rim. A small sideways buckle can be trued in the frame; dents, cracks and broken spokes need a mechanic.
What truing a wheel does, and what it cannot fix
Truing a bicycle wheel means adjusting spoke tension until the rim spins straight and round. Spokes are long, thin fasteners pulling the rim from both sides, with the nipple as the nut on each one. Park Tool's truing guide lists four aspects:
- Lateral true. Side-to-side wobble, the buckle riders notice. The guide calls it the most critical aspect on rim-brake bikes.
- Radial true. Up-and-down hop as the rim turns.
- Dish. Whether the rim is centred between the hub's locknut faces.
- Spoke tension. How tight the spokes are and how even. A wheel with widely varied tension, the guide notes, will not stay true for long.
Truing does not straighten bent metal. Park Tool says adjusting spokes on a badly bent rim is unlikely to help, and a rim bent beyond what tension can correct is replaced. A wobble from a loose spoke can be trued out, while a dent from a pothole edge remains.
Is the rim buckled, or is something else wobbling?
Check the wheel's fit, the tyre and the hub before you touch a spoke, because each of them can make a wheel look buckled. Spin the wheel slowly and watch the edge of the rim, rather than the tyre, against a brake pad or a frame tube. Then match what you see:
- The wheel shifts when you thump the tyre. The quick release, thru axle or axle nuts are loose, or the axle is not fully in the dropouts. Cycling UK's check is to lift the front and hit the top of the tyre with a fist.
- The tyre wobbles but the rim runs straight. The bead is not seated evenly. The moulding line above the bead should run consistently above the rim. Reseat it as our puncture repair guide describes.
- The rim knocks when you rock it sideways. That is play in the hub bearings; check it by pulling the wheel side to side in the frame. BikeRadar notes that hub play is amplified on a truing stand, so have it adjusted before truing.
- The rim moves sideways at one place. This is a lateral buckle, which truing corrects as long as the spokes there are intact and the rim is not dented.
- The rim rises and falls at one place. This is a radial hop, from uneven tension or from a flat spot after an impact.
- The whole rim sits closer to one side. Reseat the wheel and check it is centred in the frame. If it still sits off-centre, the dish may be out.
- A disc brake rubs once per turn while the rim runs straight. Park Tool's rotor guide lists wheel seating, hub play, caliper alignment and loose rotor bolts as causes. Our brake adjustment guide covers re-centring the caliper.
These observations point to a check rather than a certain diagnosis. If a knock and a wobble appear together, deal with the knock first.
Stop here if you find any of these
Do not adjust the spokes, and do not ride the wheel, if you find:
- A crack in the rim or around a spoke hole. Park Tool's truing stand instructions tell you to inspect the rim for cracks and bulges around the holes before truing.
- A dent, kink or flat spot in the rim. The same inspection covers dents and flat spots, and spoke tension cannot reshape bent metal.
- A broken spoke, or several loose spokes together. The rim has lost support there, and the spoke is replaced before any truing.
- A worn rim-brake track. Cycling UK warns that a rim worn thin by braking can crack under tyre pressure. Look for a concave braking surface or the wear marker.
- A carbon rim after a hard impact. ENVE asks riders to inspect the rim for cracks, chips and fibre peels after any memorable impact, and not to ride a rim that shows them.
- A wheel that will not stay secure. Park Tool warns that a wheel not securely mounted may come out when the bike is ridden.
DT Swiss's wheel user manual gives the general rule: a wheel that is damaged, or shows any signs of damage, must not be used.
What you need to true a wheel at home
Truing needs three things: a way to hold the wheel, a fixed indicator and a spoke key. At home that means:
- A spoke key that fits exactly. A key too large rounds off brass and aluminium nipples. Park Tool lists common square sizes of 3.17–3.24 mm (DT Swiss, Sapim) and 3.36–3.46 mm (value-priced bikes).
- Something to hold the wheel. A truing stand, or the bike itself in a workstand or turned upside down.
- A fixed indicator. In the bike, a zip tie on the frame or fork on each side of the rim does the job. Rim-brake pads centred on the rim show the same gap.
- Light oil and a rag for stiff or creaking nipples, wiped off any braking surface afterwards.
- A spoke holder for bladed spokes. Park Tool and DT Swiss both say flat spokes must be held while the nipple turns, or they twist. DT Swiss's Spline manual asks for round spokes to be held as well, with small flat-nose pliers, without scratching them.
A tensiometer and a dishing gauge measure what your eyes cannot. Without them, keep to small sideways corrections. A disc rotor is no guide to the rim, because it can be bent on its own and is trued separately with a rotor tool.
Check the nipples before you start. If none are visible at the rim or at the hub, the wheel is likely to have internal nipples, reached only with the tyre and rim strip off and a special key. Park Tool also lists larger nipples on hub-drive e-bikes, and proprietary ones on some DT Swiss, Mavic, Fulcrum and Campagnolo wheels.
How to true a bike wheel: small sideways buckles, step by step
This method follows Park Tool's lateral truing guide, with the wheel in the bike and zip ties as the gauge. In a truing stand the steps are the same, with the stand's calipers in place of the zip ties.
1. Set up the bike and the gauge
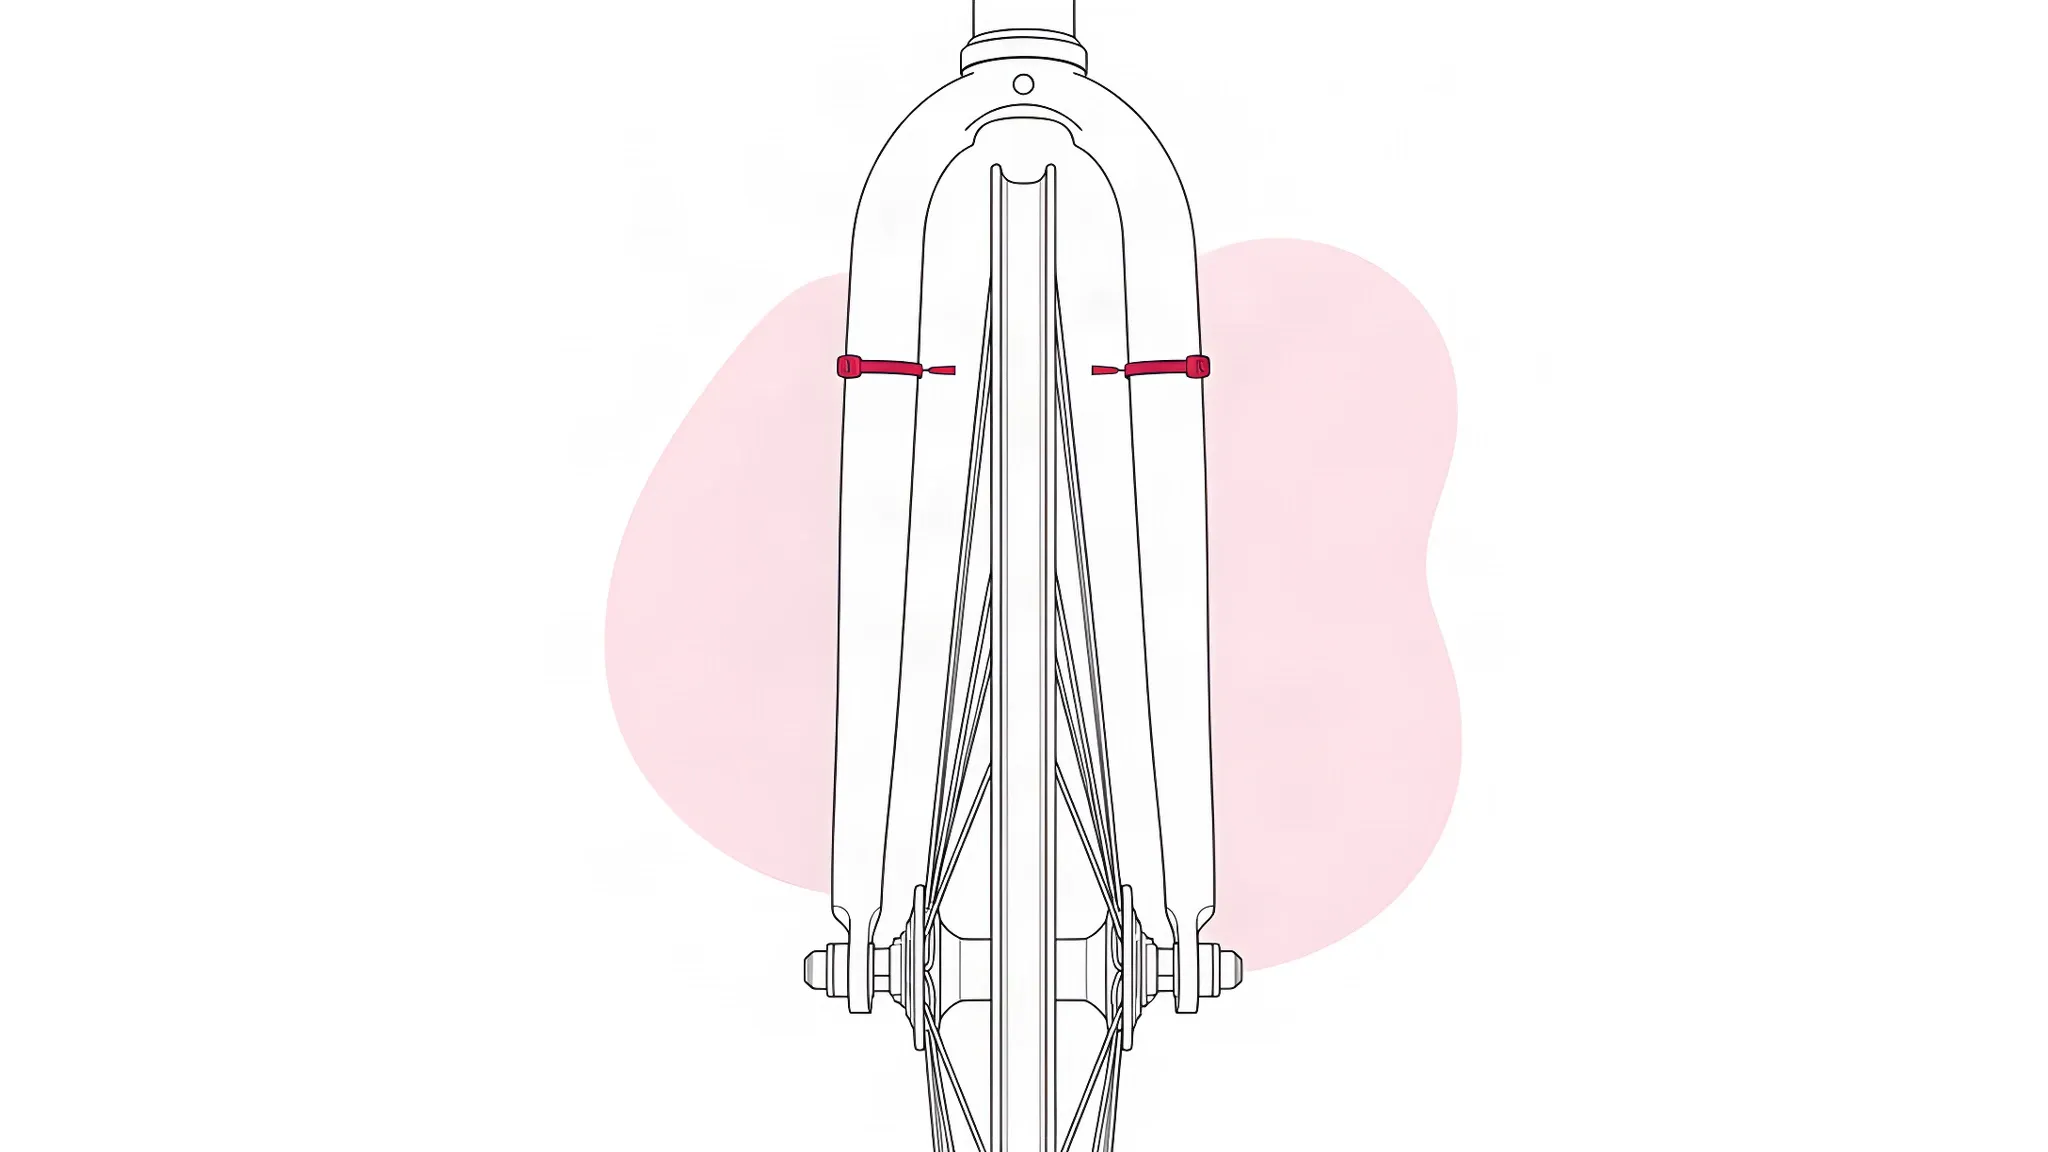
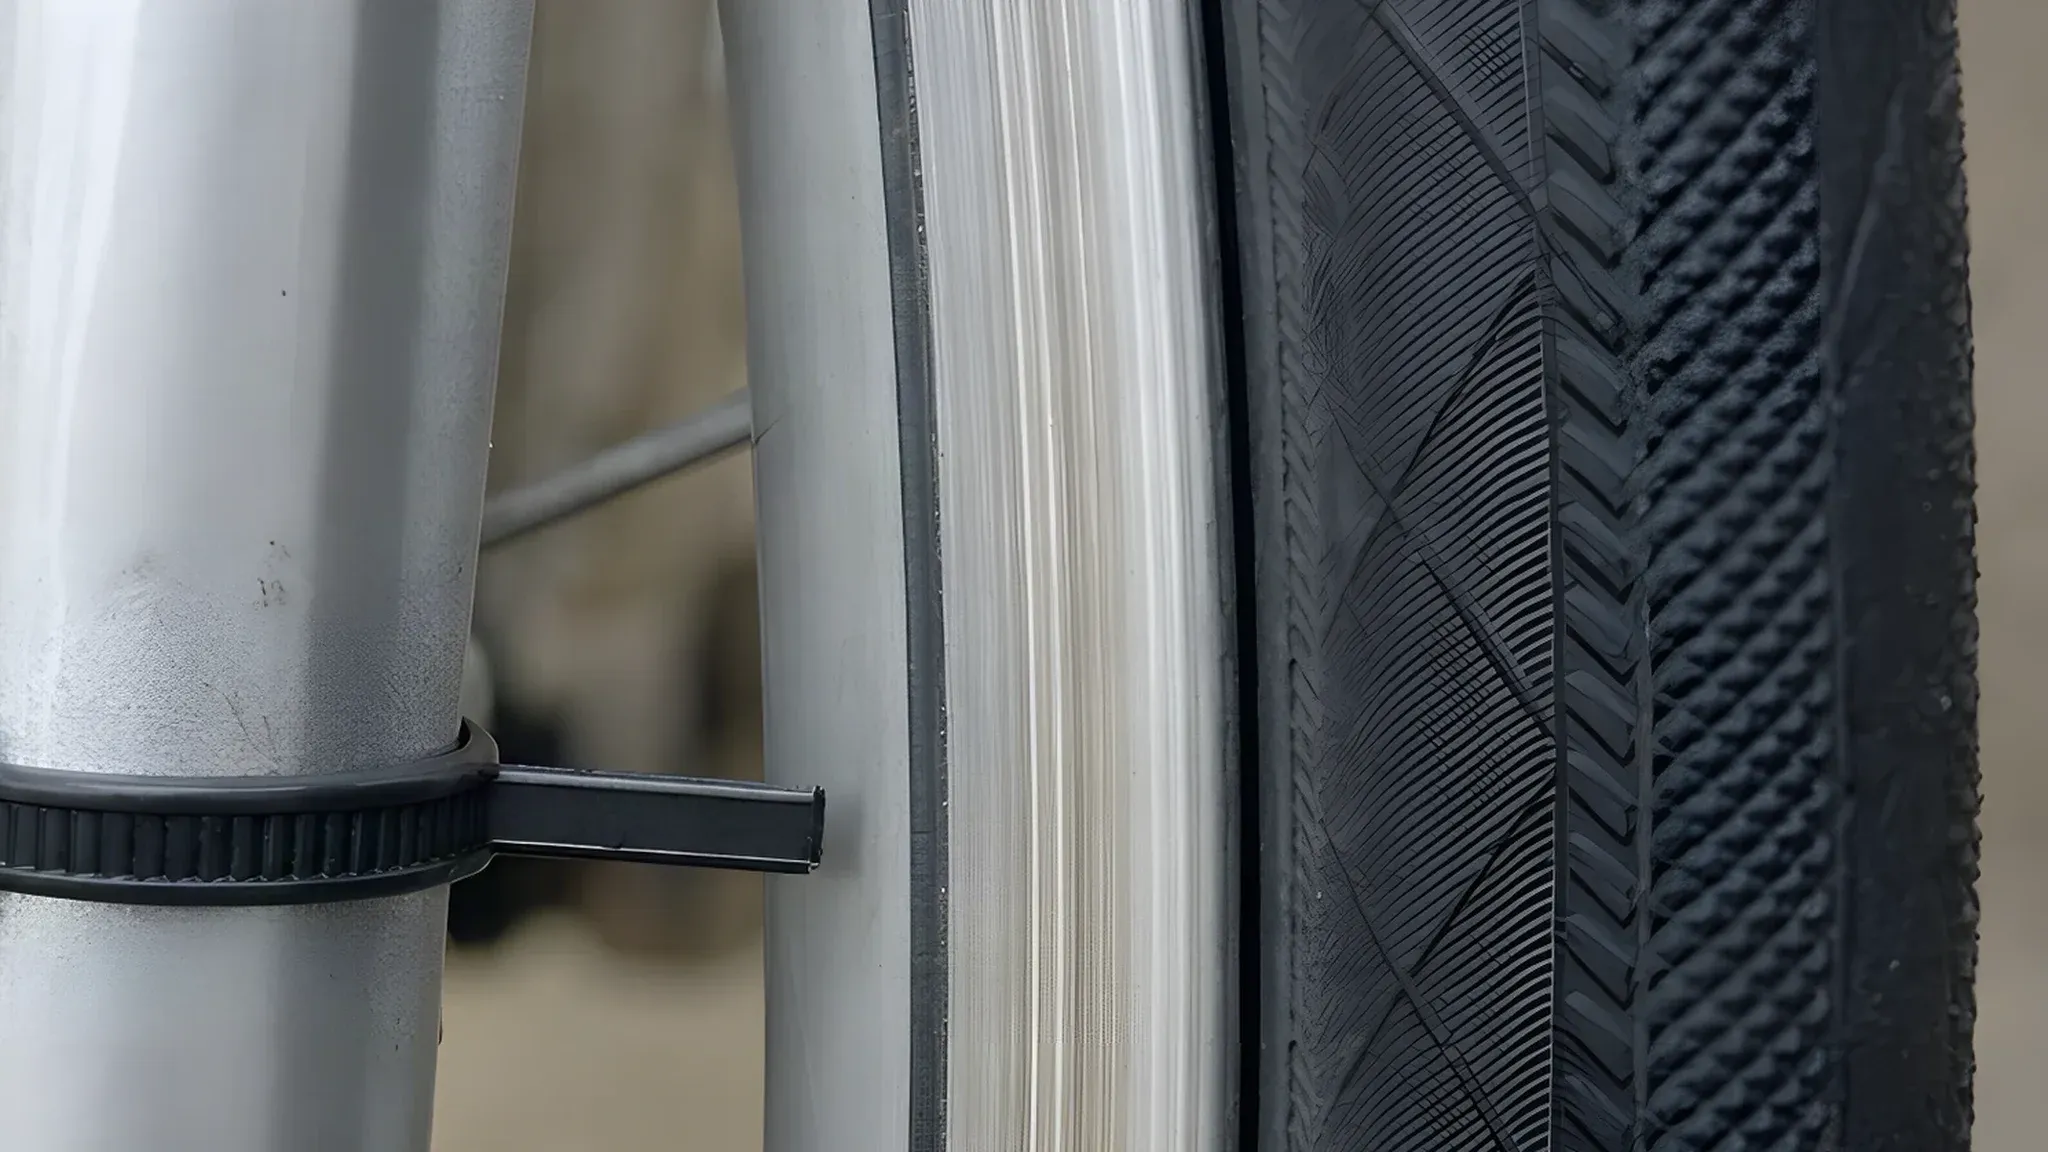
Turn the bike upside down on its saddle and handlebar, or put it in a workstand, and check the wheel is fully seated with the axle closed. Fit a zip tie around each fork blade, or each seat stay for a rear wheel, beside the rim. Trim the tails so each one stops just short of the rim's side wall.
2. Find the biggest wobble
Spin the wheel slowly and move one zip tie closer until it just touches the rim. Stop the wheel where the rim touches: that is the largest deviation on that side. Rock the wheel to see where the rub starts and ends, and mark the spoke at its centre with masking tape.
3. Choose which spokes to adjust
Each spoke pulls the rim towards its own side of the hub. If the rim touches the left gauge, tighten the nearest spoke that runs to the right flange. Park Tool prefers tightening to loosening, because a spoke run too loose can loosen further but will not tighten itself.
Squeeze the spoke first and watch the gap, which previews the adjustment. If the right-side spokes there are already tighter than their neighbours, loosen the nearest left-side spoke instead.
4. Turn the nipple the right way
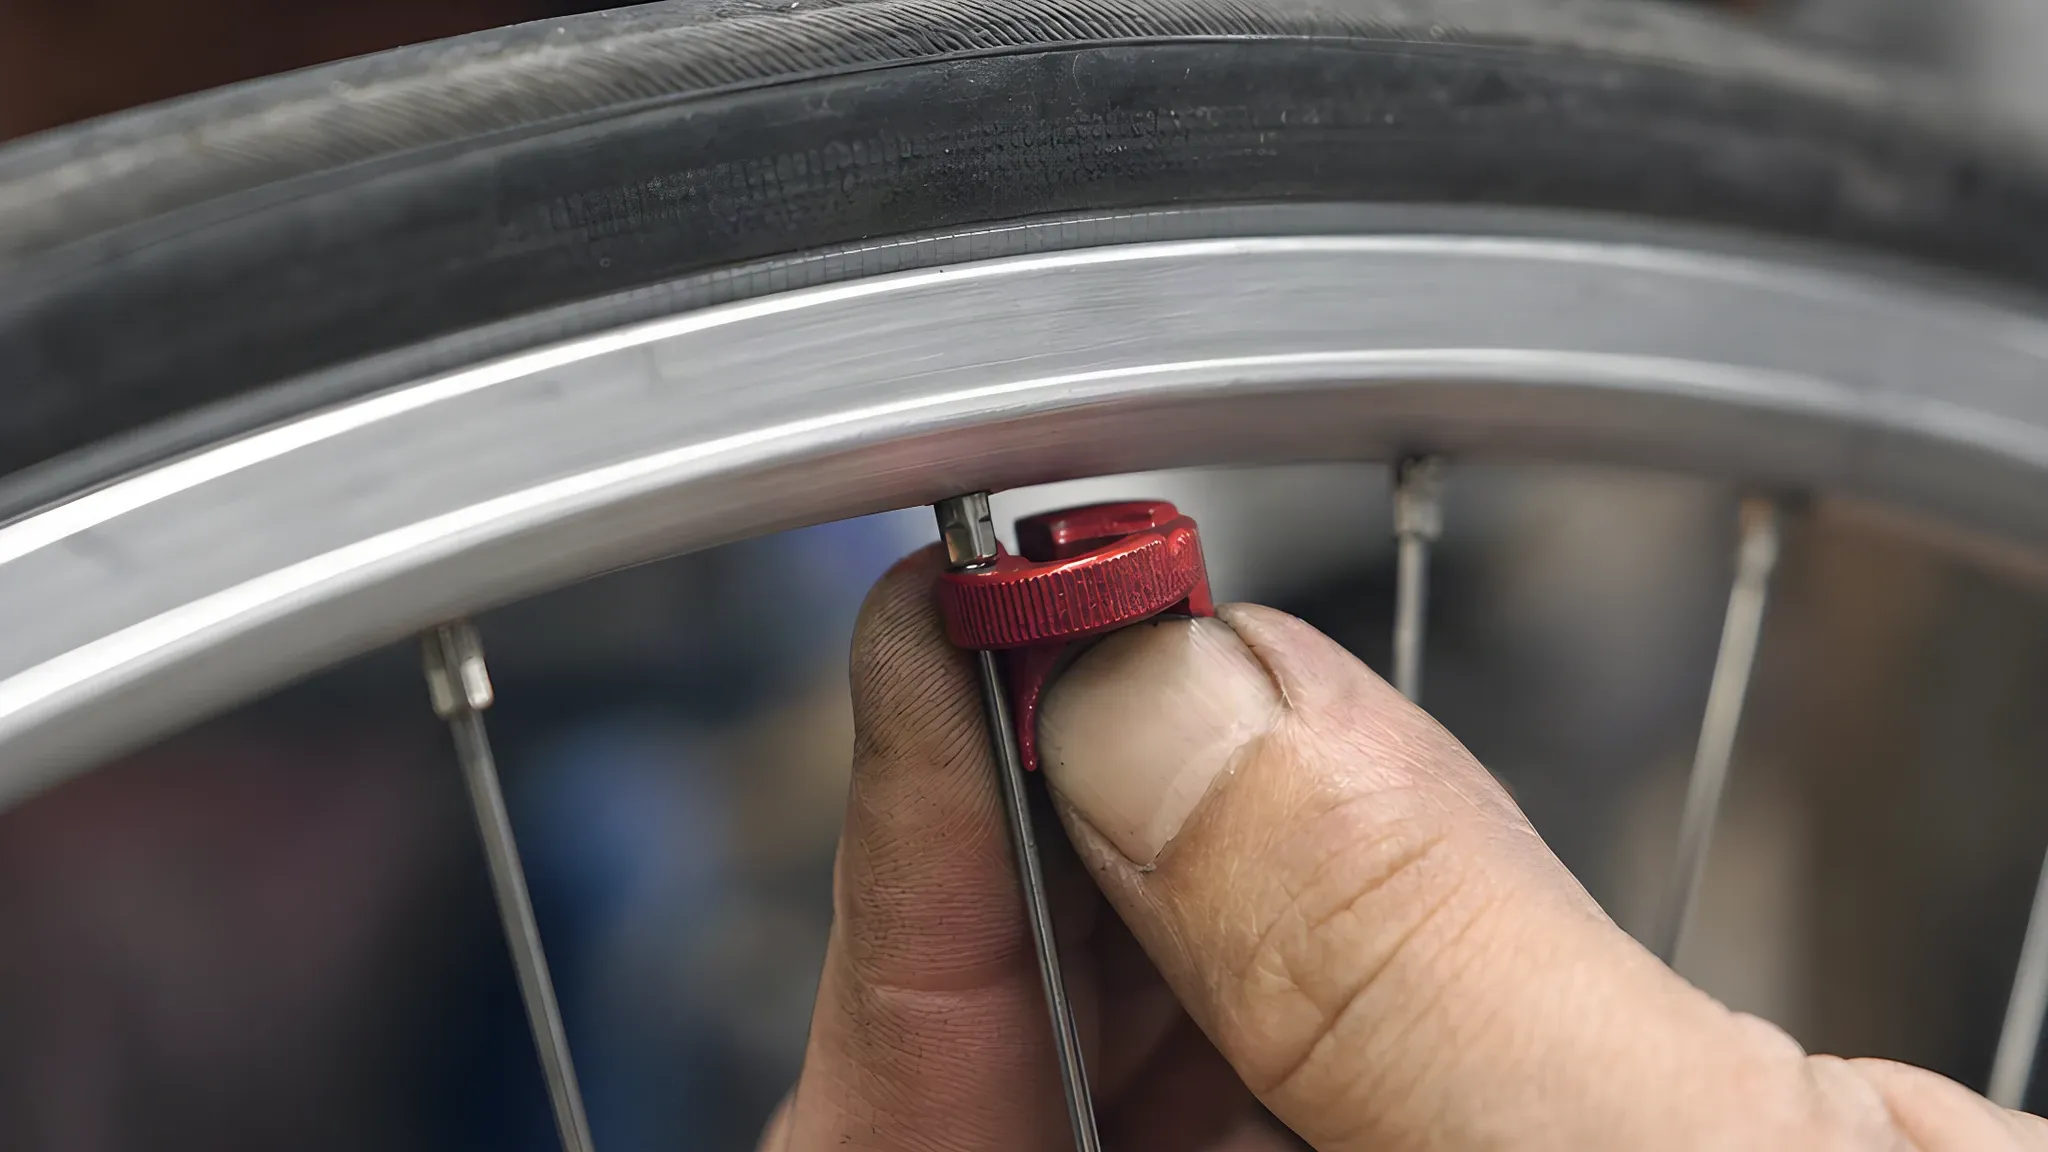
Park Tool's rule is that, looking at the nipple from the tyre side of the rim, clockwise tightens and anticlockwise loosens. With the spoke key on the nipple, you see it from the hub side instead, so a tightening turn looks anticlockwise. BikeRadar's spoke guide gives the same rule, seen from the inside of the rim.
The thread has not changed; you are looking at it from the other end of the spoke. Push the key fully onto the flats, as BikeRadar advises, so it does not strip the corners. After the first small turn, spin the wheel and check that the gap at the gauge has opened.
5. Make a quarter turn, then spin and check
Park Tool gives a quarter turn as a good general guideline, with an eighth for a minor deviation and up to a half for a large one. BikeRadar's guide works in quarter or eighth turns. For a wobble spanning several spokes, Park Tool's stand instructions give each opposite-side nipple within it a quarter turn.
Park Tool's guide corrects the three largest deviations on one side, then moves to the other gauge, making smaller corrections as the wheel improves. Stop and have the wheel checked if:
- A nipple will not turn, or the key slips. A stiff nipple may be corroded or at the end of its thread.
- The rim will not come across although the pulling-side spokes are tight and the others loose. Park Tool says that pattern means the rim itself is bent.
- The wobble grows or moves around, or you find a slack or broken spoke.
6. Stress-relieve the spokes
Turning a nipple also twists the spoke slightly. Park Tool's stand instructions relieve this wind-up by squeezing parallel pairs of spokes firmly all the way round the wheel, then re-truing until the wheel stays true after stressing. Expect a few pings. Do not stand on the wheel or bend the rim by hand.
7. Refit, check the brakes and test
Refit the wheel fully in the dropouts. Park Tool's installation guide sets a quick release so the lever starts to meet resistance at 90° to the frame or fork, then closes fully; a thru axle is screwed in until tight.
Check the tyre's bead line, close a rim brake's quick release and squeeze both levers hard. If the bike was upside down and has hydraulic disc brakes, pump each lever until it feels firm before riding.
A wheel that spins freely has not yet been tested under load. Ride slowly on a quiet street, braking gently, then check the wheel against the gauges again. Park Tool's truing guide calls a ride the safest way to settle the spokes, with a little pinging in the first pedal strokes.
A wobble that returns within a few rides points to uneven tension or a damaged rim, and the wheel needs a mechanic.
Check radial true, dish and spoke tension
These three checks decide whether a trued wheel is right, and each needs more tools than lateral truing. Treat this section as a way to judge the wheel rather than a full procedure.
Radial true: hops and flat spots
A section of rim that moves away from the hub is a high spot, and one that moves towards it a low spot. BikeRadar says the tyre must come off to judge either accurately.
Spokes pull the rim towards the hub as well as sideways, so radial corrections use pairs of spokes from both flanges. Pairs are tightened at a high spot and loosened at a low spot, with a check of lateral true every few corrections.
A short, sharp hop at the point where the wheel hit a kerb or pothole points to a flat spot, which Park Tool's stand instructions list among the damage to inspect for. Spoke tension will not round it out, and the rim needs assessing.
Dish: is the rim centred?
Dish is the rim's position between the hub's locknut faces. A rear wheel's drive-side flange is set inward for the sprockets, so a correctly dished rear wheel has different spoke angles on each side. BikeRadar calls sighting the rim in the frame inaccurate, and a dishing gauge compares both sides instead.
Park Tool treats a gap of about 1 mm at the gauge as adequately centred. Tightening one side pulls the rim towards that side, and its dish procedure turns every spoke on that side, which raises tension across the wheel. That makes dish a job for a tensiometer and the rim maker's figures.
Spoke tension: even and within range
Spoke tension is quoted in kilograms-force or newtons, and Park Tool says to start from the rim maker's range. DT Swiss's Spline manual, for example, sets a maximum of 1,200 N on the tighter side of a disc-brake front wheel and 1,300 N on a disc-brake rear wheel. Another rim's figure will differ.
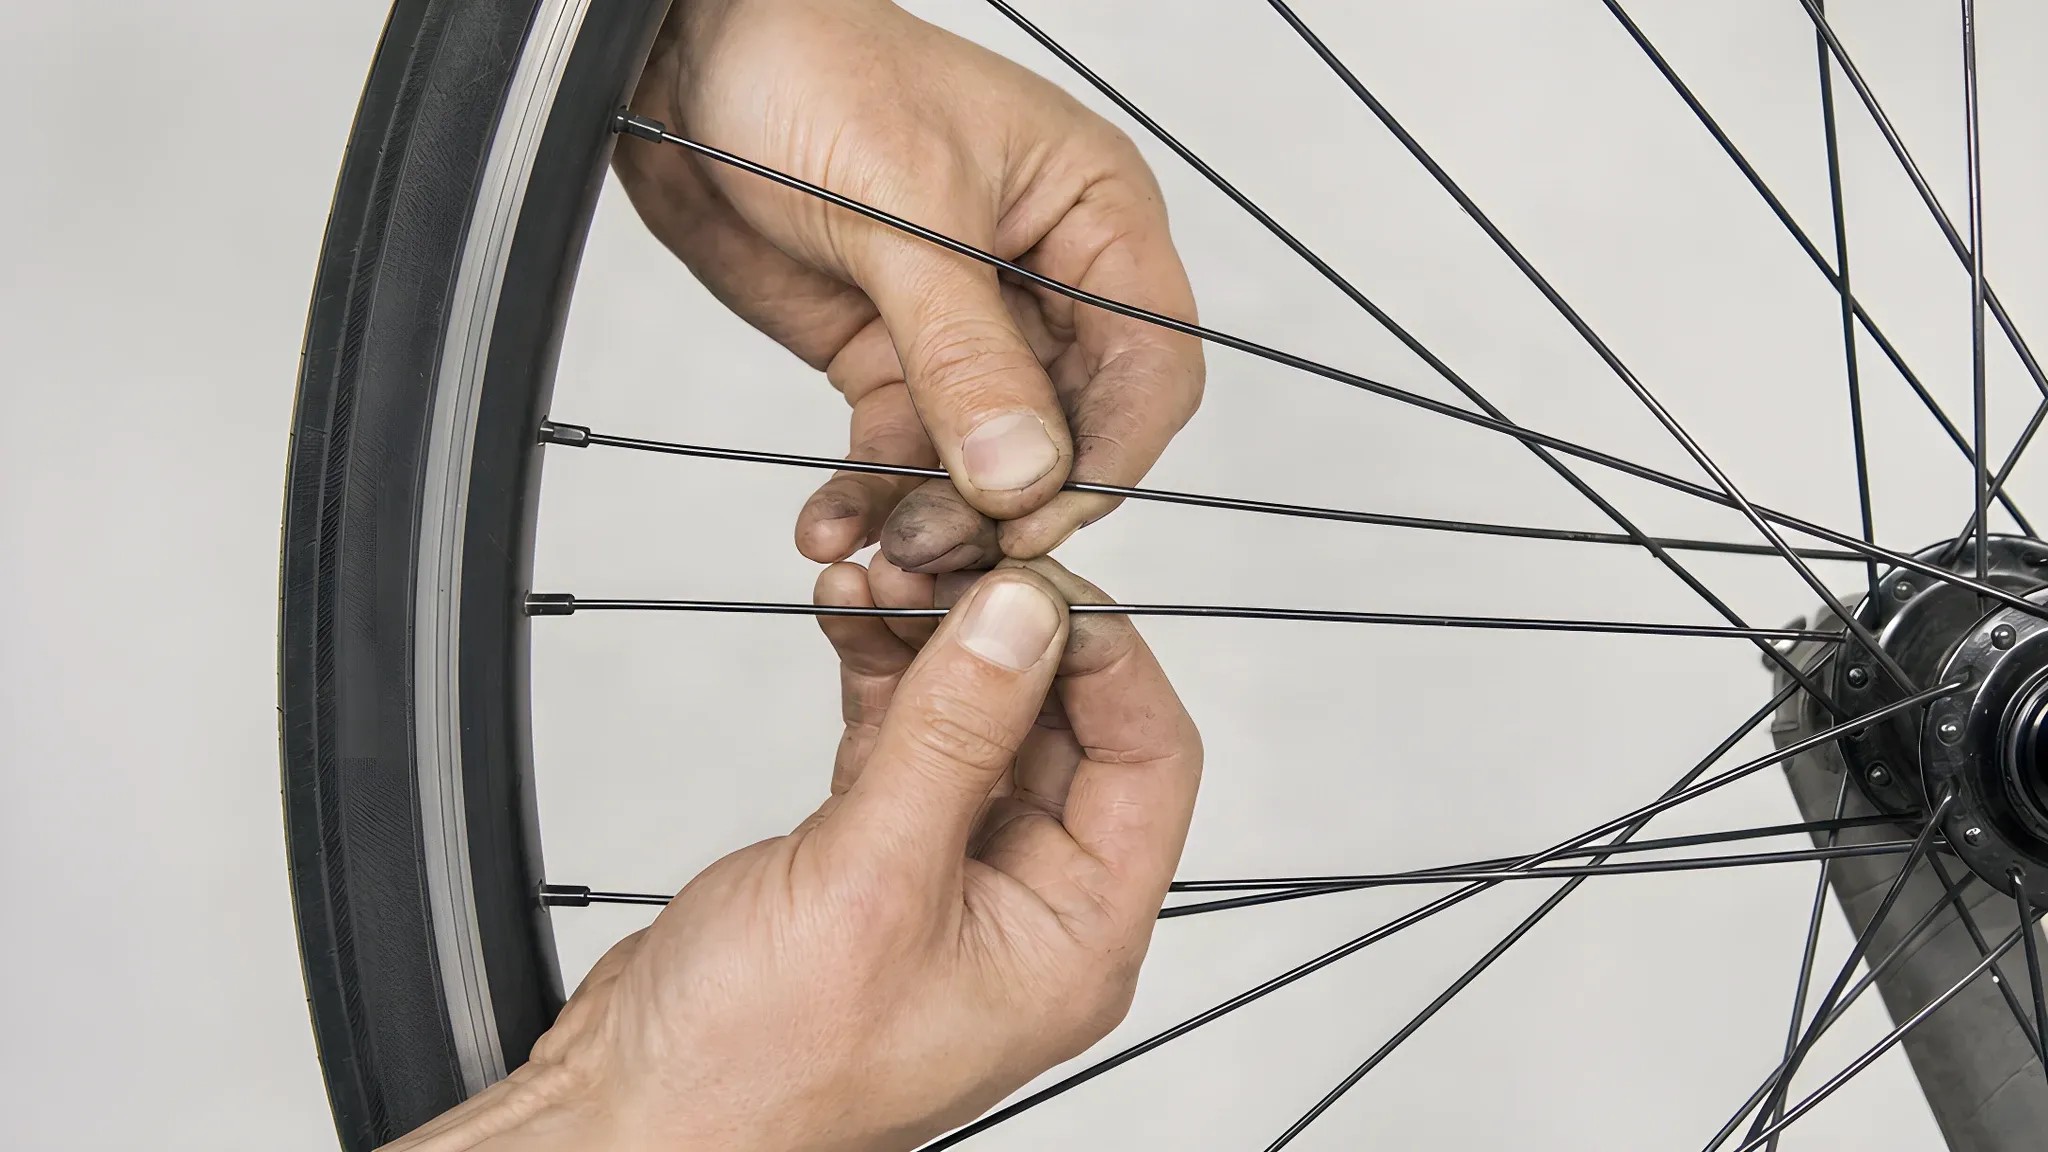
A tensiometer and its conversion chart give the reading. Park Tool accepts spokes within plus or minus 20% of their side's average, and notes that the two sides of a rear or disc-brake front wheel legitimately differ. Squeezing or plucking spokes is only a comparison, which Park Tool and BikeRadar both describe as imprecise.
The same tension guide links low tension to broken spokes and a wheel that goes out of true more readily, and high tension to cracked rims and damaged hubs.
Can you ride with a broken spoke or a buckled wheel?
Treat a broken spoke as a reason to stop and arrange a repair. DT Swiss's user manual says a damaged wheel must not be used, and a missing spoke leaves that part of the rim without support.
BikeRadar's spoke guide says a snapped spoke is unlikely to come free of the wheel. Twist it around a neighbouring spoke or tape it, so it cannot catch the frame, the brake or the derailleur while you wheel the bike.
A buckled wheel that rubs the frame or the brake should not be ridden either. Opening a rim brake's quick release to stop the rub moves the pads away from the rim, so that brake loses power while the buckle stays. A mechanic can come to you at the roadside.
What makes a wheel go out of true?
A wheel goes out of true through impacts and through low or uneven spoke tension. Potholes, rough riding, kerbs, rocks and a fall onto the side of the rim all do it.
The slower cause is tension. The spokes at the bottom of the wheel slacken and regain tension on every turn, and spokes that start too loose relax further. Corroded nipples can make a wheel impossible to true, so oil the nipple threads routinely.
A tyre run too soft can bottom out on a kerb, and our tyre pressure guide sets pressure by rider weight and tyre width. If a pothole caused the damage, GOV.UK's pothole service finds the local council for the road's postcode. TfL manages London's red routes, so a pothole on one of those is TfL's rather than the borough's.
Common mistakes when truing a wheel
- Truing a tyre, hub or axle fault. Check the bead line, hub play and wheel seating before touching a spoke.
- Big turns, or tightening every spoke. BikeRadar warns that an overtightened spoke is likely to break or damage the rim. Work in quarter turns on the spokes at the deviation.
- Chasing a dent with spoke tension. Park Tool's stand instructions warn that a wheel pulled straight around a damaged rim, with one side much tighter than the other, is weak and possibly dangerous.
- Leaving oil on the rim or the brake open. Excess lubricant on the rim can affect braking. Wipe the rim, close the brake and test both levers.
When it is a job for a mechanic
- A broken spoke, or spokes that keep loosening. The spoke is replaced and the wheel re-tensioned. Park Tool says a wheel that keeps breaking spokes should be rebuilt or replaced.
- A dent, flat spot, crack or worn braking track. The rim may need replacing, either laced to the old hub or as a new wheel.
- A buckle that returns or will not come out. The tension is uneven or the rim is bent, and both need a tensiometer and the maker's figures.
- Seized nipples, hub play, carbon rims or internal nipples. Each needs tools or checks beyond a spoke key.
- Hub-motor e-bike and cargo bike wheels. Larger nipples, motor cables and heavy loads complicate the job; see e-bike repair and cargo bike repair.
Tyred mechanics sort buckled rims and loose spokes on the spot, and wheel truing is part of the Essential and Premium service packages on the pricing page. A bent or cracked rim cannot always be trued, and the fix may be a new rim or wheel.
A mechanic comes to you with a fully stocked workshop, 9am to midnight, seven days a week, across London.
Book a repair · About mobile bike repair →
Related guides
- How to adjust bike brakes (rim and disc)
- How to fix a bike puncture
- Bike tyre pressure: the right psi for your weight, tyre and bike
Sources and further reading
- Park Tool: wheel truing (lateral and radial), the four aspects of truing, truing in the bike with zip ties, nipple direction from the rim and from the hub side, tyre removal, oiling nipples, corroded nipples, bladed spokes, internal nipples, quarter, eighth and half turns, three corrections per side, high and low spots, radial pairs, de-stressing by riding, and the bent rim test.
- Park Tool: how wheel truing works, spokes as fasteners with the nipple as the nut, the four aspects of truing, and lateral true as the most critical aspect on rim-brake bikes.
- Park Tool: spoke key selection, brass and aluminium nipples, rounding from a key too large, the square nipple sizes, hub-drive e-bike nipples, star and hex nipples and internal nipples.
- Park Tool: wheel dishing, locknut faces, front and rear flange spacing, the dishing gauge, the 1 mm gap and 0.5 mm offset, one side pulling the rim towards it, and quarter-turn dish corrections raising overall tension.
- Park Tool: spoke tension measurement and adjustment, kgf and newtons, the rim maker's range with no tyre pressure, squeezing as an estimate, stiff nipples, the plus or minus 20% guideline, different tension on each side, and the effects of low and high tension.
- Park Tool: TS-2 wheel truing stand instructions, the pre-truing inspection for cracks, bulges, dents and flat spots, tightening and loosening across the wobble, the damaged rim warning and prestressing by squeezing parallel pairs.
- Park Tool: hub overhaul and adjustment, the side-to-side test for bearing play; Park Tool: wheel removal and installation, the 90° quick-release lever, centring the wheel and the warning about an insecure wheel; Park Tool: tyre and tube removal and installation, the moulding line above the bead.
- Park Tool: disc brake rotor truing, the causes of rotor rub and truing a rotor separately from the wheel.
- DT Swiss: wheels user manual (V2026.07), damaged wheels must not be used, the hand check for loose spokes and the rim brake track inspection.
- DT Swiss: Spline wheels technical manual, holding round and flat spokes, new tubeless tape after nipple work from the tyre side, the runout and tension check intervals and the spoke tension table.
- BikeRadar: how to true a bicycle wheel (Oscar Huckle, October 2023), potholes and rough riding as causes, hub play amplified on a truing stand, a tyre rubbing the stays in extreme cases, pushing the key fully on, quarter or eighth turns, overtightening, tyre off for radial truing, the frame as an inaccurate dish check and tension figures with the tyre removed.
- BikeRadar: how to replace a spoke (November 2014), securing a snapped spoke and the nipple tightening anticlockwise seen from inside the rim.
- Cycling UK: guide to simple cycle safety and service checks (Victoria Hazael), spinning the wheel, rocking it for bearing play, the worn rim-brake track and the fist test for a secure wheel.
- ENVE: general care and maintenance, inspecting carbon rims after a crash or memorable impact, not riding a cracked rim, and checking trueness and tension at tyre changes.
- GOV.UK: report a pothole, finding the local council for a road from its postcode.
- TfL: red routes, TfL manages the red route network rather than the boroughs.