Why is my tubeless tyre losing pressure? Finding and fixing the leak
How to tell normal tubeless pressure loss from a leak, find it with soapy water, and read what bubbles at the valve, tape, bead, sidewall or tread mean.

Written by Conor DonoghueCargo bike mechanic
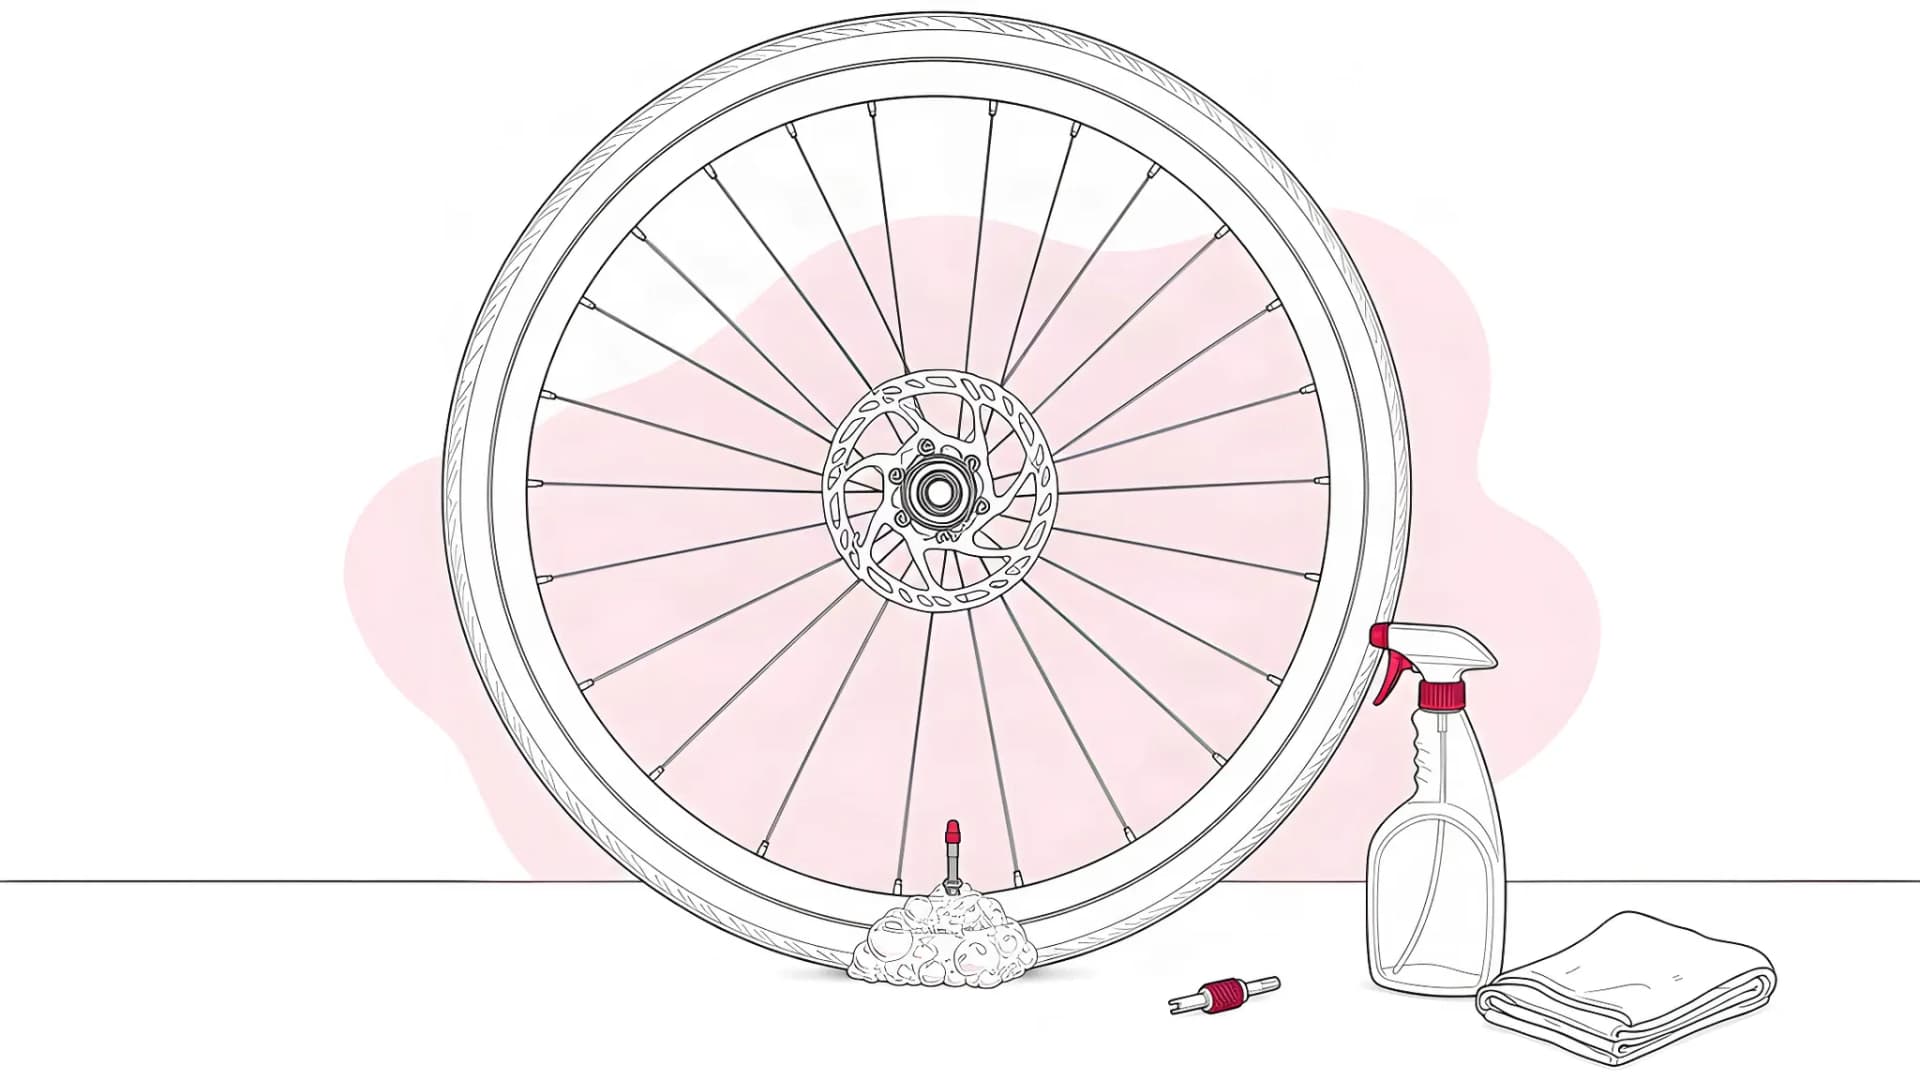
Short answer: a tubeless tyre losing pressure is leaking at one of six places: the valve core, the valve base, the rim tape under the spoke holes, the bead, the sidewall or an old puncture. A small drop overnight can be normal; Silca puts it at up to 10 per cent of the tyre's air. Soapy water finds the rest: pump the tyre up, wet it and watch where bubbles keep forming. Air leaving at the valve can come from tape that has failed somewhere else.
Do tubeless tyres lose pressure overnight, and how much is normal?
Yes, some loss is built in. Continental's tubeless-ready page says the air loss of a tubeless system may be higher than with an inner tube, and recommends checking the pressure before every ride. The makers who publish a figure for a normal overnight drop do not agree with each other:
- Silca: a few psi overnight, up to 10 per cent of the tyre's total air, may be normal depending on the temperature and the age and type of tyre.
- Zipp: losing 10 to 20 per cent of pressure overnight is generally nothing to worry about. Losing half or more within 24 to 48 hours points to a problem.
- Hunt: a new tubeless tyre that has lost more than 10 psi overnight should be pumped up and ridden again, which Hunt says often seals it.
There is no single acceptable number, so use the figure from the maker of your wheels or tyres. Judge the loss as a share of the starting pressure: a 5 psi drop is a fifth of a 25 psi mountain bike tyre and a sixteenth of an 80 psi road tyre.
A new tyre is a special case. Hunt says new tubeless tyres lose pressure through small imperfections in the casing, and that it can take a couple of rides for the sealant to be forced into those pores.
Before you call a drop a leak, rule out three things that lower the reading without any air escaping:
- Temperature. Continental's tyre FAQ says the volume of air in a tyre is directly related to the surrounding air temperature. A tyre pumped in a warm room and left in a cold hallway reads lower in the morning.
- The gauge. Use the same pump or gauge each time, read it with the valve at the 12 o'clock position as Continental suggests, and take the reading without pumping.
- CO2. Zipp's troubleshooting page says CO2 passes through rubber about five times faster than oxygen. A tyre inflated from a cartridge drops faster until it is refilled from a pump.
A change in behaviour is the real signal. A tyre that held pressure for months and now needs air every morning has a cause. Start with what changed just before: new tape or valves, a sealant top-up, a kerb strike or a puncture that sealed itself.
How to find a tubeless air leak with soapy water
Pump the tyre to riding pressure, wet the whole wheel with soapy water and watch for bubbles that keep forming. Schwalbe's tubeless FAQ gives two versions of the test: hold the wheel completely under water, or coat it with assembly fluid. Stan's and Zipp use soap and water.
Bubbles mark where air leaves the wheel, which is not always where it gets in. You need a track pump with a gauge, a spray bottle of water with a squirt of washing-up liquid, chalk and a valve core tool. Keep the soapy water off disc rotors and pads.
1. Look before you pump
Spin the wheel slowly. Look at the tread for cuts and embedded glass, at the sidewalls for bulges, wet sealant or white dots, and at the bead on both sides for a section sitting lower than the rest. Stan's adds one check at the valve: the tyre beads should sit either side of the valve hole, not cover it.
Stop here if the tyre or rim is damaged or a length of bead has come off its seat: that wheel needs a mechanic or a new tyre. If the set-up is new, our guide to bike tyre sizes and rim fit covers the markings that show whether tyre and rim are approved for each other.
2. Pump to riding pressure and note the reading
Inflate to your normal pressure, inside the lower of the tyre's and the rim's limits; our bike tyre pressure guide explains how to find both. Note the pressure and the time. Do not keep adding air to force a seal: BikeRadar's Q&A allows a little above riding pressure to seat a bead, never above the maker's limit.
3. Spray and watch, in a fixed order
Work round the wheel in the same order each time:
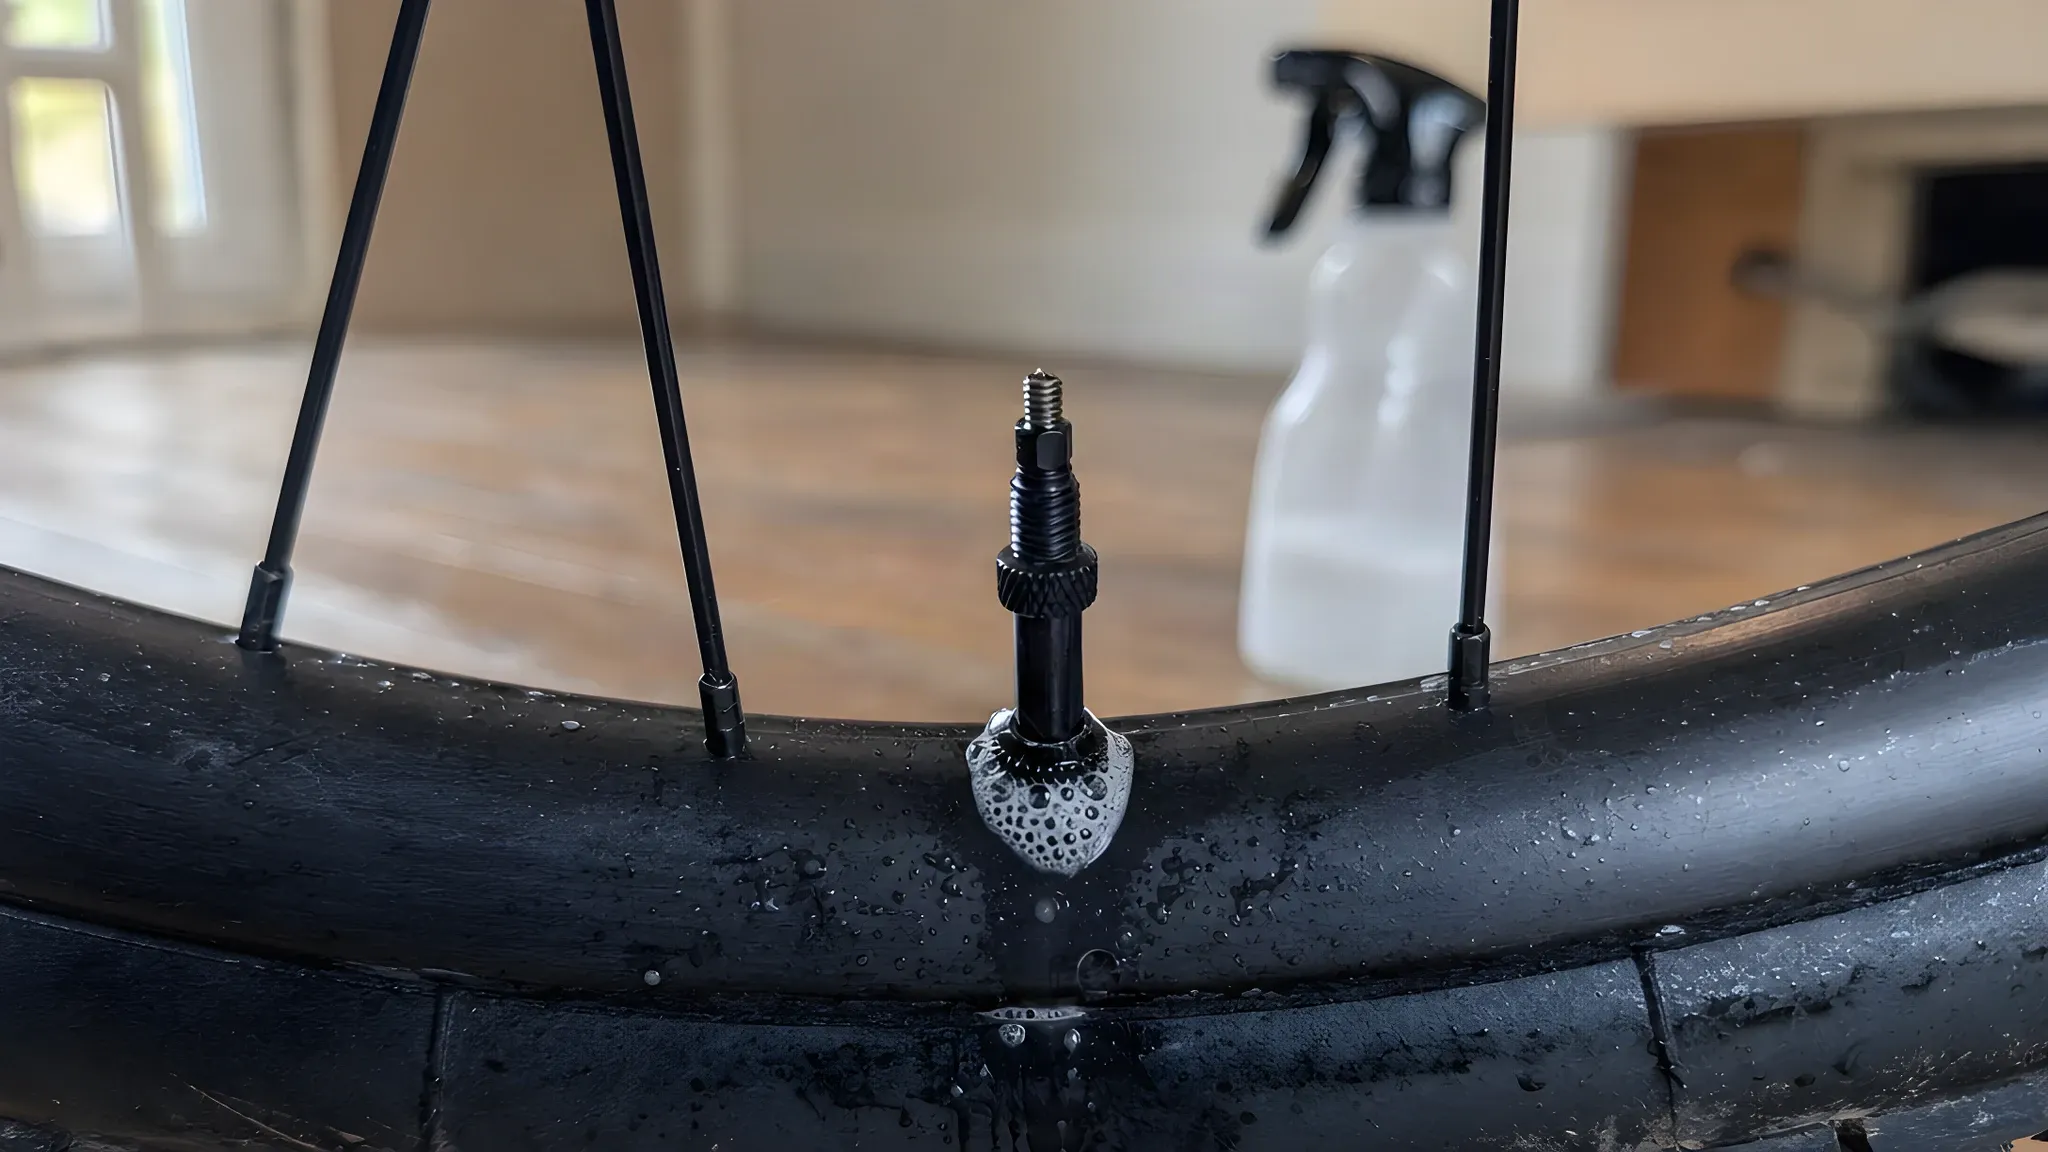
- The valve core. Silca's test is to spray or drip the solution onto the core and watch closely. Steady bubbling at the tip means the core.
- The valve base and lock nut. Bubbles where the rubber base meets the rim.
- Each spoke nipple and the rim joint, which sits opposite the valve on an aluminium rim.
- The bead line on both sides. Hold the wheel so the bead is horizontal and bubbles can collect.
- The sidewalls, then the tread. Look for a single point against a diffuse fizz.
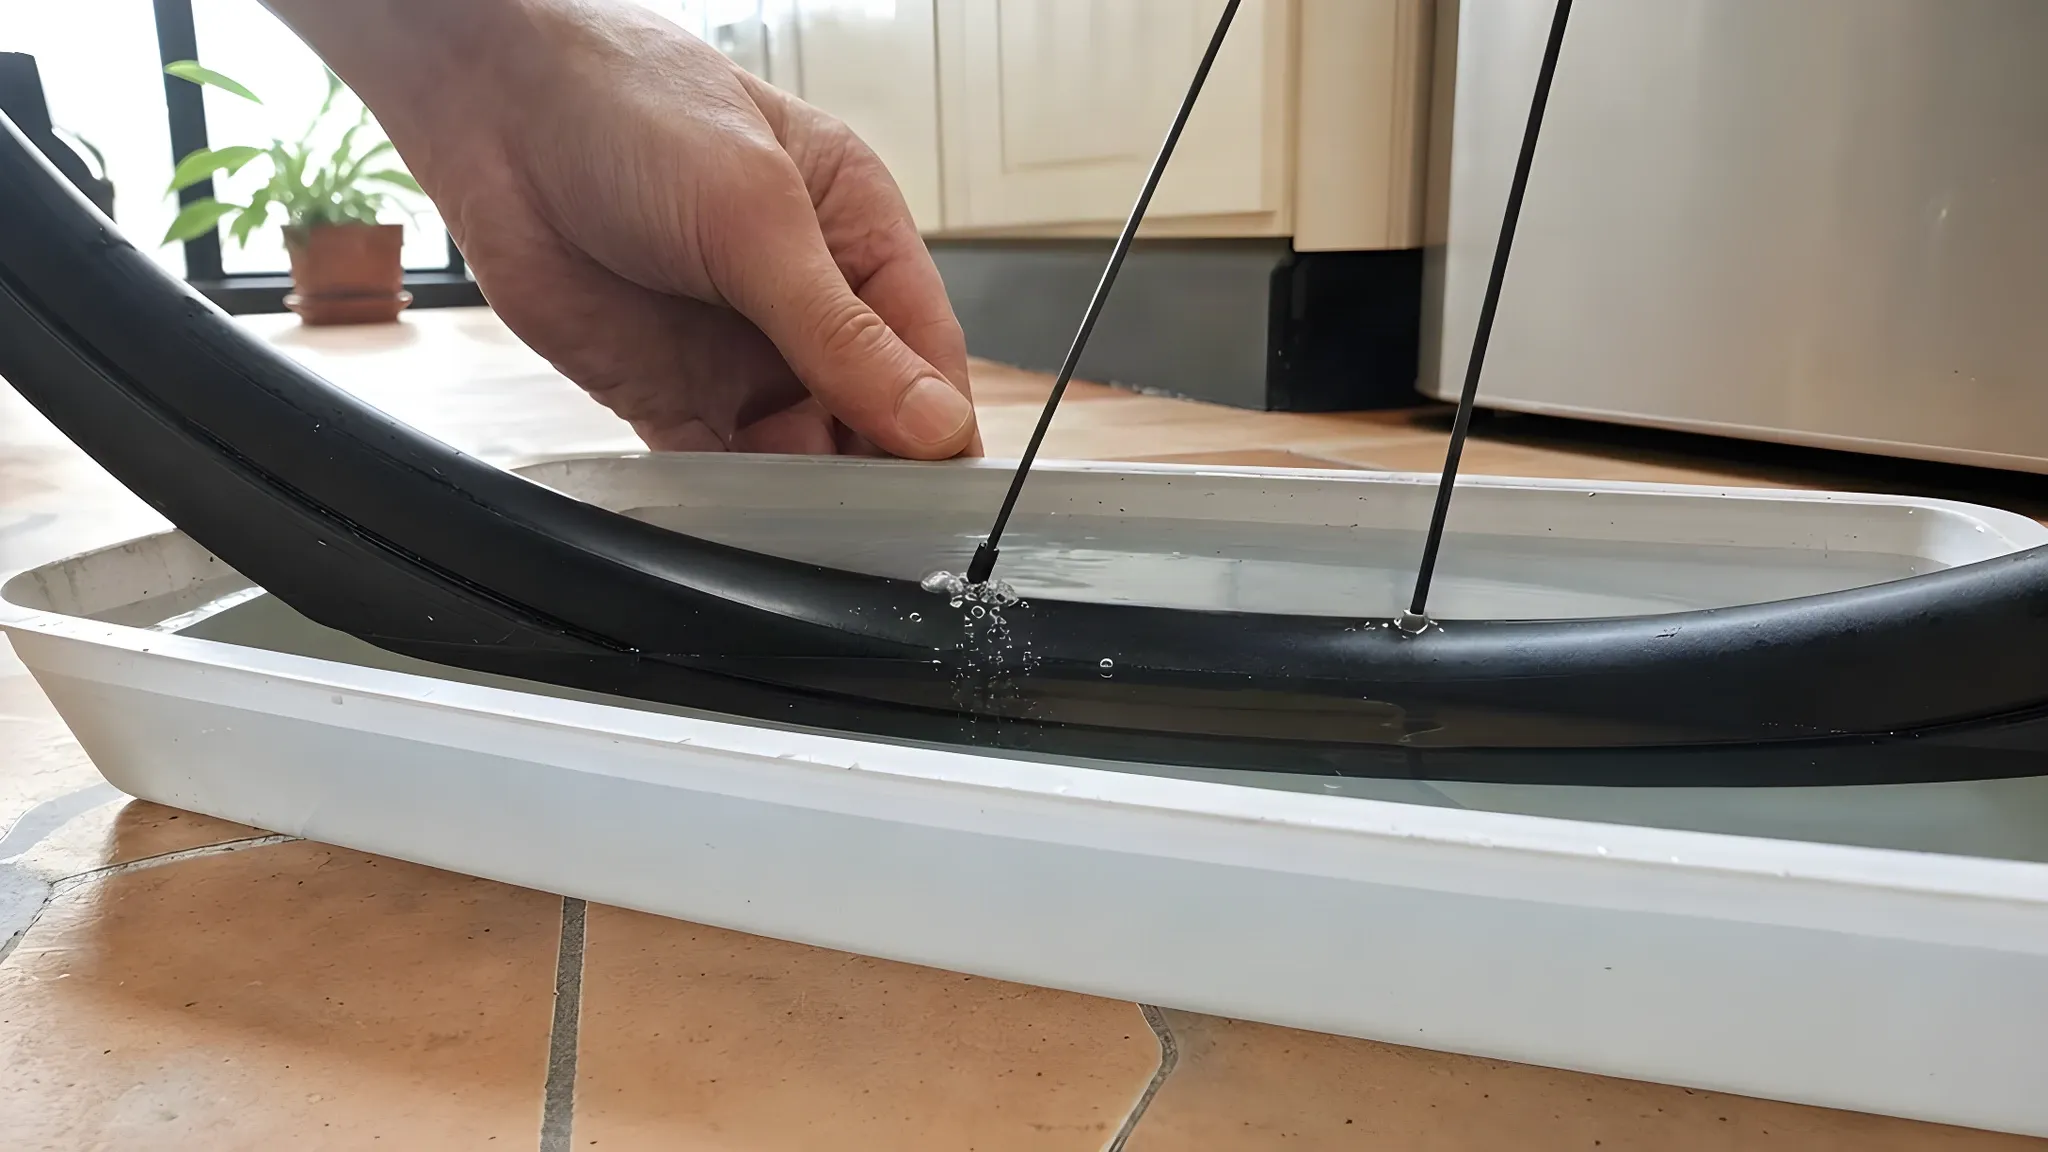
A bubble that grows, bursts and grows again is a leak; a film of froth that stays still is soap. Mark each live spot with chalk. A shallow tray of water shows a spoke-hole leak clearly, and only the rim, tyre and valve need to go under, never the hub.
4. Let the air out before you touch anything
Deflate the tyre fully before you remove a core, loosen the lock nut or unseat a bead. Park Tool's tubeless guide says to deflate with the valve away from the bottom of the wheel, so sealant does not come out through it. If the valve is blocked and the tyre will not deflate, leave it to a mechanic.
What each leak location means and how to fix it
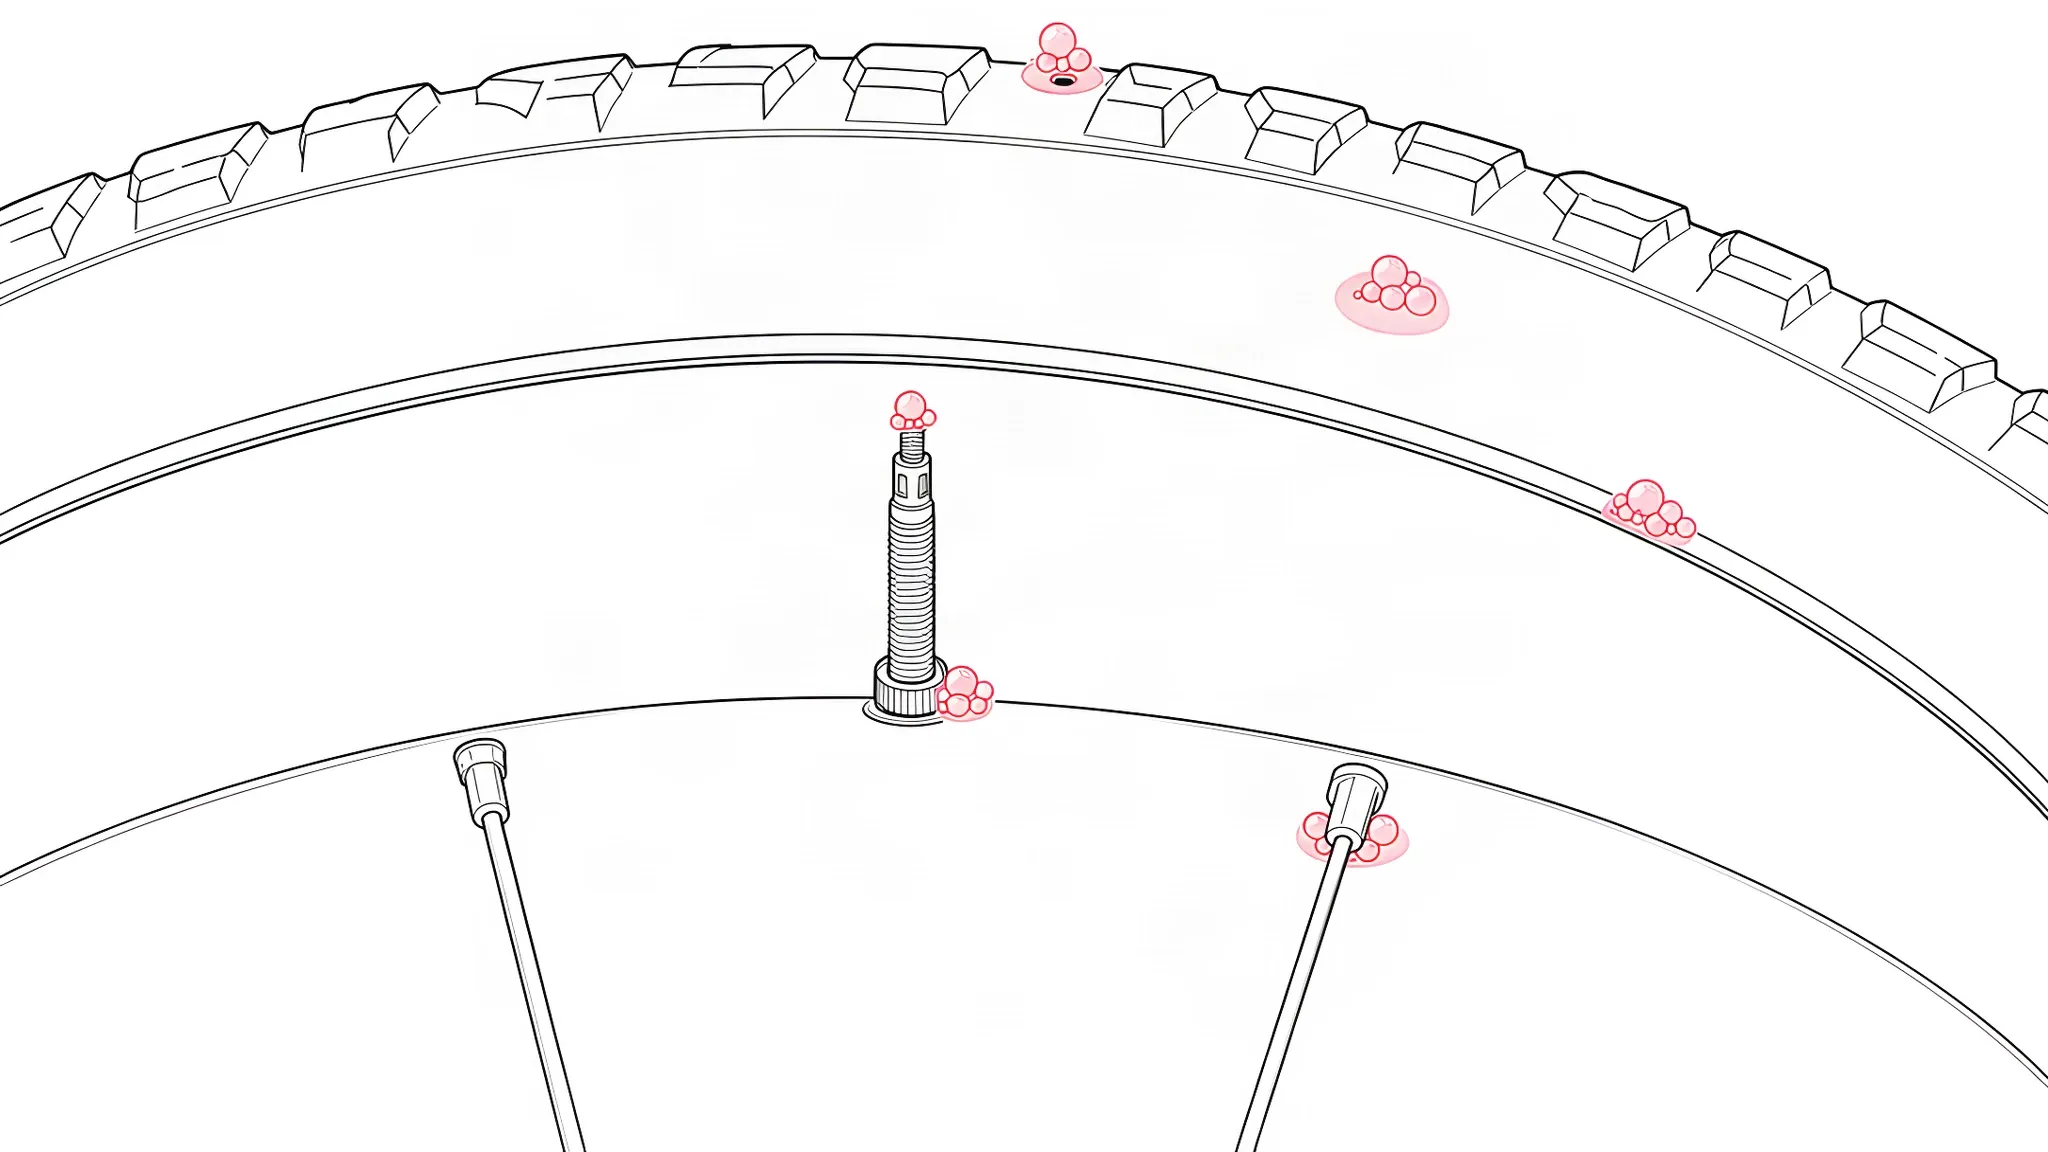
The spot where bubbles form narrows the fault to one or two causes. It does not prove the cause, because the rim is hollow. Stan's and DT Swiss both warn that air entering the rim cavity through a tape fault can leave at the valve hole or along the rim seam. Do the cheapest, reversible check first at each location.
Bubbles through the tip of the valve: the core
- What it means. Silca reads steady bubbling around the valve core as a faulty or clogged core, and Zipp says sealant can clog a removable core.
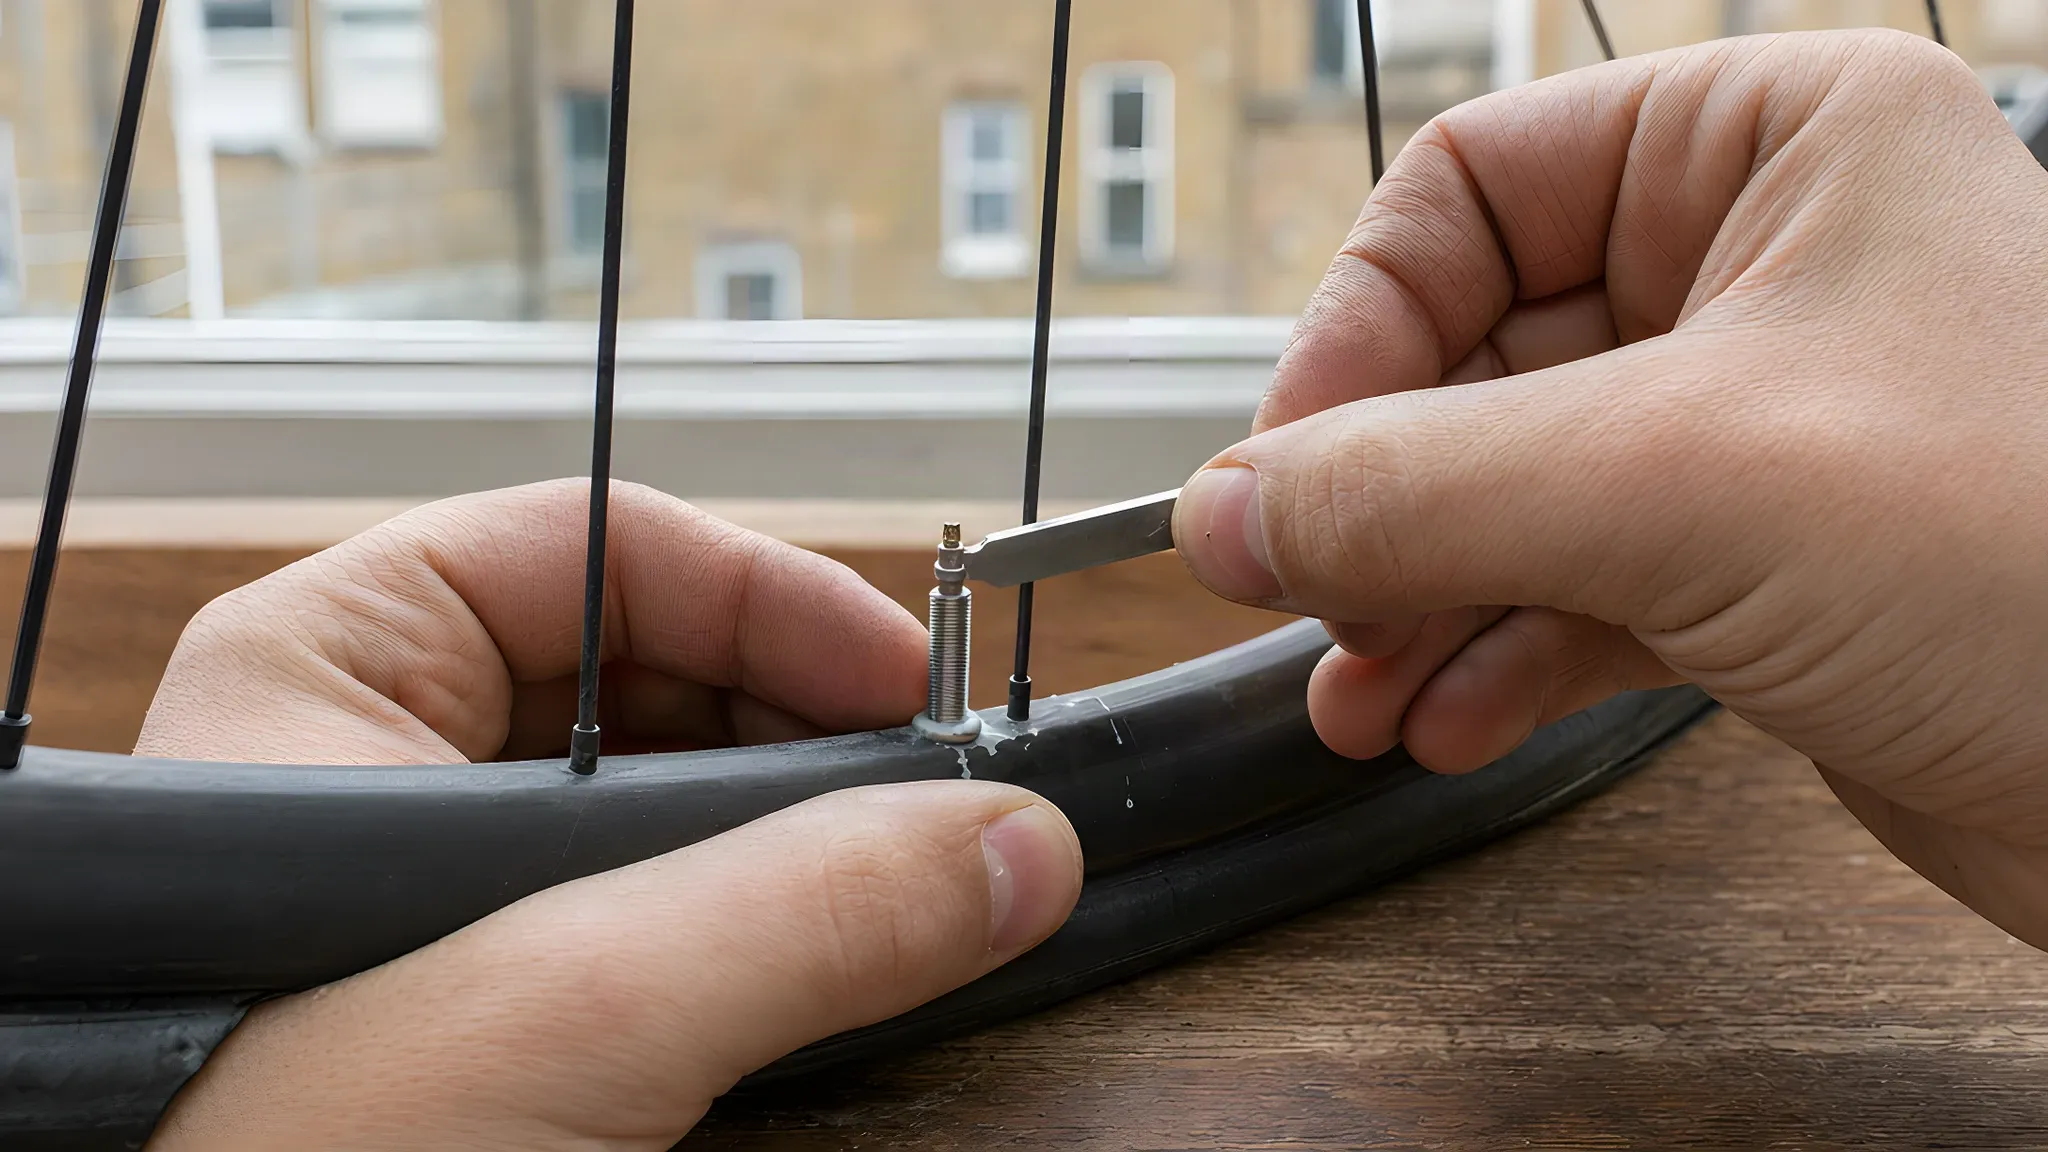
- Fix. Deflate, unscrew the core anticlockwise with a core tool, wipe off the dried sealant and refit it snug. Tightening the external lock nut does nothing for a leaking core. A clean, snug core that still bubbles gets replaced.
Bubbles where the valve meets the rim: the valve base
- What it means. Silca reads bubbles at the valve base as a poor seal between valve and rim. The seal is the rubber base pressed onto the tape by the lock nut, so the tape around the valve hole is part of it.
- Check first. Zipp says the lock nut should be finger-tight and not freely spinning, and that screw-on pump heads loosen it over time. Peaty's instructions are to hand-tighten it until firm. No pliers: MBR says overtightening damages the tape and compresses the rubber seal too much.
- Then the tape. Stan's says the tape should not be split beyond the valve hole, and that air at the valve can be travelling through the rim cavity from a fault elsewhere.
- Fix, in Schwalbe's order. Tighten the valve nut, clean and deburr the valve and rim contact area, replace the valve, replace the rim tape. A new valve is third on that list.
Bubbles at the spoke nipples or the rim joint: the tape
- What it means. Air is under the tape. DT Swiss says that when the valve or tape is not attached correctly, air or sealant gets into the rim cavity and leaks out around the seam. Zipp looks for sealant residue at the nipples and tape with tears or lifted edges.
- Fix. New tape, laid flat over the whole rim bed with every spoke hole covered, which is Schwalbe's rule. Re-taping and refitting the valve are in our guide to setting up tubeless tyres. Do not seal nipples or the seam from outside: that traps air inside the rim and hides the fault.
- When to stop. A crack in the rim, a damaged joint or a leak that continues after a correct re-tape needs a mechanic.
Bubbles along the bead: the tyre-to-rim seal
- What it means. The bead is not sealing all the way round. Hunt reads air at the side of the tyre, sealant leaking through or a flat overnight as a seating problem, and says the tyre may need to come off and be re-seated.
- Check first. BikeRadar's Q&A names old, dried sealant on the bead seat as a cause of persistent weeping, and a bead kinked in its packaging as another. The moulded line above the bead should sit an even distance from the rim edge all the way round; a pop on inflation does not prove it.
- Fix. Deflate, lift the bead, scrape the dried sealant off the bead seat and wipe it with isopropyl alcohol. Check the tape for wrinkles, then seat the tyre again as in our guide to inflating tubeless tyres. An unapproved tyre and rim pairing needs a different tyre, not more tape or pressure.
Weeping or fizzing through the sidewall: the casing
- What it means. A diffuse fizz or a scatter of white dots across the sidewall is the casing's pores sealing, which Peaty's describes as normal on a new tyre. Silca says porous casings lose air faster, especially supple gravel tyres.
- Fix. Shake the sealant to where the bubbles form, as Stan's advises, then ride: Continental says flexing the tyre on the road carries the sealant to the leak points. Weeping that has not settled after a couple of rides points to sealant that is old or short; our tubeless tyre maintenance guide covers the check.
- When it is damage. Bubbles from one point on the sidewall, a cut, a bulge or visible casing threads are not porosity. That tyre needs replacing.
Bubbles from one point in the tread or at an old repair: a puncture
- What it means. A hole the sealant has not closed, or a plug that has started to seep. Hunt's road tubeless guide warns that sealant may have sealed earlier punctures with the thorn or glass still in place.
- Fix. Pull out anything still in the tread and turn the hole to the bottom of the wheel; Schwalbe says sealant cannot reach a hole held at the top. A hole that keeps bubbling needs a plug, an inside patch or a tube, and our guide to repairing a tubeless puncture covers which.
No bubbles, but the pressure keeps dropping
Repeat the test more slowly and with more water: a leak that shows nothing in a spray can show in a tray.
Then look at the sealant. Hunt's road guide says a tyre losing air through old punctures with dried latex needs a top-up. Schwalbe names sealant that was not shaken before filling as a cause of a system that does not stay airtight. A sloshing sound says there is liquid, not that there is enough.
Consider a leak that only opens under load. A bead that lifts off the rim for a moment in a hard corner or over a kerb lets out a burst of air and reseals. The tyre then holds overnight and loses pressure on rides. Check the bead and the pressure; the tyre pressure calculator gives a figure to compare with.
If the cause is still unclear after a second test, have the wheel checked rather than adding sealant or swapping parts at random.
Road, gravel and mountain bike tubeless: what changes
The test and the six locations are the same on every bike. Pressure and sealant volume change what you see:
- Road. High pressure and little sealant: Continental recommends 30 ml for a road tyre against 70 ml for a mountain bike tyre. Hunt's road guide says high pressure can force sealant out through a larger hole before it seals, so a road puncture shows as a wet spot and a fast drop.
- Gravel. Silca singles out supple gravel casings as the ones that weep through the sidewall, and says lightweight tyres can take a few rides to settle.
- Mountain bike. At low pressure a 5 psi loss is a large share of the tyre, and a bead lifting over rocks and kerbs is the leak to rule out first.
Checks before you ride again
Pump to riding pressure, leave the wheel for a few hours and read the gauge under the same conditions as before. Park Tool says sealing can take hours, and in some cases days, on tyres that are not UST, and suggests topping up the pressure and spinning the wheel every few hours while it does.
Before the first ride, check that the bead line sits evenly on both sides, the lock nut is finger-tight and both brakes bite. Ride a short loop near home and read the pressure again; a tyre that holds through that loop and the following night is sealed.
Common mistakes with a tubeless tyre losing pressure
- Tightening the lock nut with pliers. MBR says it damages the tape and over-compresses the rubber seal; Zipp says to check the o-ring for cuts from over-tightening. Finger-tight is the limit.
- Sealing spoke nipples or the rim seam from outside. It traps the air inside the rim and leaves the tape fault in place.
- Adding sealant to a tape, valve or bead leak. Sealant closes pores and small holes. It does not fix a loose lock nut, a split tape or a kinked bead.
- Riding a tyre that goes flat overnight in the hope it seals. Hunt treats a flat overnight as a seating problem, not a settling-in period.
When it is a job for a mechanic
- Bubbles at the nipples or the rim joint that come back after a correct re-tape, or a crack in the rim.
- A bead that will not seal after cleaning and re-seating, or a tyre that burps repeatedly on rides: the tyre and rim pairing needs checking.
- A blocked valve on a tyre that will not deflate.
- A cut sidewall, a bulge or casing threads showing: the tyre needs replacing and seating, which can take more air than a track pump gives.
Tyred mechanics carry inner tubes, patches, tyre levers and a track pump, and the puncture repair page says they repair tubeless tyres too. Puncture repair starts from £30, and a new tyre is not included in that price, as the pricing page shows.
A mechanic comes to you with a fully stocked workshop, 9am to midnight, seven days a week, across London.
Book a repair · About mobile puncture repair →
Related guides
- Tubeless tyre maintenance: checking and replacing sealant
- Bike tyre pressure: the right psi for your weight, tyre and bike
Sources and further reading
- Silca: why is my tubeless tyre losing air pressure overnight?, the up-to-10-per-cent figure, the valve core and valve base test, the signs of tape failure and porous gravel casings.
- Hunt Bike Wheels support: tyres leaking air, new tyres losing pressure through small imperfections, a couple of rides to seal, the 10 psi overnight figure, air at the side of the tyre as a seating problem and re-seating; and Hunt: road bike tubeless tyre maintenance and puncture repair guide, dried latex and topping up, sealed punctures with the thorn still in place, high pressure forcing sealant out.
- Zipp (SRAM): tubeless troubleshooting, the 10-to-20-per-cent overnight figure and the 50-per-cent warning, CO2 passing through rubber five times faster than oxygen, the finger-tight lock nut loosened by pump heads, the o-ring, clogged cores, hissing at the nipples and soapy water.
- Stan's NoTubes: troubleshooting, air travelling through the rim cavity to the valve, beads either side of the valve hole, tape not split beyond the valve hole, soap and water and shaking sealant to the bubbles.
- Schwalbe: tubeless FAQ, the wheel under water or coated with assembly fluid, the valve-area remedies in order, every spoke hole covered, unshaken sealant, Tubeless Easy tyres not airtight without fluid and a hole at the top of the wheel.
- Continental: tubeless ready, higher air loss than an inner tube, checking pressure before every ride, 30 ml and 70 ml of sealant, flexing on the ride carrying sealant to leak points; and Continental: bicycle tyre FAQ, air volume and temperature, reading the gauge at 12 o'clock.
- DT Swiss: FAQ, why is the tubeless setup losing air?, air or sealant entering the rim cavity and leaking at the seam, the valve seated and the tape flat over the whole rim bed.
- Peaty's tech hub: why won't my tubeless tyre stay inflated?, white dots on the sidewall, the lock ring and rubber cone base, nicks and bubbles in the tape, clogged cores and the water test; and Peaty's: how to set up tubeless tyres, hand-tightening the lock nut until firm.
- BikeRadar: help, there's air leaking from my tubeless tyres (Jack Luke, March 2026), dried sealant on the bead seat, the kinked bead, isopropyl alcohol, tape wrinkles and a little extra pressure for seating within the maker's limit.
- MBR: six reasons for tubeless troubles (James Bracey, January 2018), overtightening the lock ring damaging the tape and compressing the rubber seal.
- Park Tool: tubeless tyre removal and installation, deflating with the valve away from the bottom, sealing taking hours or days on non-UST tyres, and topping up and spinning the wheel every few hours.