How to bleed bike brakes: when a bleed is due, what it fixes and what it does not
When hydraulic bike brakes need bleeding: the spongy-lever test, what a bleed fixes, maker intervals, mineral oil vs DOT, DIY limits and the mechanic's job.

Written by Conor DonoghueCargo bike mechanic
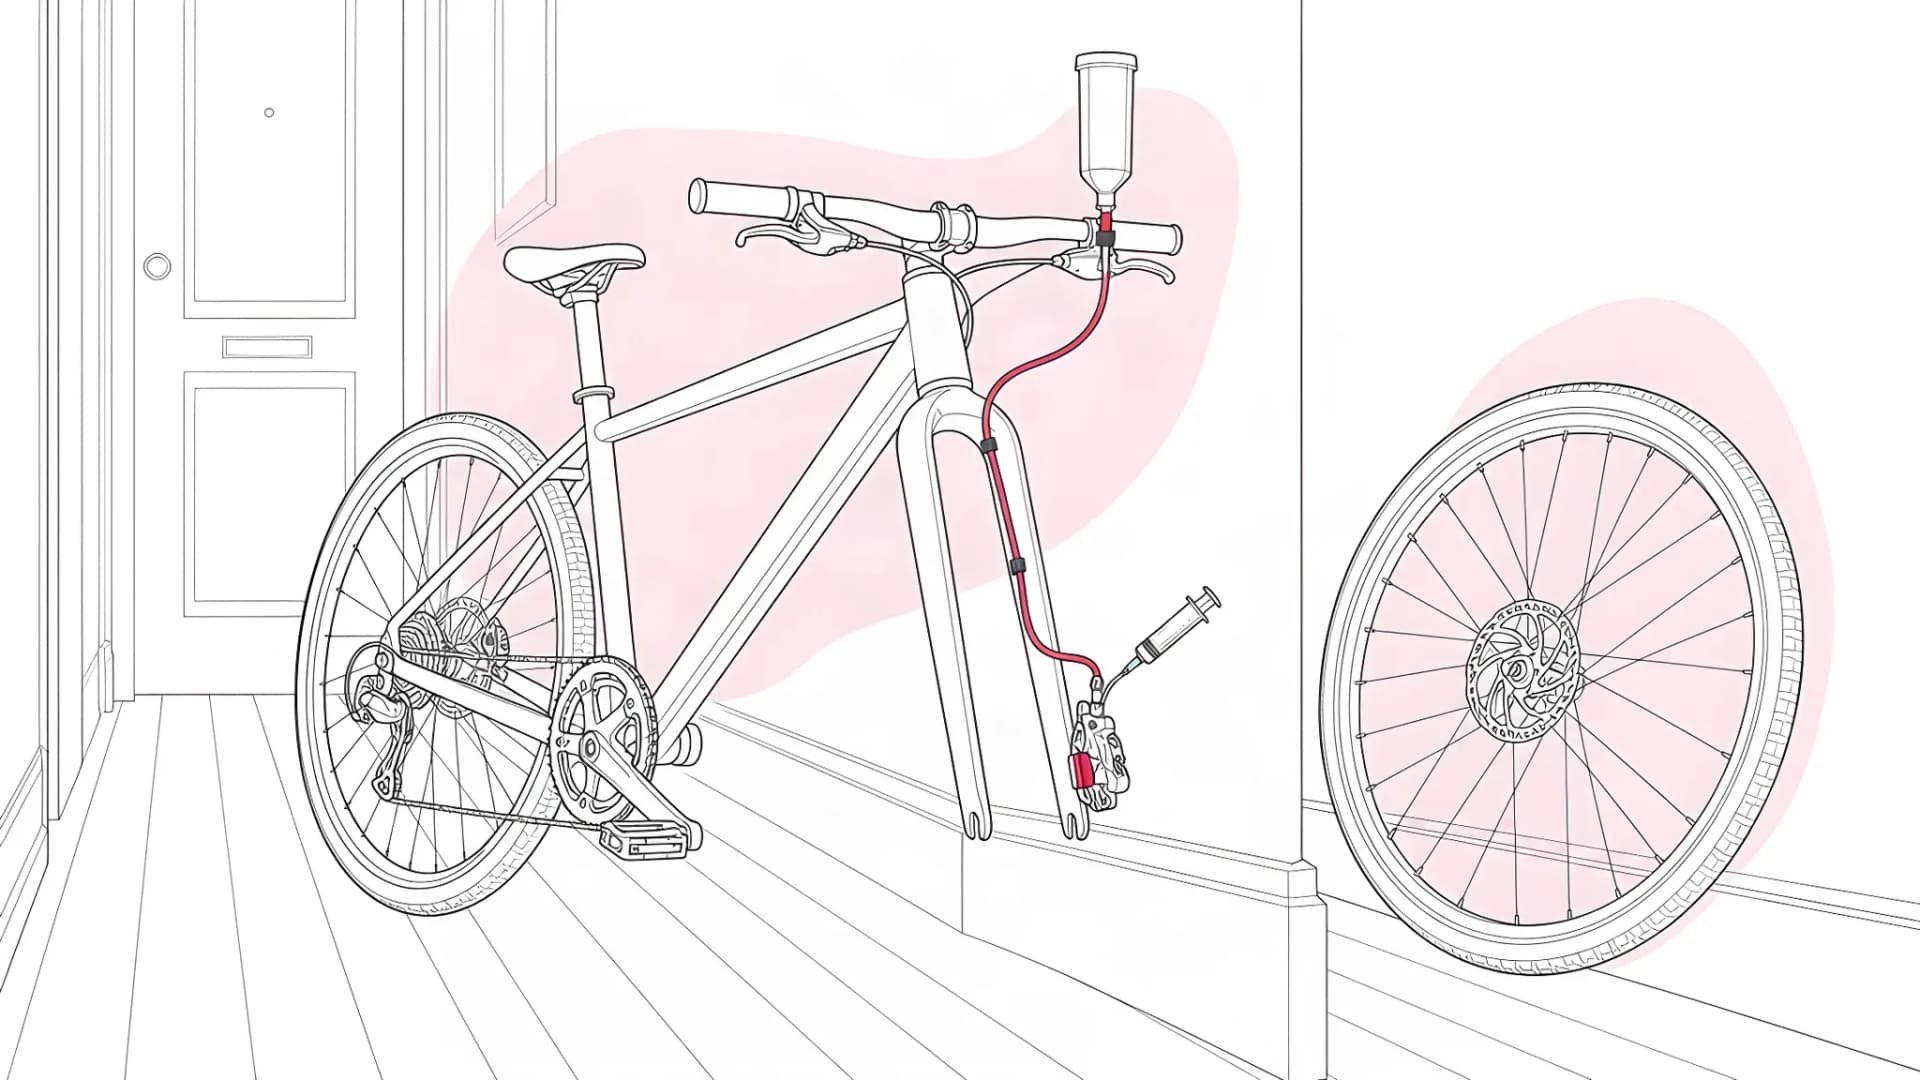
Short answer: bleeding bike brakes means pushing fresh fluid through a hydraulic brake to remove the air that makes the lever soft. It is due when the lever feels spongy or its bite point drifts as you pump it, not simply because the brake feels weak. Worn pads, oily pads and a sticking piston feel similar and are checked first. The fluid is brand-specific, mineral oil or DOT, never mixed. A mechanic bleeds one brake at your door from £40.00.
What does bleeding bike brakes actually do?
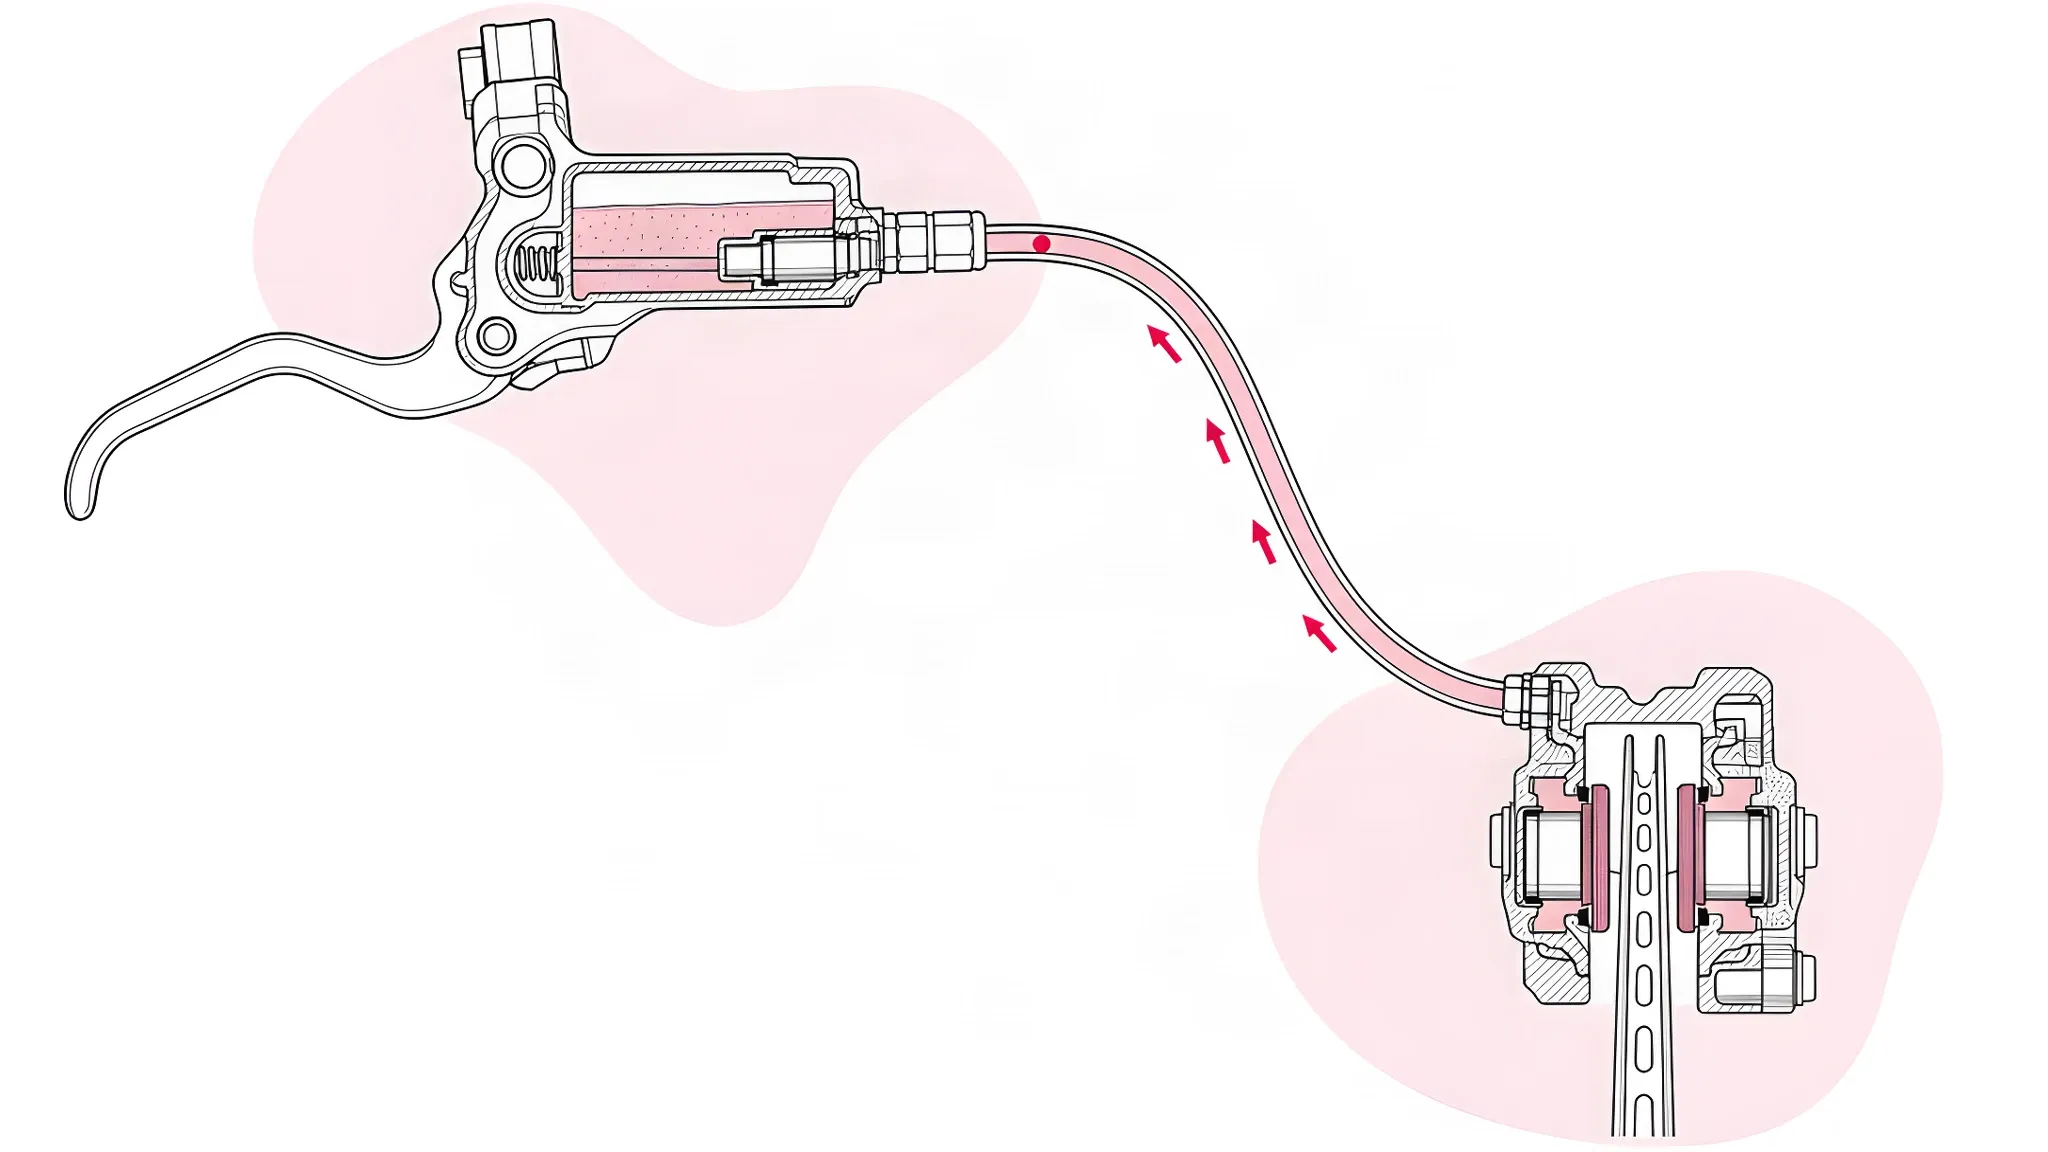
A hydraulic brake works because the fluid in the hose does not compress. road.cc's explainer describes both brake fluids as highly resistant to compression, which is why a small lever movement becomes a hard squeeze at the caliper.
Air does compress. A bubble in the hose turns part of your lever travel into squashing that bubble instead of moving the pads. Park Tool's bleed guide puts it plainly: air bubbles compress and cause the brake to feel soft when the lever is pulled with force.
A bleed pushes fresh fluid through the system and carries the air out. Done as a full flush, it also replaces fluid that has darkened or, on DOT systems, taken on water. That is the whole job. A home service does not do it: our guide to servicing a bike at home leaves bleeding to the workshop.
Hydraulic brakes have no barrel adjuster because the pistons move out to follow pad wear on their own. So a bleed does not fix the things that are not air:
- Worn pads. Hope's Tech 4 bleed instructions end with fitting new pads, which "will eliminate any unpleasant spongy feeling caused by worn pads". Thin pads mean the pistons sit far out and the lever travels further.
- Contaminated pads. Oil on a pad gives a firm lever and a weak stop, with a squeal. Magura's manual says never to use pads contaminated with oil or grease, "not even after attempting to clean them".
- A sticking piston. SRAM's troubleshooting page says dirt and grime can keep pistons from moving freely, so one pad lags and the lever feels wrong.
- A bent rotor or a leak. A rotor that rubs once per turn is alignment, and a wet hose end means fluid getting out and air getting in. Neither is cured by a bleed.
Is it air? The spongy-lever test before you bleed
Work through four checks, cheapest and most reversible first. Each one takes minutes and tells you whether the brake needs a bleed, new pads or a mechanic.
1. Look at the pads
Take the wheel out and look into the caliper with a torch. Each maker prints a limit.
SRAM's service guide says replace the pads when pad plus backing plate measure 3 mm or less, and Tektro's bleed procedure sets 2.2 mm for the two together. Park Tool's rule of thumb is that the pad material should measure at least 1 mm, and Shimano's service instructions say replace at 0.5 mm of pad material.
Thin pads lengthen lever travel because the pistons sit further out. If the pads are at the limit, the job is brake pad replacement, and the limits by maker are in our brake adjustment guide.
2. Watch the pistons
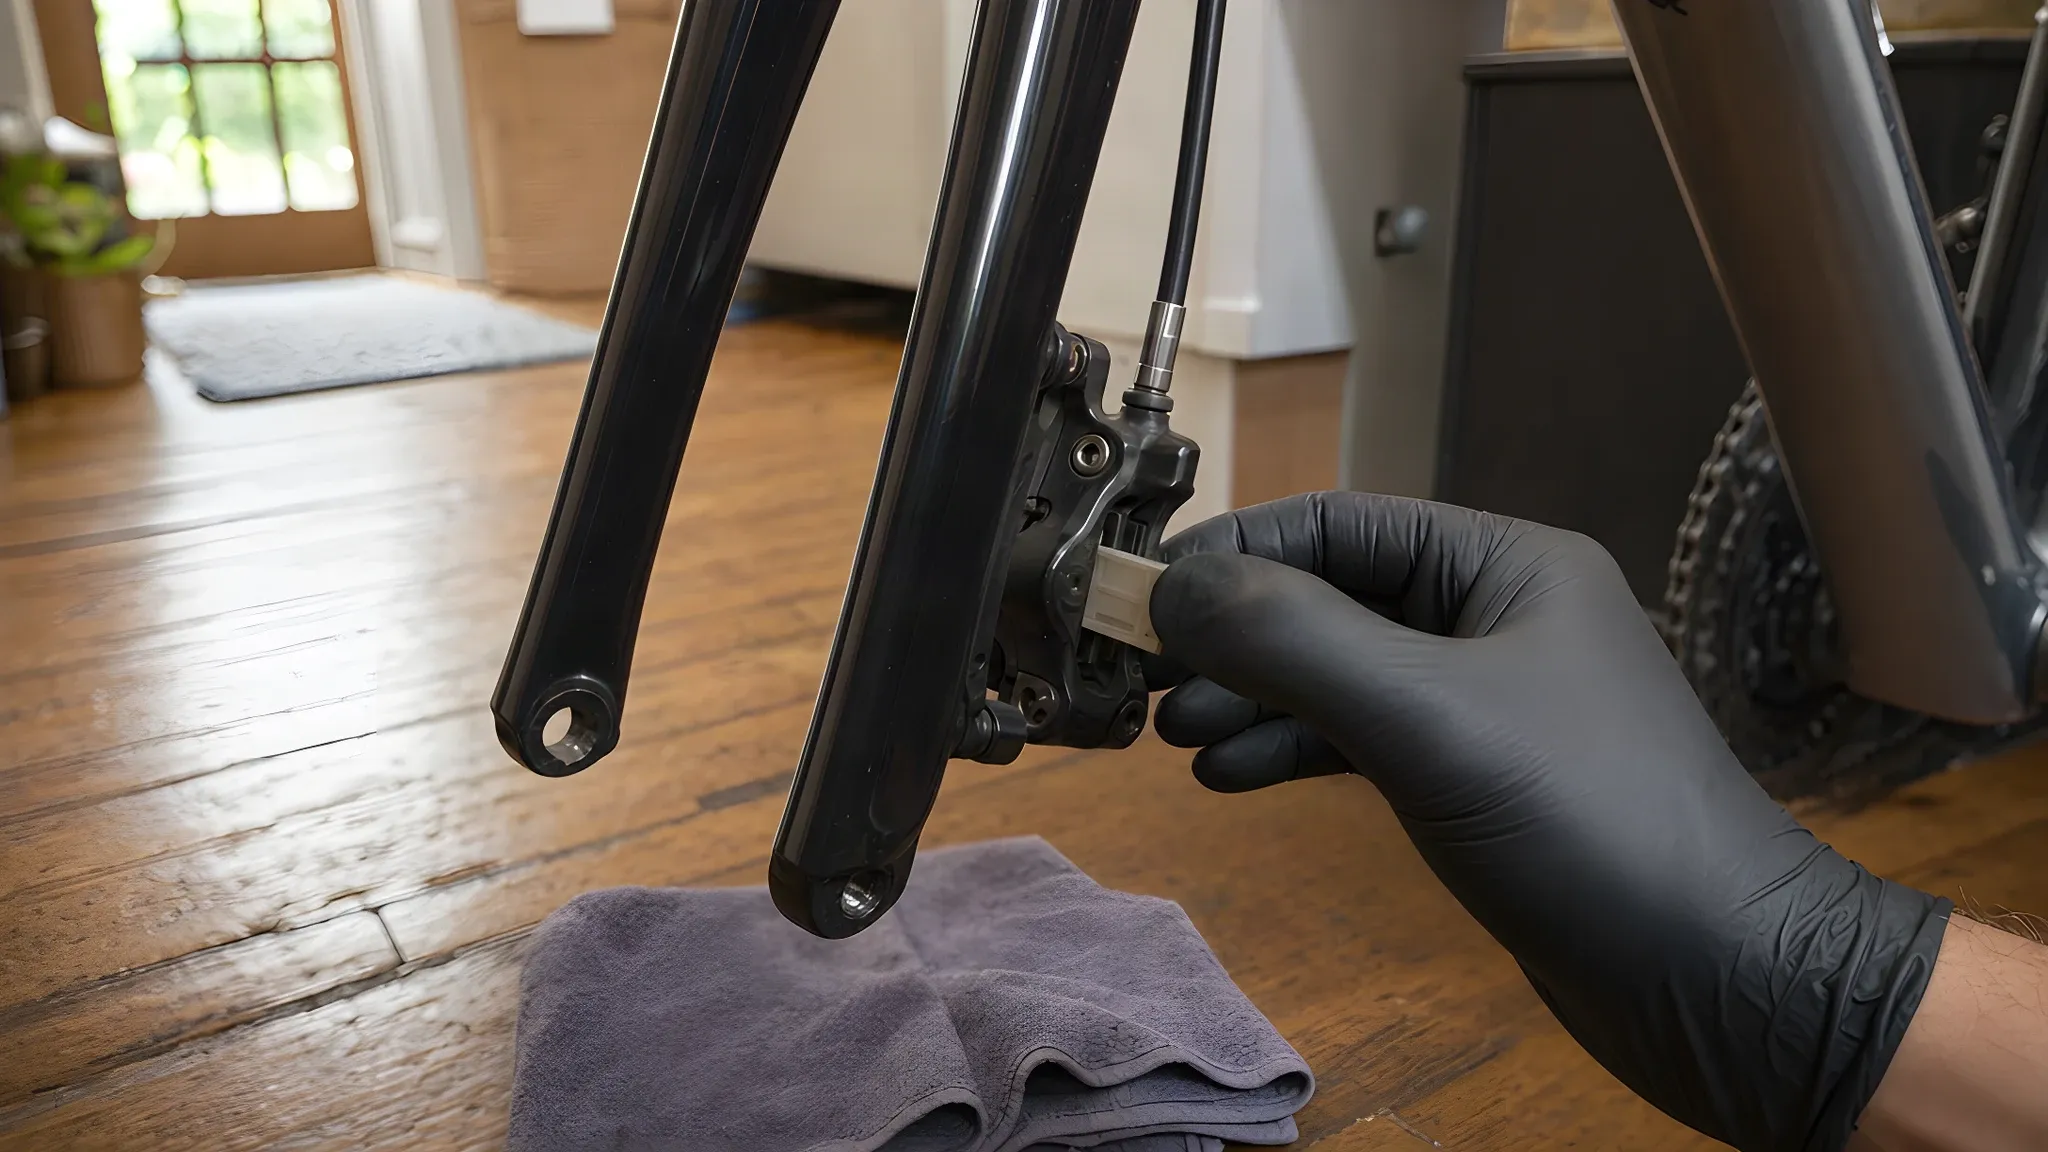
With the wheel still out, put a bleed block or the old pads between the pistons and squeeze the lever gently while you watch the caliper. Both pistons should creep out together and settle back when you let go.
One that lags or stays out is a piston that needs cleaning, which is SRAM's pad-advance procedure, and a mechanic job if it will not free.
Never squeeze the lever with nothing between the pistons. Park Tool's pad guide warns the pistons will push out and have to be pressed back, and Magura's manual says do not pull the brake lever if the transport device is not in position.
3. Check the wheel, the rotor and the hose ends
Refit the wheel, push it fully home and do the axle up with the bike on the ground. Spin it: a rub or a tick once per turn is a caliper off centre or a bent rotor, both covered in the adjustment guide.
Run a dry finger around the hose fittings at the lever and the caliper and look at the pad faces. A wet fitting or an oily pad is a leak. A leak lets air in as fast as a bleed takes it out, so it goes to a mechanic before anything else.
A knock under braking rather than a soft lever is the headset, covered in our bike noises guide.
4. Pump the lever, then hold it
Now the lever itself. Pump it three or four times and feel where it bites. road.cc's description of a brake that needs bleeding is a lever that feels spongy, or a bite point that drifts away from the bar as you keep pulling: that is air or contaminated fluid, and a bleed.
Then hold the lever with steady pressure for ten seconds. A lever that keeps sinking towards the grip is not safe to ride on, in the live Tyred page's words, and goes to a mechanic rather than a bleed kit.
A firm lever on a bike that still stops badly points to the pads, as the live Tyred page puts it. The brake squeal guide covers the clean-and-inspect order. Shimano's maintenance checklist asks the same two questions of every hydraulic lever: does it feel spongy, and does it pull all the way to the bar.
When is a brake bleed due? What the makers say
The makers do not agree on a calendar, so the honest answer is per brand. Every statement below is from the maker's own document, opened on 21 October 2026.
- Shimano. No calendar interval in the documents we read. Its maintenance checklist asks whether the levers feel spongy or pull to the bar, and its service instructions say to replace the oil in the reservoir if it becomes severely discoloured. The same instructions say the system is not designed to be turned upside down.
- SRAM. "For DOT fluid brakes, you should perform a bleed at least once a year." Mineral oil brakes "only require bleeds once every two years", and more often "if you ride frequently or on aggressive terrain that requires heavy braking". For a lever that reaches the bar, SRAM's order is pads, pad advance, kinked hose, then bleed.
- Magura. "Because MAGURA Royal Blood does not age, it is not necessary to bleed or refill your MAGURA brake regularly." Magura bleeds only when the brake does not respond immediately, when the pressure point is spongy or does not remain constant, or after changing the brake hose.
- Hope. "You shouldn't need to bleed your brake more than once a year", and "Always bleed the brake after shortening the hose", from the Tech 4 bleed instructions of September 2025.
- Tektro. Mineral oil only, and no bleed interval in the bleed procedure dated 26 January 2026. Its regular checks are the oil level in the reservoir and the pads, replaced below 2.2 mm, and its safety notes say the lever should feel firm when the brake is applied.
The triggers the makers share are a changed lever feel, a cut or replaced hose, a brake that is new on the bike, and fluid older than its maker's interval. The live Tyred page lists the same signs for booking, from a spongy lever to fluid older than a year, on hydraulic brake bleed.
Mineral oil or DOT: which fluid does your brake take?
Two fluids, and the one your brake was built for is printed on the lever or the reservoir cap. BikeRadar's brake fluid guide (21 June 2022) lists the brands:
- Mineral oil. Shimano, Magura, Campagnolo, Tektro and TRP, Clarks, and SRAM's DB8.
- DOT fluid. Most SRAM brakes, Hope and Hayes, on DOT 5.1, with DOT 4 also usable on many of them.
The difference that matters for intervals is water. DOT fluid is hygroscopic: BikeRadar says it absorbs about 2 to 3 per cent of its volume in water a year, and SRAM's service guide says mineral oil brakes take longer to absorb moisture, which is why SRAM's DOT interval is shorter.
Water lowers the boiling point: BikeRadar gives DOT 5.1 a minimum boiling point of 270 °C dry and 190 °C wet. Mineral oil does not absorb water, but BikeRadar notes that water which gets in pools at the caliper, where it boils first on a long descent.
Never mix them and never share a kit between them. BikeRadar says mixing "will degrade the seals". Park Tool says never to share bleed kits between DOT fluid and mineral oil systems. Magura says never to use DOT brake fluid, and Tektro's procedure says other fluids, "ESPECIALLY DOT based oils, will harm the system".
Handling is different too. Park Tool describes DOT fluid as corrosive, irritating to skin and eyes and damaging to paint, and Hope's instructions call for latex gloves and protective glasses.
Tektro calls its mineral oil non-toxic but still says to flush the eyes with water if it splashes, rinse skin and move to a ventilated space if the vapour is inhaled. Keep both fluids off the pads and the rotor.
Can you bleed bike brakes at home? What a DIY bleed needs
Yes, with the kit made for your brake and the maker's instructions open on your phone. Park Tool describes bleeding as an advanced service procedure, and road.cc's Shimano guide passes on the advice of Shimano's UK distributor that a bike shop should do it if you are not fully confident.
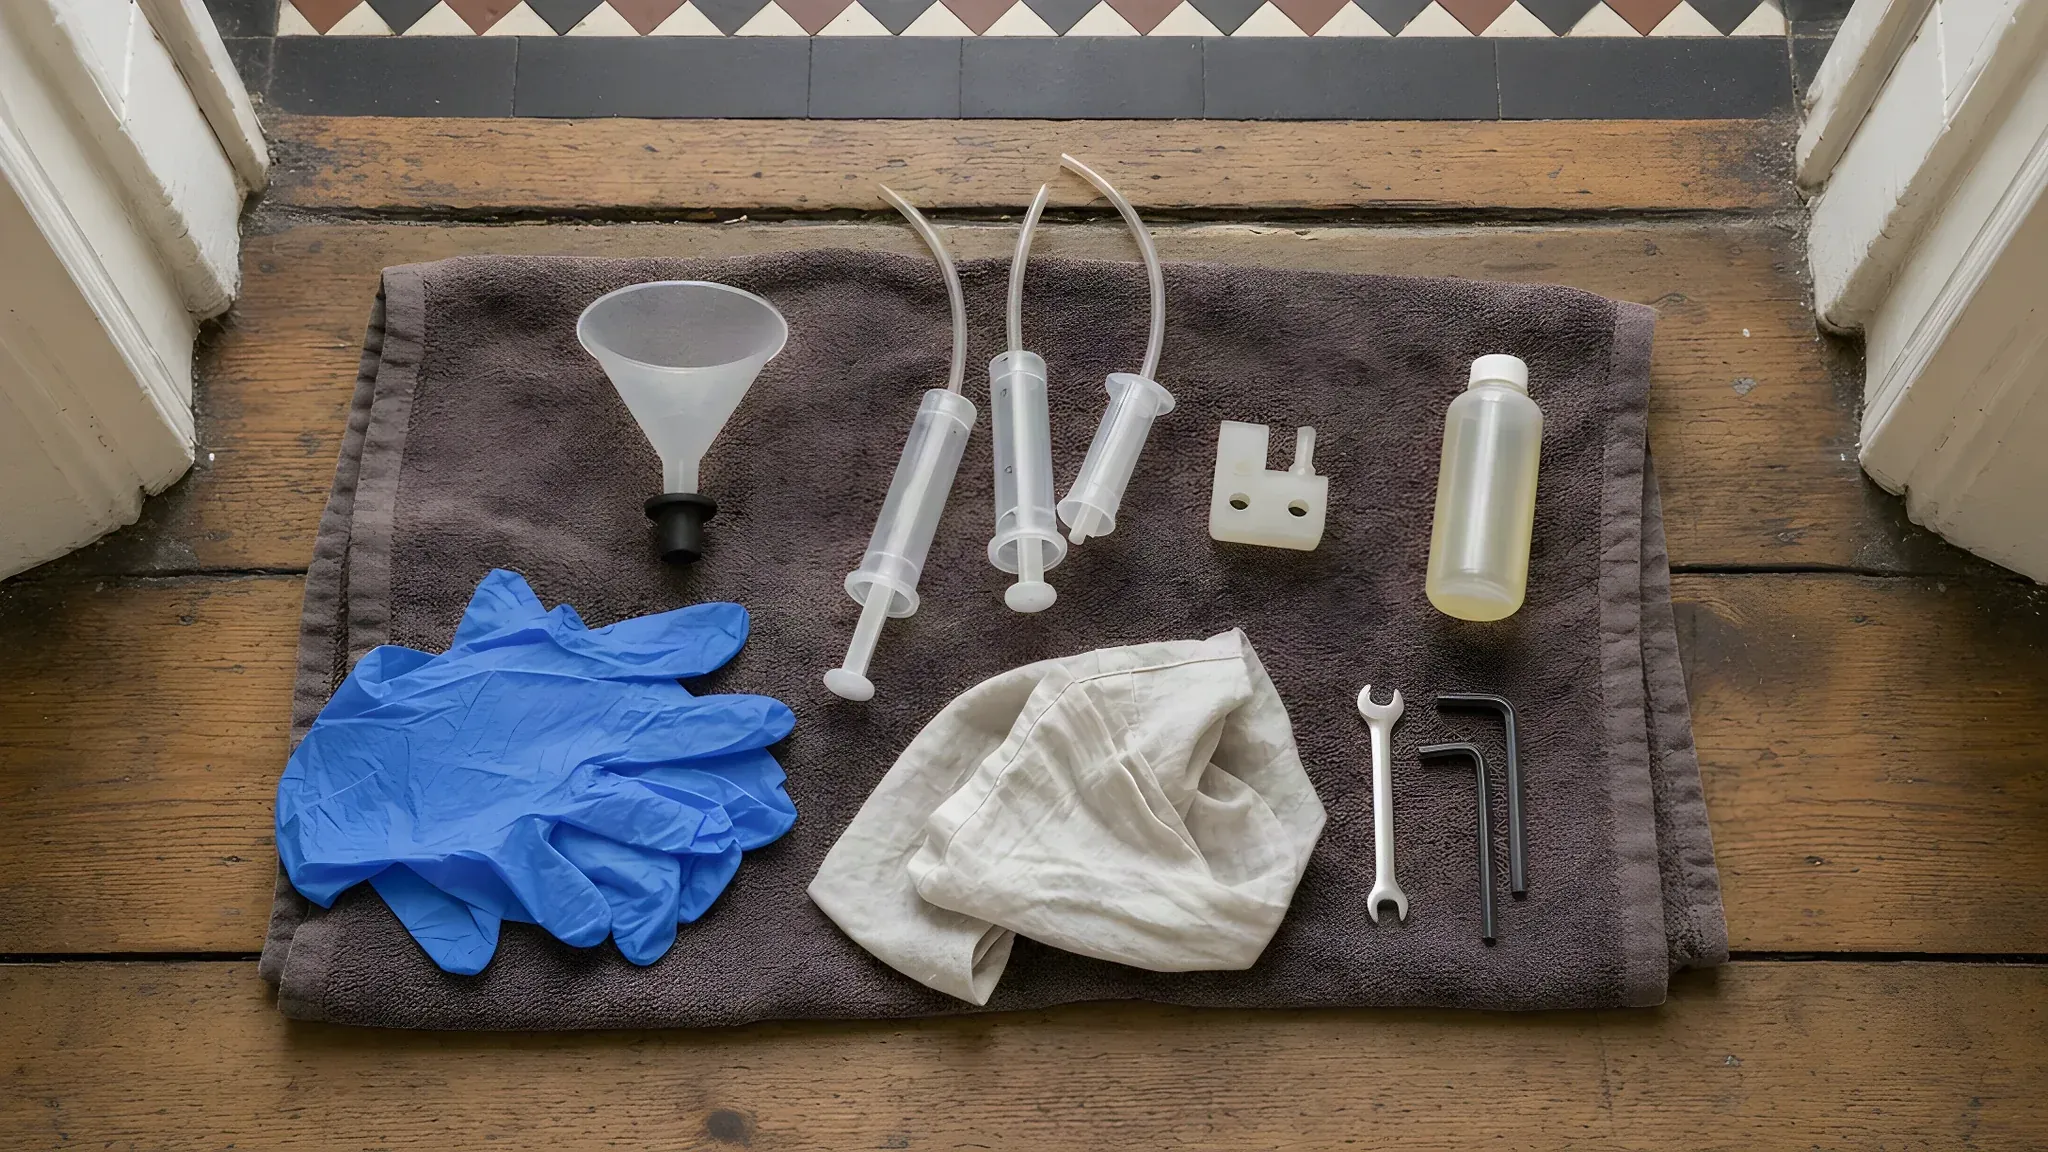
What you need, by the makers' own lists:
- The bleed kit for your brand. A funnel or syringe that seals to the lever port and a syringe for the caliper, with the adapter that fits your bleed screw. road.cc's MTB guide warns that not all funnels fit all brakes.
- Fresh fluid of the right type. BikeRadar says mineral oil keeps on the shelf once opened, though Shimano's service instructions say to use oil from a freshly opened container. BikeRadar reports SRAM's shelf life for an opened DOT bottle as up to one year, so buy a small one.
- A bleed block. Park Tool and Hope both put one between the pistons so they cannot move while the pads are out.
- The small tools. Hex keys down to 2 mm or 2.5 mm and a 7 mm spanner for Shimano-type bleed nipples (road.cc), an 8 mm spanner for Hope's.
- Clean-up. Isopropyl alcohol, rags, gloves and glasses, and somewhere the pads and rotor cannot be splashed.
Budget an hour the first time. Park Tool's Shimano procedure runs to four sections of steps and road.cc's to thirteen numbered steps, and the rear brake has the longer hose.
"Without a kit" is a common search and the short answer is no. Every maker procedure seals a funnel or a syringe to the port.
The one thing you can do without a syringe is what BikeRadar calls a burp bleed: a funnel on the lever, the lever flicked until the bubbles stop. BikeRadar says it suits a brake that was fully bled recently or has had its hose shortened, and that a brake which is still spongy afterwards needs a full bleed.
Where a home bleed goes wrong
- Fluid on the pads or rotor. road.cc's MTB guide says a stray drop of any brake fluid on a pad or rotor will likely destroy all performance, which is why the wheel and pads come out first. Oily pads are replaced, not cleaned.
- The wrong fluid, or a shared kit. Park Tool's rule is never to use mineral oil in brakes designed for DOT fluid, or vice versa, and never to share kits.
- Bleeding with worn pads in and no block. The pistons sit far out, the system takes extra fluid, and new pads will not go in. BikeRadar names a previously overfilled system as a cause of a piston that will not seat, and Hope's final step is to push all the caliper pistons back.
- The lever squeezed with the pads out. Park Tool, Magura and Hope all warn against it; Hope's words are that you risk the pistons coming out of the caliper.
- Air drawn back in. road.cc's MTB guide tightens the bleed port after every pull of the lever so air cannot be sucked back, and Park Tool says do not let the funnel run out of fluid.
If any of those five has already happened, or you would rather not find out, a mechanic bleeds one brake or both where the bike stands: hydraulic brake bleed in London.
Why are my brakes still spongy after bleeding?
A brake that is still soft after a bleed has air you did not reach, or a cause that was never air. In order:
- Air trapped at the caliper or in a loop of hose. Hope says to work the caliper pistons with the bleed nipple pointing upwards, and to watch for a hose looping inside the frame or around a motor. Magura's procedure taps the caliper and lever while flicking the lever.
- Bubbles that will not rise. Teton Gravity's tip is a bleed cup or syringe on the lever and the lever strapped to the bar for 30 to 40 minutes while the bubbles climb out.
- The lever port lower than the hose. Teton Gravity's rule is that the lever's bleed port should be the highest point and the caliper's the lowest, otherwise bubbles get trapped in the line. Rotate the lever on the bar so the reservoir sits level before you start.
- Worn pads. Hope's instructions fit new pads after the bleed for exactly this reason.
- A piston that lags. SRAM's pad-advance and a clean, as in check 2 above.
- A leak. A wet fitting after the bleed means the olive, the hose or a seal, and that is a workshop job.
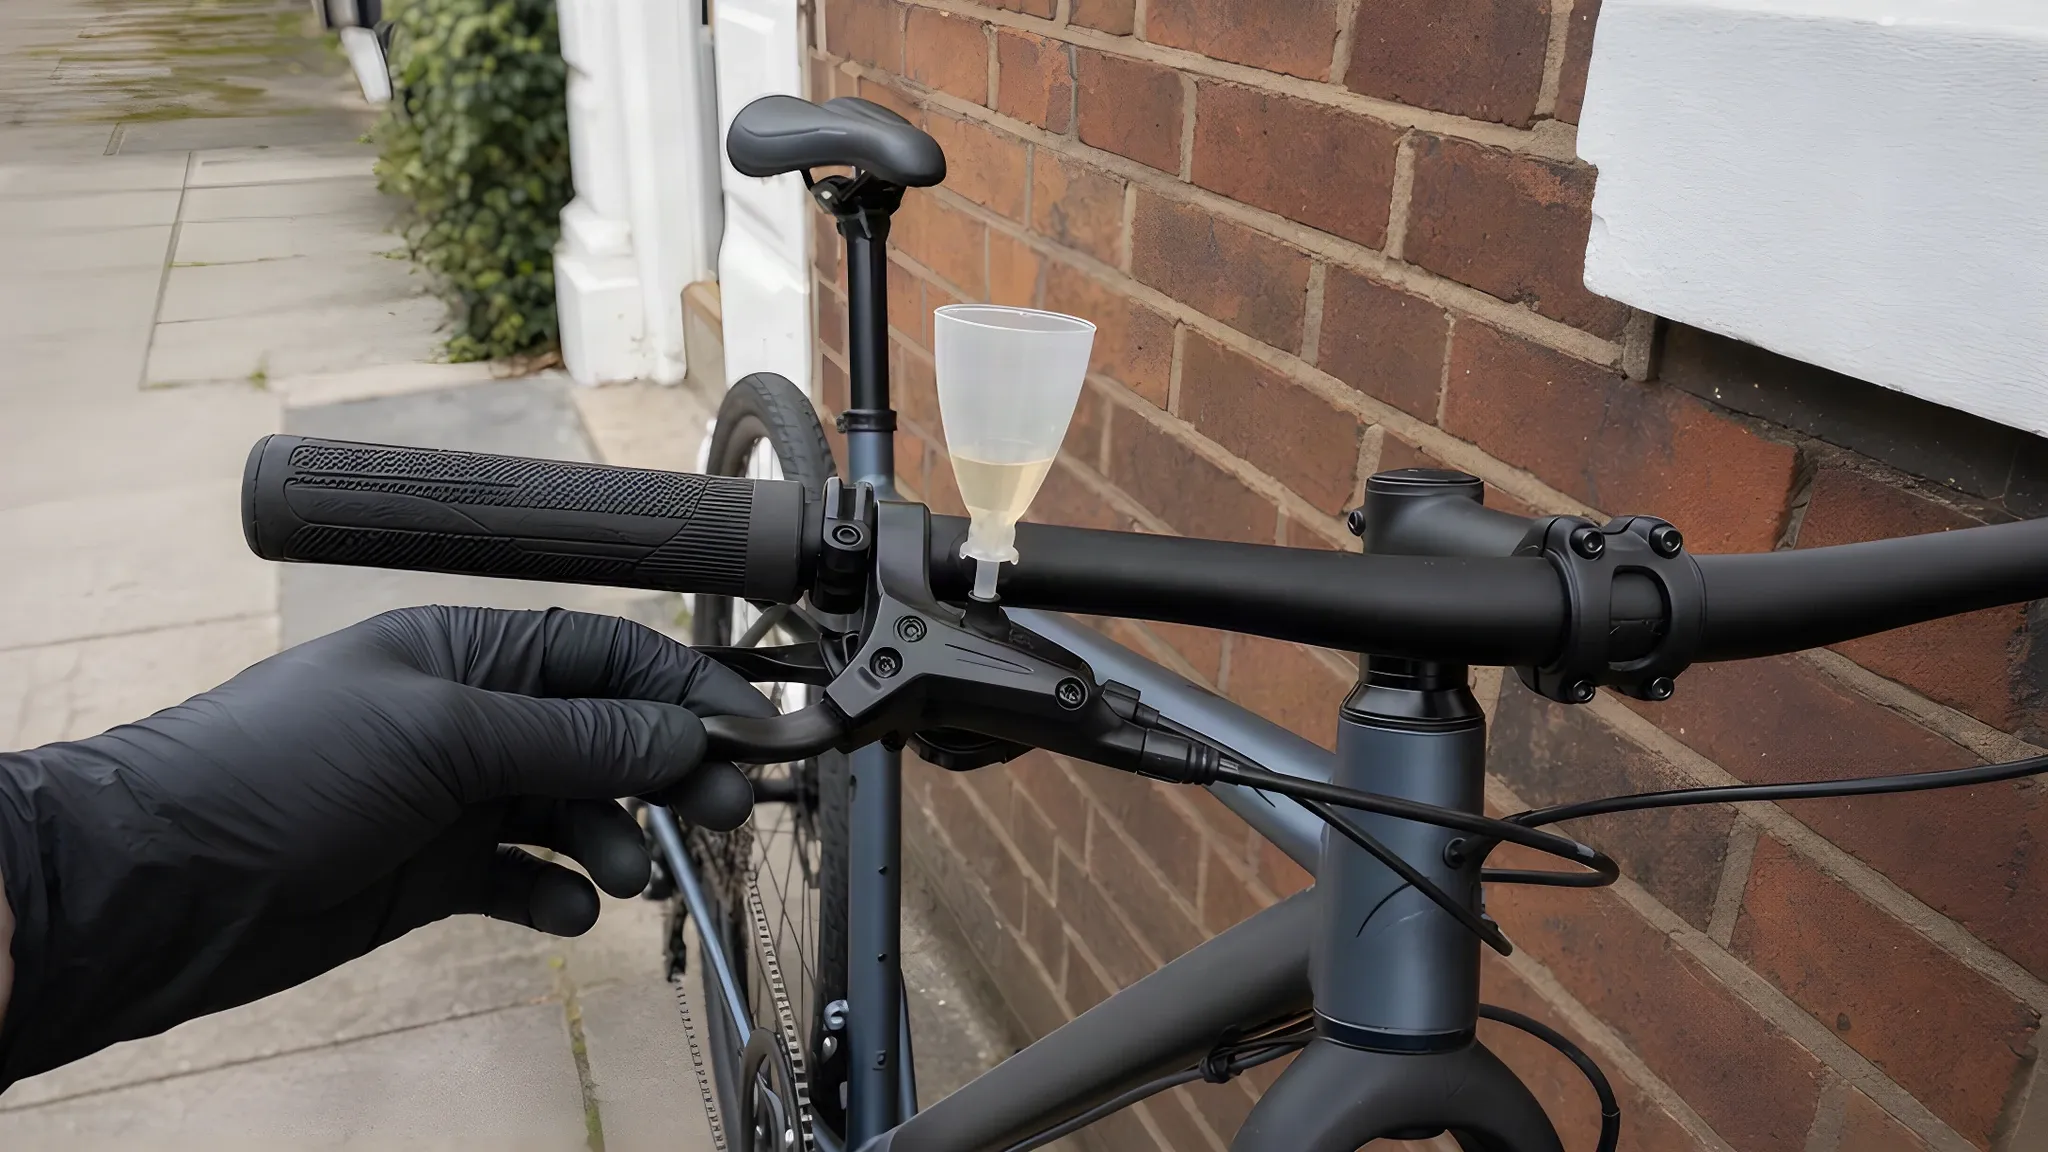
A brake that is still spongy after two careful bleeds is a mechanic job. Something is letting air in, and a third bottle of fluid will not find it.
Stored upside down or transported: do you need a bleed?
Not automatically, but check the lever before you ride. Shimano's service instructions say its disc brake system is not designed to be turned upside down or laid on its side, because bubbles in the reservoir can move towards the caliper, and they say to operate the lever a few times and check the brake works normally before riding.
Shimano's order for a sluggish lever is gentle squeezes, then a reservoir top-up, then a bleed if it is still soft.
Magura's manual requires its transport device between the pads whenever the wheel is out.
Hope says always to bleed after shortening the hose; Magura says a bleed is generally not needed after shortening, only after a hose change or if the pressure point is no longer stable. The hanging and storage positions are covered in our guide to storing a bike with hydraulic brakes vertically, upside down or on its side.
E-bikes and cargo bikes
An e-bike or cargo bike uses the same hydraulic systems as other bikes, with larger rotors on the heavier models, as the live Tyred page puts it. The fluid rules and the four checks are the same.
The one maker statement on frequency is SRAM's: bleeds may be needed more often with heavy braking, and a heavy bike with the week's shopping aboard on a London hill is the case SRAM describes. Hope warns about a hose looping around a motor, where air can sit.
Bosch's spring check has the dealer refill and bleed the system as necessary, in our e-bike maintenance guide. Tyred does the mechanical work on e-bikes, including brakes, and refers motor, battery and controller faults to an authorised service centre, see e-bike repair.
What not to do
- Do not squeeze the lever with the wheel out and nothing between the pistons. Park Tool, Magura and Hope all warn against it.
- Do not top up or bleed with the wrong fluid, or with a kit that has held the other fluid. The seals are the casualty.
- Do not bleed with worn pads in and no bleed block. The system ends up overfilled.
- Do not let any fluid near the pads or the rotor, and do not try to clean a pad that has been splashed. Magura says replace it.
- Do not ride on a lever that reaches the grip. The live Tyred page says the brake is not safe to ride on.
- Do not ignore a wet fitting. A leak undoes every bleed.
When it is a job for a mechanic
- A lever that reaches the bar, or sinks while you hold it, on a bike you need tomorrow.
- A brake still spongy after a careful bleed, or after two.
- A piston that will not free or will not go back.
- Fluid on the outside of the brake: a leak, and then the pads it has reached.
- A brake whose fluid type or bleed port you cannot identify.
- A cut or kinked hose, or a hose that needs shortening.
- New pads fitted and still no bite.
What the mechanic does, in the words of the live page: air is removed from the line until the lever feels firm, fresh fluid of the correct type goes in, mineral oil or DOT and never mixed, the pistons are reset and the pads re-centred on the rotor. Lever reach and bite point are checked.
Both brakes are tested before the bike is handed back.
The fluid type printed on the lever is checked before the brake is opened. One brake is from £40.00 in a 30 minute slot and both are £70.00 in 40 minutes, the same for standard bikes, e-bikes and cargo bikes. New pads, rotors, hoses, levers and calipers are not included and are priced before they are fitted.
A mechanic comes to you with a fully stocked workshop, across London.
Book a brake bleed · Hydraulic brake bleed →
Related guides
- How to adjust bike brakes (rim and disc)
- Bike brakes squeaking? Causes and how to stop it
- How to store a bike at home, in a garage or outside
Sources and further reading
- SRAM: brake service guide, bleed at least once a year for DOT brakes and every two years for mineral oil, more often with heavy braking, the 3 mm pad limit and isopropyl alcohol for a rotor.
- SRAM: troubleshooting eTap AXS disc brakes, dirt and grime keeping pistons from moving freely, the pad-advance procedure, and the pad check, pad advance and bleed order for a lever that pulls to the bar.
- Magura MT owner's manual (PDF), Royal Blood only and never DOT, no regular bleeding, the three triggers for a bleed, the transport device and the rule against contaminated pads.
- Hope: Tech 4 brake bleed instructions (PDF, September 2025), DOT 5.1 or DOT 4, once a year, always after shortening the hose, pistons out without a block, worn pads and the spongy feel, the hose loop around a motor, gloves and glasses.
- Tektro: bleed procedure (PDF, edition 26 January 2026), Tektro mineral oil only, DOT harms the system, the 2.2 mm pad limit, the regular checks, a firm lever, and the eye, skin and inhalation precautions.
- Shimano: spring maintenance checklist for road bikes (24 October 2023), the brake lever check: spongy, or pulling all the way to the bar; with Shimano service instructions SI-8JZ0A: disc brake system (PDF), not designed to be turned upside down or on its side, the lever check before riding, the order for a sluggish lever, the 0.5 mm pad limit, oil from a freshly opened container and replacing severely discoloured oil.
- Park Tool: how to bleed Shimano flat bar hydraulic brakes (10 October 2023), air bubbles compressing, an advanced service procedure, never DOT in a mineral oil brake, never share kits, do not let the funnel run out, the four sections of steps.
- Park Tool: brake bleeding for SRAM hydraulic brakes (12 March 2020), DOT fluid corrosive to skin, eyes and paint, bleed blocks.
- Park Tool: disc brake pad removal and installation (31 May 2018), the lever squeezed with the wheel out, pressing pistons back, the 1 mm rule of thumb and contaminated pads.
- BikeRadar: buyer's guide to brake fluid, mineral oil vs DOT (Oscar Huckle, 21 June 2022), brands by fluid, 2 to 3 per cent water a year, 270 °C and 190 °C, water pooling at the caliper, seals, shelf life, gloves and eyewear.
- BikeRadar: how to bleed Shimano disc brakes (Oscar Huckle, 3 April 2023), the burp bleed and when it is enough, an overfilled system, bleeding annually.
- road.cc: how to bleed your MTB brakes (Liam Mercer, 20 February 2025), the symptoms including a bite point that drifts as you keep pulling, a stray drop on a pad or rotor, tightening the port after each pull, funnels that do not fit, the 7 mm spanner.
- road.cc: how to bleed Shimano hydraulic disc brakes (Mat Brett, 20 February 2025), pads checked before a bleed, the 13 steps, hex keys down to 2 mm, and the distributor's advice to use a shop if not confident.
- road.cc: how do hydraulic brakes work? (Lance Branquinho, 18 October 2023), fluids resistant to compression, air forming over time, what a bleed replaces.
- Teton Gravity Research: how to bleed your MTB brakes (Max Ritter, 29 August 2020), the lever port highest and the caliper lowest, a bleed cup or syringe on the lever and the lever strapped to the bar for 30 to 40 minutes, stuck pistons.